The signs you need a foundation inspection are the ones that change: a crack that widens, a door that starts sticking, a floor that begins to slope. Most Florida homes have cracks somewhere, and most of them mean nothing.
Central Florida Building Inspectors has been reading that difference on Florida slabs since 1988. Here’s what to look for inside and outside your home, what causes movement in this part of the state, and when it’s worth a call.
What Movement Looks Like Inside
Foundation movement shows up indoors first. The house is a rigid box sitting on soil that isn’t, so when part of a slab settles, the tightest-fitting parts of the house complain first.
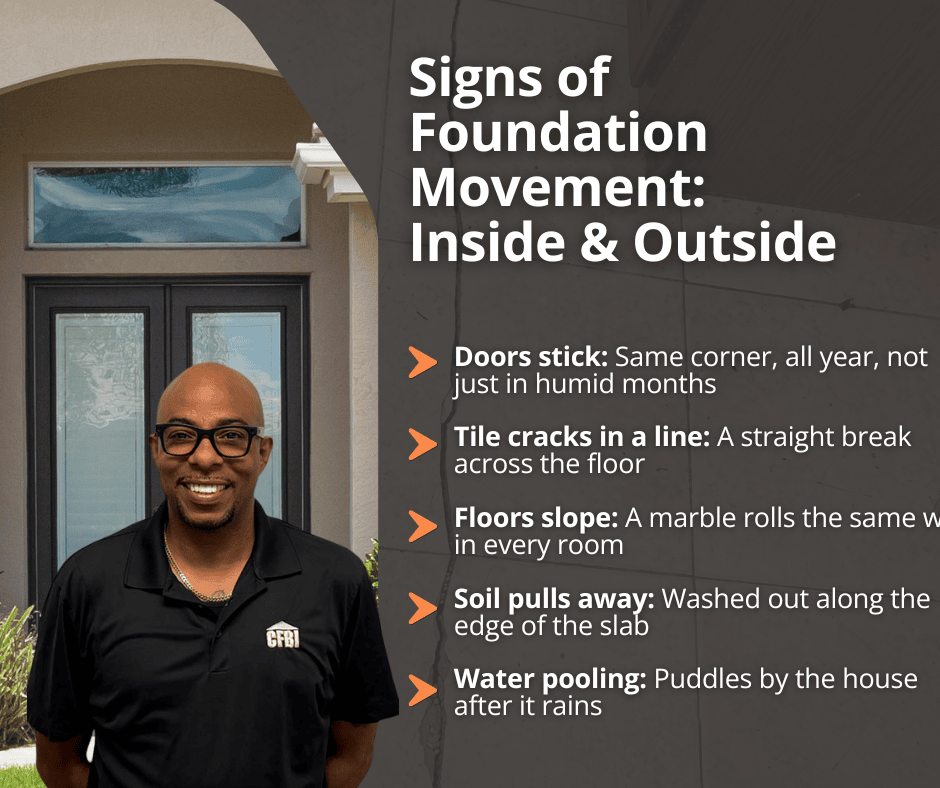
Doors are the earliest warning. A door that binds at one top corner, or one that used to latch and now needs a shove, means the frame is out of square. Humidity swells wood too, so the test is whether it ever releases. Seasonal swelling eases in the dry months. Foundation movement sticks year-round.
Floors come next. A single low spot in one room is a construction issue. A floor that pitches the same direction in every room is differential settlement. In slab homes, a line of cracked tile across a room is often the first thing anyone notices, because tile breaks along the crack underneath it before drywall shows anything.
Then the finish work separates. Cabinets are anchored to wall framing, so when the slab drops, the countertop pulls away and leaves a gap. Crown molding lifting off the ceiling and rows of popped nail heads are the same signal in different materials.
Quick Indoor Check, 5 Min
Roll a marble in three or four rooms and note which way it goes
Open and close every exterior door, plus the windows you rarely use
Run a finger along cabinet and countertop joints
Look for tile cracks that run in a straight line
Where the Problem Actually Starts
Indoors gives you symptoms. The perimeter gives you the cause, and in Central Florida the cause is almost always water. Walk the house during the next heavy rain, not on a dry afternoon. That’s when drainage problems are obvious.
Look for:
What You See Outside
Why It Matters
Soil washed away from the slab edge
Erosion is creating a void under the foundation
Downspouts emptying at a corner of the house
Concentrated water saturates one spot repeatedly
Mulch or grading sloped toward the house
Water is being directed at the foundation
Standing water lasting more than a day
Poor drainage, sustained soil saturation
Large trees close to the house
Roots draw moisture out of soil during dry spells
One more worth watching: a water bill that jumps with no change in usage. A failed line under the slab washes out soil just as effectively as a bad downspout.
Most foundation advice online was written for somewhere else. It assumes a basement, clay soil, and freeze-thaw cycles, and almost none of it applies here.
Elsewhere
Central Florida
Basements and crawl spaces
Slab-on-grade, so symptoms show in tile, doors, and cabinets
Homes built on former wetland or poorly compacted fill also keep settling for years after construction, and that history rarely shows up in a listing.
Settlement or Sinkhole?
Most Florida foundation movement is ordinary settlement. The two look nothing alike once you know what separates them.
Settlement
Sinkhole Activity
Develops over years
Appears over days
Concentrated at one corner or addition
Affects the yard and structure together
Tracks with visible drainage problems
Circular depression, ground drops suddenly
Yard looks normal
Fence posts or pool deck tilt as a unit
Worth knowing: a home inspector does not confirm a sinkhole. Florida’s Department of Environmental Protection states that home inspectors and insurance adjusters are not qualified to make that determination, and that only a licensed geologist or engineer can. Our job is to identify the signs, document them, and tell you when to escalate.
Direction and pattern do most of the work here. Vertical hairline cracking that holds steady is normal. Diagonal, stair-step, and horizontal cracks are the ones that suggest movement.
What You See
Usually Means
What to Do
Hairline, stable
Normal curing
Monitor
Vertical, under 1/8 inch, not growing
Common settlement
Monitor, seal if water enters
Diagonal from a door or window corner
Frame racking
Schedule an inspection
Stair-step through block joints
Differential settlement
Schedule an inspection
Horizontal in a stem wall
Lateral pressure
Call promptly
Wider than 1/4 inch, or growing
Active movement
Call promptly
The quarter-inch figure is a rule of thumb, not a diagnosis. A narrow crack that’s growing matters more than a wide one that hasn’t moved in a decade.
The 60-Day Test
This settles the question and costs nothing:
Mark both ends of the crack with a pencil. Write the date beside it.
Photograph it with a coin or tape measure in frame for scale.
Note which doors stick.
Check again in 60 days.
Past the pencil marks means active movement. No change means you have documentation, which is worth having when you sell.
What an Inspection Covers, and What It Doesn’t
A foundation inspection looks at the visible structure and the conditions acting on it:
Slab, stem wall, or piers
Floor level and door operation
Exterior grading and drainage
Moisture readings and thermal imaging where useful
Evidence of prior repair work, which matters if you’re buying
You get a written report with photos. If the findings point to structural failure, that report is what a structural engineer builds on.
The gap that catches people out: a 4-point inspection does not include your foundation. It covers the roof, electrical, plumbing, and HVAC for insurance. Here’s what a 4-point inspection actually includes if you’re unsure which one you had.
Related Questions to Explore
How much does a foundation inspection cost? It depends on home size, foundation type, and whether you need a general inspection or a structural engineer’s report. The inspector’s evaluation is the cheaper first step and usually settles whether an engineer is needed at all.
How often should I have my foundation inspected? Every few years for most Florida homes, plus any time new symptoms appear. Move it up after a hurricane, a flood, a plumbing leak, or construction nearby. Timing it well makes a real difference in repair cost.
Who should you hire for a foundation inspection? Start with a licensed, independent home inspector who has no stake in the repair. A structural engineer comes next if there’s evidence of structural failure. Be cautious with free inspections from repair companies, since they profit from finding a problem.
How can you tell if a crack is structural? Direction, pattern, and change. Diagonal cracks from corners, stair-step cracks, and horizontal cracks suggest movement. Vertical hairline cracks at a steady width usually don’t.
Does homeowners insurance cover foundation crack repair? Usually not for settlement or gradual deterioration, which most policies exclude. Florida policies must include catastrophic ground collapse coverage, and broader sinkhole coverage is separate. It depends on your policy and the cause of loss.
Should I be worried about buying a house with foundation cracks? Not automatically. Plenty of sound Florida homes have cosmetic cracking. Get a clear read on whether the movement is active during your pre-purchase home inspection, not after closing. If repairs are needed, knowing the repair options when a foundation starts to sink helps you negotiate.
When to Call a Professional
Monitoring on your own works for stable hairline cracks. Call an inspector when:
A crack has measurably widened over a few months
Cracks run diagonally from corners or step through block joints
A door that used to latch no longer does
Floors slope consistently from room to room
Gaps have opened between cabinets and walls
Water pools against the foundation after every rain
A depression appears in the yard
You’re under contract on a home showing any of the above
Wind mitigation matters for Florida homes because it does two things at once: it documents the features that help your house survive a hurricane, and it unlocks insurance discounts that Florida law requires insurers to offer.
A wind mitigation inspection records those features on a state form, and for most Central Florida homeowners it pays for itself in the first year through lower premiums.
If your homeowners insurance keeps climbing, this is one of the few inspections that can actually bring the bill back down.
What Is a Wind Mitigation Inspection?
A wind mitigation inspection is a focused evaluation that documents the wind-resistant construction features of your home. The inspector records what they find on Florida’s Uniform Mitigation Verification Inspection Form, the OIR-B1-1802, which is the standard document insurers accept statewide. You hand that completed form to your insurance company, and they apply any credits your home qualifies for.
A few things set it apart from a regular inspection:
It is not pass or fail. The form only records the features your home already has. A weaker result means no discount, never a penalty or a higher premium.
It is not a code inspection or a repair list. The inspector is documenting, not grading.
The report is good for up to five years, as long as you have not made structural changes to the roof or openings.
For a home in Orlando or anywhere across Central Florida, that form is the key that opens the door to mandated insurance savings.
Why Wind Mitigation Matters for Florida Homes
Here is where the importance comes in. Florida is one of the most hurricane-exposed states in the country, and it is also in the middle of a homeowners insurance crisis. Wind mitigation sits right at the center of both problems.
It lowers your insurance premium
Under Florida Statute 627.0629, insurers are required to offer discounts, credits, or deductible reductions to homeowners whose houses have wind-resistant features. This is not a favor your insurer chooses to do; it is state law.
Since October 2023, residential insurers also have to post their discount information on their websites. A wind mitigation inspection is how you prove your home qualifies, and the credits can stack across several features at once.
It reflects how well your home handles a storm
The same features that earn you a discount are the ones that keep your roof on and the water out during a hurricane. A hip roof, a properly strapped roof-to-wall connection, and impact-rated windows are not just line items on a form; they are the difference between minor damage and a destroyed home when a storm comes through. The inspection gives you an honest picture of where your home stands.
It tells you what to upgrade next
If your home earns few credits today, the report shows you exactly which features would earn more. That turns a vague worry about storm safety into a clear, prioritized list, and some of those upgrades may qualify for separate grant programs like My Safe Florida Home.
What Do Inspectors Check in a Wind Mitigation Inspection?
The inspection focuses on seven construction features that determine how your home performs in high wind. Each one can carry its own insurance credit.
Roof covering. Whether the shingles or tiles meet current Florida building code for wind resistance.
Roof deck attachment. How the plywood or sheathing is fastened to the trusses, since nail type and spacing matter under uplift.
Roof-to-wall connection. Whether the roof is tied to the walls with toe nails, clips, single wraps, or double wraps. This is often the single biggest credit.
Roof geometry. The shape of the roof. Hip roofs, which slope on all four sides, resist wind far better than gable roofs and earn the strongest credit.
Secondary water resistance. Whether there is a sealed barrier under the roof covering that keeps water out if the shingles blow off.
Opening protection. Whether windows, doors, and garage doors are protected by impact-rated glass or shutters.
Home and roof age. Newer construction built to stricter codes generally performs better.
The inspector documents each feature with photos and records it on the form. Undocumented features earn nothing, which is why the inspection has to be done by a qualified inspector, not self-reported.
How Does the Wind Mitigation Inspection Process Work?
The process is quick and low-effort on your end. Here is what it looks like from start to savings:
Schedule the inspection. Book with a qualified Central Florida inspector. You do not need to prepare the house, though clear access to the attic and electrical panel helps.
The inspection. Most single-family homes take about 30 to 45 minutes. The inspector examines the roof, attic, and openings, and photographs each qualifying feature.
Receive the form. You get the completed OIR-B1-1802 with supporting photos, usually within a day or two.
Submit it to your insurer. Send the form to your insurance agent or company, and they apply any credits your home qualifies for to your policy.
That is the whole cycle. One short visit, one form, and the credits stay in place for up to five years.
How Much Can You Save, and What Does It Cost?
A wind mitigation inspection in Central Florida typically runs a modest flat fee, and the savings usually dwarf it.
Cost: generally around $75 to $150 for a standard single-family home.
Savings: commonly several hundred dollars a year, and often $1,000 or more, depending on your insurer, your home, and how many features qualify.
The exact number depends on your specific policy and home, so treat any figure as an estimate rather than a promise. Still, for most homeowners, the math is simple: a one-time fee, valid for up to five years, against annual savings that often exceed it in the first billing cycle. Ask your insurance agent what each credit is worth on your policy before you assume the inspection will not help.
Wind Mitigation vs. 4-Point Inspection: What Is the Difference?
These two get confused constantly, and they are often ordered together, but they do opposite jobs.
A wind mitigation inspection documents wind-resistant features to earn you insurance discounts. It works in your favor and cannot raise your rate.
A 4-point inspection assesses the condition and age of your roof, electrical, plumbing, and HVAC systems, usually on older homes, so an insurer can decide whether to write or renew a policy at all.
One is about savings, the other is about insurability. If you are buying an older Central Florida home, you may need both, and your inspector can handle them in a single visit.
Related Questions to Explore
Does wind mitigation actually lower my insurance?
Yes, in most cases. Florida law requires insurers to offer credits for qualifying wind-resistant features, and the wind mitigation form is how you document them. The size of the discount depends on your home and insurer, but for many homeowners the savings are significant.
How long is a wind mitigation inspection good for?
The form is valid for up to five years, as long as you do not make structural changes to the roof or openings. You do not need a new inspection every year.
Can a wind mitigation inspection raise my premium?
No. The inspection can only earn credits or earn nothing. A home with few qualifying features simply gets no discount; it never triggers a surcharge.
Do I need a wind mitigation inspection on a new home?
Often yes, and it usually pays off. Newer homes built to current code tend to have strong wind-resistant features, which means more credits to claim. Many builders provide a form at closing, but an independent inspection confirms it.
What if my home does not qualify for many credits?
That result is still useful. The form shows which features are missing, so you know exactly what to upgrade to earn credits later, whether that is a roof replacement, roof-to-wall straps, or impact-rated openings. Some of those improvements may also qualify for state grant programs, and you can have the home re-inspected once the work is done.
When to Call a Professional
A wind mitigation inspection is not something you can do yourself, because the credits only count when a qualified inspector documents the features on the state form.
If your homeowners premium has gone up, if you are buying or refinancing a home in Central Florida, or if you have replaced your roof or added shutters and want the credit for it, that is the moment to schedule one.
It is also worth doing simply to understand how your home would hold up in a hurricane, before the next one is on the forecast.
Conclusion
Wind mitigation matters because it connects the two things every Florida homeowner cares about right now: staying safe in a storm and getting insurance costs under control. A single inspection documents the features your home already has, earns the discounts state law entitles you to, and shows you where you stand for the next hurricane season.
The biggest benefit of a sewer scope inspection is simple: it shows you the one part of a home that no standard inspection covers, the buried sewer line, before a hidden problem becomes your problem.
A camera runs the length of the pipe and reveals root intrusion, cracks, bellies, and corroded or collapsed sections that would otherwise stay invisible until they back up into the house. For buyers of older Central Florida homes, that hour of video can be the difference between a smooth closing and a surprise repair bill running into the thousands.
Here is what a sewer scope covers, what it costs, and why it matters so much in Florida.
What Is a Sewer Scope Inspection?
A sewer scope inspection is a video inspection of the lateral sewer line, the privately owned pipe that runs from the home’s foundation out to the city sewer main, an HOA tap, or a septic tank.
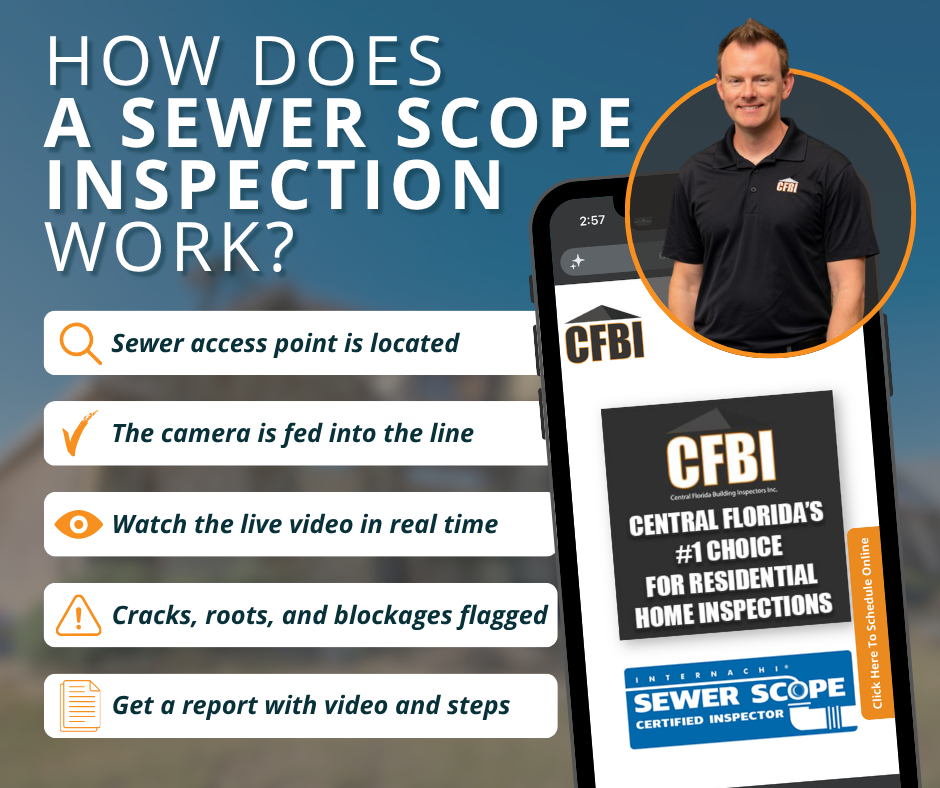
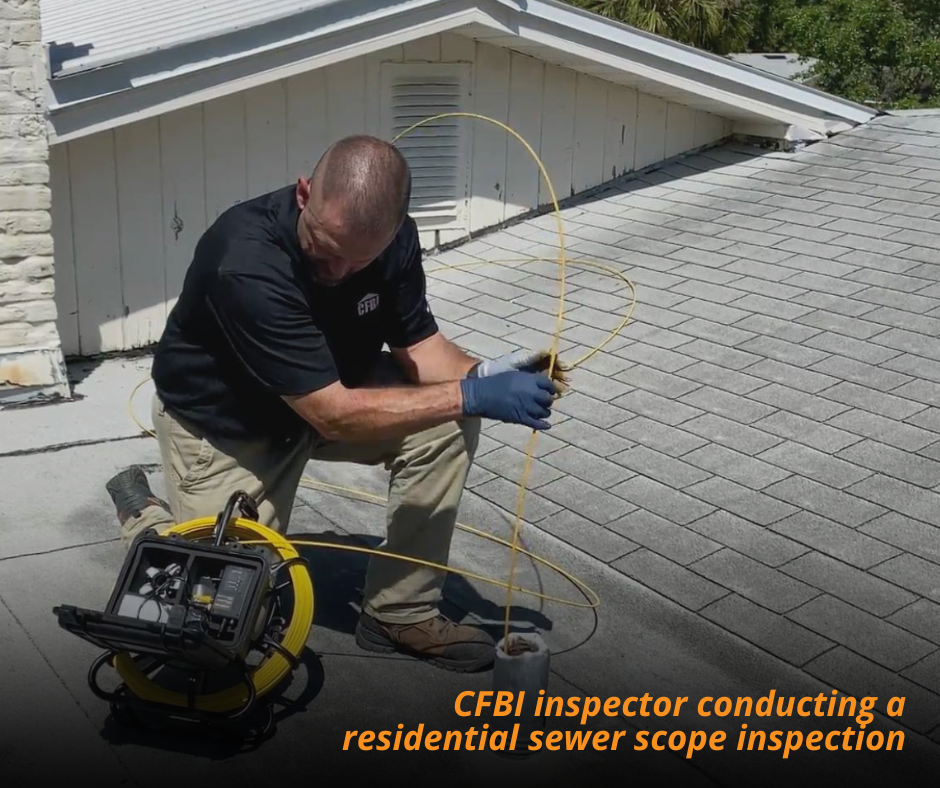
A waterproof camera on a flexible cable is fed through a cleanout or drain access point, and the inspector watches a live feed of the pipe’s interior from end to end.
The key thing to understand is that this line is yours to maintain and repair, and a standard home inspection does not cover it. Home inspectors follow standards of practice that specifically exclude the underground sewer line, so unless you order a sewer scope as a separate service, that pipe is a blind spot in your purchase.
A sewer scope is the only practical way to see its true condition without digging up the yard.
The Benefits of a Sewer Scope Inspection
A sewer scope pays for itself by turning an expensive unknown into a documented, negotiable fact. Here are the benefits that matter most.
1) It catches tree root intrusion early
Roots are the number one enemy of a sewer line in Florida. They find their way into the smallest crack or joint, then grow into a dense mass that snags waste and eventually blocks the pipe. A camera spots root intrusion long before it causes a backup, so you can address it on your terms instead of during an emergency.
2) It reveals the true condition of aging pipe
Older Central Florida homes were often plumbed with cast iron, clay tile, or Orangeburg pipe, all of which degrade with age. A scope shows exactly what material you are dealing with and how far gone it is: flaking and corrosion in cast iron, open joints in clay, or the soft, collapsing walls of Orangeburg. That is information you cannot get any other way short of excavation.
3) It finds breaks, bellies, and blockages before you close
The camera reveals cracks, offset joints, collapsed sections, and bellies, which are low spots where the pipe sags and waste collects. Any of these can cause slow drains, recurring clogs, or sewage backups. Finding them before closing means they become the seller’s problem, not a repair you discover a month after moving in.
4) It gives you real negotiating leverage
A documented sewer defect is one of the strongest bargaining chips a buyer has. Because a sewer line repair or replacement can run from a couple thousand dollars to well over ten thousand, a clear video showing the problem lets you request a credit, a price reduction, or a completed repair before you sign.
Homeowners insurance typically does not cover these lines, so catching the issue up front is the only real protection you have.
How Does a Sewer Scope Inspection Work?
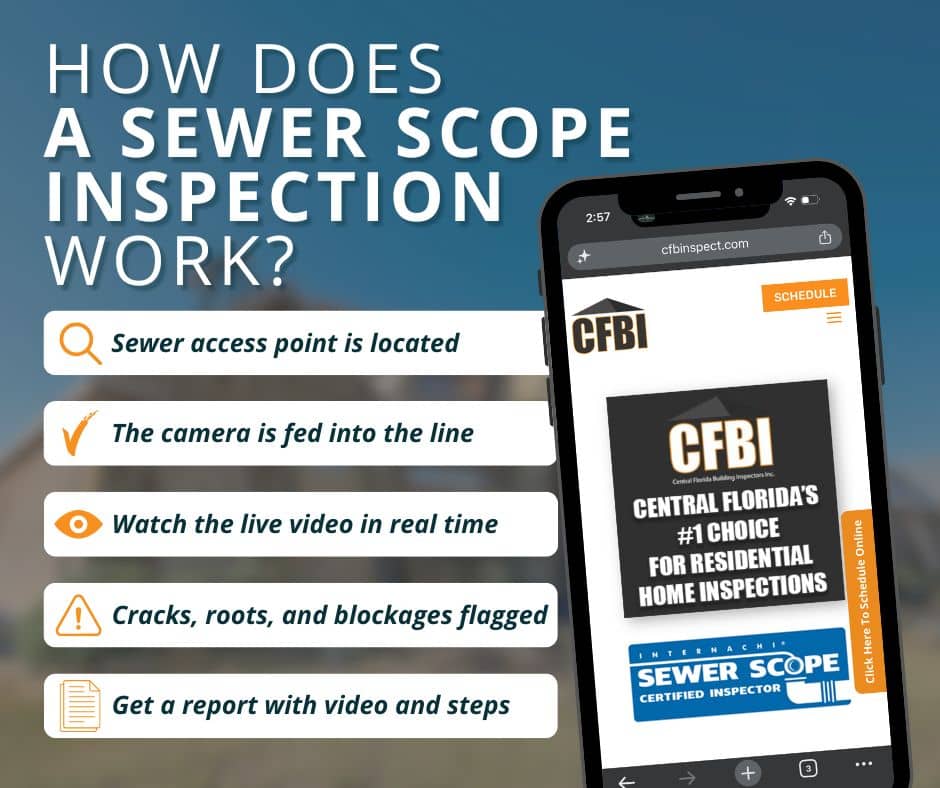
The process is quick and completely non-invasive. Here is what it looks like:
Locate access. The inspector finds a cleanout or a suitable drain access point. Clear access is what makes the job possible, so it helps to know where your cleanout is.
Run the camera. A waterproof camera on a long, flexible cable is pushed through the line while the inspector watches a live monitor, recording the footage as it goes.
Identify defects. As the camera travels, the inspector notes the pipe material, its condition, and any problems, and can often mark the approximate location and depth of a defect.
Deliver the report. You receive a written report with video or images documenting what was found, which is exactly what you need for negotiation or for planning a repair.
Most inspections take only about 20 to 30 minutes. Here is a quick reference for what the camera can reveal:
What the camera finds
What it means for you
Tree root intrusion
Blockages and cracked joints; regrows in 1 to 3 years if untreated
Cracks and offset joints
Leaks, soil erosion, and entry points for roots
Bellies (low spots)
Standing waste, recurring clogs, and slow drains
Corrosion / deteriorated pipe
Aging cast iron or Orangeburg near the end of its life
Collapsed or broken sections
Immediate failure risk and the most expensive repair category
Blockages and debris
Backups waiting to happen; may signal a deeper problem
Why Central Florida Homes Are Especially at Risk
Florida’s conditions are unusually hard on sewer lines, which is what makes a scope so worthwhile here. The sandy soil, high water table, and year-round growing season combine to attack pipes from every direction.
Root pressure never lets up in a climate where trees grow all year. Live oaks, which shade so many Orlando-area neighborhoods, along with palms, ficus, and camphor, send aggressive roots dozens of feet toward the moisture inside a sewer line. Any mature tree within roughly ten to fifteen feet of the pipe is a real threat.
Age is the other factor. Many homes built before the mid-1980s still have their original cast iron, clay, or Orangeburg pipe, and cast iron in particular is prone to corrosion and cracking in homes built before 1975. Orangeburg, a tar-paper pipe used in some mid-century construction, deteriorates and collapses readily in wet Florida soil.
If you are buying an older home in Central Florida, there is a real chance the sewer line is at or past the end of its service life, and a scope is the only way to know.
How Much Does a Sewer Scope Inspection Cost?
A sewer scope is inexpensive relative to what it protects you from. Pricing depends on access and property, so treat these as ranges rather than quotes.
Item
Typical range
Sewer scope inspection
Roughly $125 to $350
Common sewer line repair
Around $2,500 and up
Full line replacement
$2,000 to $10,000 or more
Set a small one-time inspection fee against a repair that can climb into five figures, and the math is straightforward. Because access can affect the job, and because CFBI does not quote a flat price online, the best move is to contact us for a quote on your specific property.
Sewer Scope Inspection vs. Home Inspection
These get confused often, so here is the clean version. A general home inspection evaluates the house and its visible, accessible systems, and it explicitly does not include the buried sewer line. A sewer scope is a separate, specialized service that films the inside of that line. A sewer scope is also different from a septic inspection, which evaluates the tank and drain field. A scope films the pipe running to the tank or the city main, and it is worth doing whether your home is on city sewer or septic.
The takeaway: if you want to know the condition of the sewer line, you have to ask for the scope specifically. It is never bundled into the standard inspection by default.
Related Questions to Explore
Is a sewer scope inspection worth it?
For an older home, almost always. One inspection can reveal root intrusion, cracks, or a failing pipe that would cost thousands to fix, giving you the leverage to negotiate before closing or to walk away. Homeowners insurance generally will not cover the sewer line, so the scope is your main safeguard.
Do I need a sewer scope inspection on a new construction home?
It is still worth considering. New lines can hide installation debris, poor slope, or damage from the build, and catching a defect while it is under warranty is far easier than discovering it later.
What are the signs of a sewer line problem?
Slow drains throughout the house, gurgling toilets, sewage odors, recurring clogs, and patches of unusually lush grass over the pipe can all point to a sewer line issue. A scope confirms what is actually happening inside.
How long does a sewer scope inspection take?
Usually about 20 to 30 minutes, assuming there is clear access to a cleanout. The inspector records the run and provides the footage in the report.
When to Call a Professional
A sewer scope is not a do-it-yourself task. It takes a proper camera, a trained eye to tell a harmless scuff from a structural crack, and experience reading the pipe materials common in Central Florida homes.
The right time to schedule one is when you are under contract on a home, especially anything built before the mid-1980s or with large trees near the sewer line.
Existing owners should also consider a scope after repeated backups, before buying, or simply to know the condition of a line that has been in the ground for decades. Bringing in a qualified inspector before closing is what turns a hidden risk into a documented, fixable fact.
Conclusion
The benefits of a sewer scope inspection come down to visibility and leverage. It shows you the one system every other inspection skips, catches root intrusion and pipe failure before they become emergencies, and gives you documentation to negotiate with or a clear plan to act on.
In Central Florida, where sandy soil, relentless roots, and aging cast iron and Orangeburg pipe put sewer lines under constant stress, that visibility is well worth the modest cost.
A pool inspection is a professional evaluation of a swimming pool’s structure, equipment, electrical systems, and safety features, done before you buy a home so you know the condition of one of the most expensive things in the backyard. It is usually a separate add-on to a standard home inspection, not part of it.
This checklist walks through exactly what a licensed inspector examines, what falls outside the inspection, and what it costs, so you know what you are paying for and what the report should tell you.
What Is the Scope of a Pool Inspection?
A pool inspection is a visual, operational evaluation of the pool and its systems by a qualified inspector. It confirms the shell and deck are sound, the equipment runs, the electrical is safe, and the required safety barriers are in place. The goal is to catch expensive or dangerous problems before closing, while you still have room to negotiate.
Most buyers assume the pool is part of the home inspection. It usually is not. A standard home inspection covers the house itself, and the pool is typically excluded or offered as a specialty add-on because it takes different equipment and training to evaluate. If a pool matters to your purchase, ask for a dedicated pool inspection in writing so it is not skipped.
Buyers are not the only ones who benefit. Sellers use a pre-listing pool inspection to fix problems before they surface in a buyer’s report and stall the deal, and existing owners use one to catch small issues before they turn into expensive repairs. In Central Florida, where pools run close to year-round, this matters more than it does in colder states.
Equipment rarely gets a winter rest, and constant sun, humidity, and salt air wear on finishes, screen enclosures, and metal hardware faster than most buyers expect.
The Pool Inspection Checklist
A thorough pool inspection follows the same logic every time: structure first, then the systems that keep it running, then the features that keep people safe. Here is what a licensed inspector examines, grouped by system. This mirrors InterNACHI’s pool inspection checklist, the national standard our inspectors are certified under.
Pool structure and interior finish
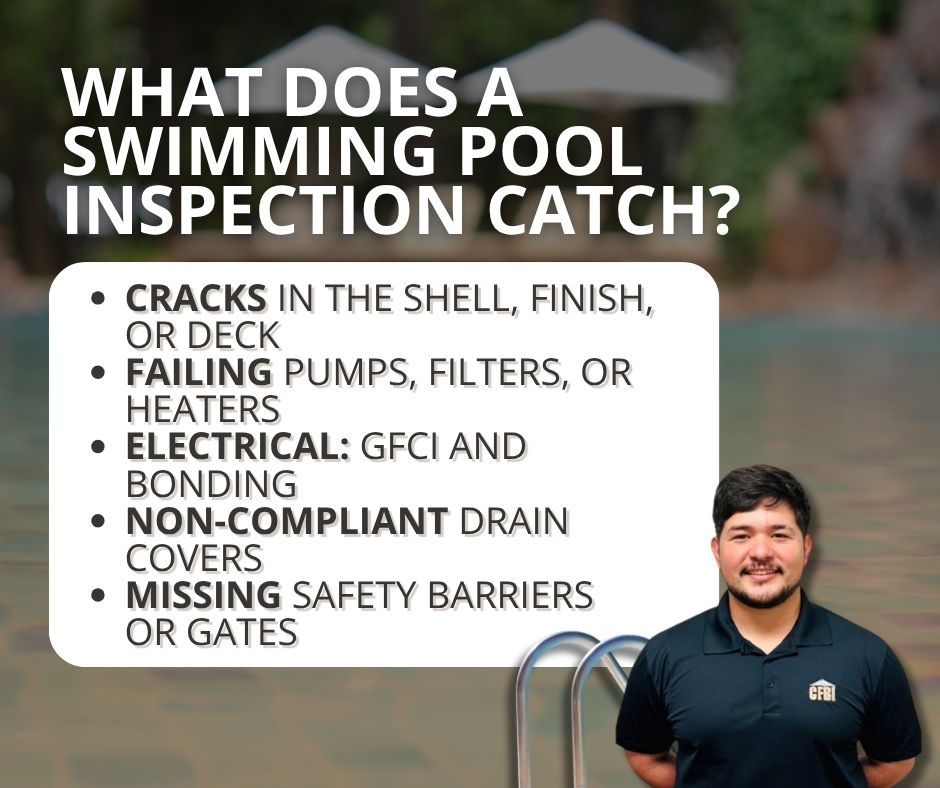
Interior surface (plaster, pebble, tile, fiberglass, or vinyl liner) for cracks, hollow spots, staining, and wear
Waterline tile and grout for looseness or missing pieces
Visible shell cracks that could point to structural movement or leaks
Signs of past patching or resurfacing
Cracks in the shell are not always cosmetic. A hairline surface crack is common, but a structural crack can signal soil movement under the pool, the same forces that cause warning signs of foundation cracks in a house. An inspector notes the location and pattern so you know whether it is minor or worth a specialist’s look.
The finish type also tells the inspector what to expect. Plaster and pebble surfaces show their age through rough spots, etching, and staining, and typically need resurfacing every 10 to 15 years. Fiberglass shells can develop surface blisters or spider cracks in the gelcoat. Vinyl liners tear and fade and have the shortest lifespan.
Resurfacing a pool is not cheap, often several thousand dollars and up, so knowing where the finish sits in its life cycle is real information when you are negotiating a price.
Deck, coping, and safety barriers
Coping (the cap around the pool edge) for cracks, separation, and trip hazards
Deck surface for cracking, settling, and drainage that runs toward the pool instead of away
Safety barrier: a fence at least four feet high, or an approved alternative
Self-closing, self-latching gates and any door or pool alarms
Florida takes pool safety seriously. Under Florida’s Residential Swimming Pool Safety Act, a residential pool must have at least one approved safety feature, such as a barrier, an approved cover, or self-latching gates and door alarms. An inspector flags where the pool falls short so you know what a compliant fix would take.
Pump, filter, and circulation equipment
Pump and motor operation, noise, and leaks
Filter type and condition (sand, cartridge, or DE)
Heater operation, if present
Salt chlorine generator cell, if the pool is a saltwater system
Valves, timers, automation panels, skimmers, and return jets
Visible plumbing for leaks and proper water circulation
Equipment is where the surprise costs hide. A pool pump replacement runs several hundred dollars, a heater can be well over a thousand, and a salt cell, common on Central Florida pools, is a wear item that needs periodic replacement. An inspector confirms each component actually runs and flags anything near the end of its life, so you are not discovering a dead heater the first cold week after closing.
Dead or weak circulation is a red flag. When a pump or filter is not moving water, the pool turns stagnant, and in Florida a stagnant pool quickly becomes a mosquito breeding ground. If the equipment is not running during the inspection, that is worth investigating before you close.
Electrical safety: GFCI and bonding
GFCI (ground-fault) protection on pool receptacles and equipment
Equipotential bonding of metal components to prevent shock
Underwater light and wet-niche condition
Panel and any sub-panel serving the pool
Water and electricity are the most dangerous combination at a pool, so this section matters more than any other. Missing GFCI protection or improper bonding is a serious safety defect, not a maintenance item.
Drains and anti-entrapment covers
Main drain and suction outlet covers for compliance with anti-entrapment standards
Signs of missing, cracked, or outdated drain covers
Modern anti-entrapment drain covers exist to prevent swimmers, especially children, from being trapped by suction. An inspector confirms the covers are present and compliant.
Screen enclosure and surrounding area
Screen cage structure, fasteners, and corrosion (common in Florida’s humidity and salt air)
Screen panels for tears and gaps
Enclosure roof and any attachment to the house
What a Pool Inspection Does Not Cover
Knowing the limits keeps expectations realistic. A standard pool inspection is visual and operational, so it generally does not include:
Water chemistry testing. Balancing chlorine, pH, and alkalinity is a maintenance task, not part of the structural and safety inspection.
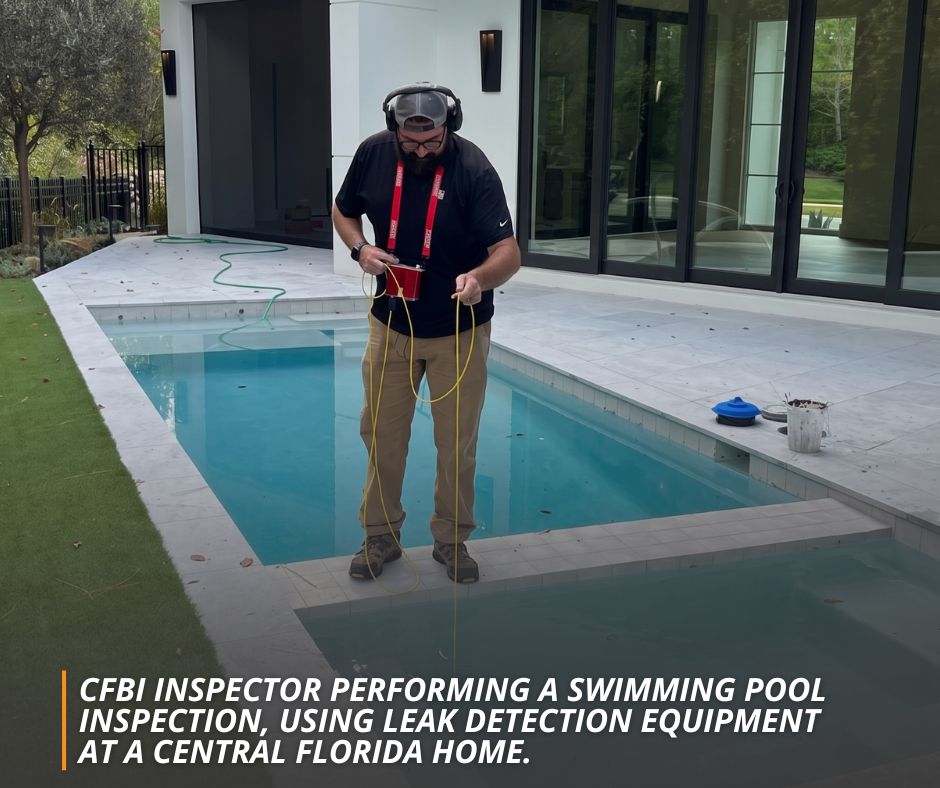
Underground leak location. An inspector can flag signs of a leak, but pinpointing an underground pipe leak usually requires a separate leak-detection test.
A guarantee of future performance. The report reflects condition on the day of the inspection, not a warranty that equipment will keep running.
If any of these matter to you, ask up front so you can arrange the right specialty test.
How Much Does a Pool Inspection Cost, and How Long Does It Take?
A standalone pool inspection typically runs between $125 and $300 nationally, and it is often less when bundled with a full home inspection since the inspector is already on site. Price depends on the pool’s size, type, and equipment. For current Central Florida pricing, see CFBI’s pricing and rates or contact our office.
A few things push the price toward the higher end: a spa or attached hot tub, a saltwater system, a heater, a screen enclosure, and older equipment that takes longer to evaluate. Weigh that against what it protects you from. A single missed defect, a cracked shell, a failing heater, or a non-compliant safety barrier costs far more to fix than the inspection costs to catch it.
On timing, most pool inspections take 30 to 60 minutes. A small, well-maintained pool goes quickly; a larger pool with a heater, spa, and screen enclosure takes longer.
Related Questions to Explore
Does a standard home inspection include the pool?
Usually not. A standard home inspection focuses on the house, and the pool is typically excluded or offered as a specialty add-on. If the home has a pool, request a dedicated pool inspection in writing so it is not overlooked.
How much does a pool inspection cost?
Most standalone pool inspections run $125 to $300, and less as an add-on to a full home inspection. Pool size, equipment, and whether there is a spa or heater all affect the price.
How long does a pool inspection take?
Typically 30 to 60 minutes, depending on the pool’s size and equipment. It is often done at the same visit as the home inspection, which is why buyers ask how long a home inspection takes overall.
Is it worth inspecting a green or neglected pool?
Yes, and arguably more so. A green or stagnant pool often hides equipment failures, structural problems, and safety issues, and it can be an active mosquito source. An inspection tells you whether the pool is restorable or a costly liability before you commit.
When to Call a Professional
Call a licensed inspector for a pool inspection any time you are buying a home with a pool, especially an older pool, a screened enclosure, or a pool that looks neglected.
Warning signs in a pool you already own are worth a professional look too: cracks in the shell or deck, equipment that will not run, tripped breakers around the pool, a barrier or gate that does not self-latch, or water you cannot keep clear.
A qualified inspector has the training to tell a cosmetic issue from a structural or safety defect, and the report gives you documentation to act on, whether that means negotiating a repair or planning maintenance.
Conclusion
A pool can be the best part of a Central Florida home or its most expensive surprise, and the only way to know which before closing is a real inspection. This checklist is what a professional covers: structure, equipment, electrical, drains, and safety.
If you are buying, selling, or want a straight answer on the condition of your pool, schedule a swimming pool inspection with CFBI’s certified team. Contact us today to book or ask a question.
A sewer scope is a video inspection of the underground lateral sewer line that carries waste from your house to the city main or your septic tank. An inspector feeds a small waterproof camera on a flexible cable through a cleanout or drain access point and watches a live feed, looking for cracks, blockages, and root intrusion that a standard home inspection never sees.
For anyone buying a Central Florida home, it is one of the cheapest ways to avoid a five-figure repair surprise after closing.
What Is a Sewer Scope?
A sewer scope is a camera inspection of your home’s lateral sewer line: the pipe you own that runs from your foundation out to the municipal sewer main or a septic tank. A waterproof camera on a flexible push cable travels the length of that pipe while the inspector reviews the footage in real time, recording the condition of the line and marking where any problems sit.
The reason this matters is simple. A standard pre-purchase home inspection covers what an inspector can see and reach: the roof, visible plumbing fixtures, the electrical panel, HVAC, and structure. It does not include the pipe buried three or four feet underground. A sewer scope fills that gap. You may also hear it called a sewer camera inspection or a sewer line inspection, and they all describe the same process.
How a Sewer Scope Inspection Works
The process is quick, non-invasive, and involves no digging. Here is what happens on site:
Locate the access point. The inspector finds a cleanout or a suitable drain opening that connects to the main line.
Feed the camera. A waterproof camera mounted on a flexible cable is pushed through the pipe toward the municipal connection or septic inlet.
Review the live feed. The inspector watches a monitor in real time, noting the location of anything unusual along the run.
Deliver the report. After the run, you receive a written report with recorded video, still images, and a plain-language summary of what was found and what it means.
Most inspections take roughly 30 to 60 minutes depending on the length of the line and how easy the access point is to reach. CFBI’s inspectors follow InterNACHI’s sewer scope inspection standards, the same national standards our team is certified under.
What Problems a Sewer Scope Finds
A sewer scope catches damage long before it becomes a backup in your bathroom. The most common findings fall into a few categories:
Tree root intrusion. Roots seek out moisture and work into the pipe through joints and small cracks, then grow until they choke the line. This is the single most common issue inspectors find.
Cracks, breaks, and collapses. Ground movement, age, and soil pressure crack pipe walls. Left alone, a hairline crack becomes a full break or collapse.
Bellies (sagging sections). When a section of pipe sinks, waste and debris pool there instead of flowing through, causing repeat clogs.
Blockages. Grease, debris, and foreign objects restrict flow.
Corrosion and offset joints. Older metal pipe corrodes from the inside, and shifting soil pulls joints out of alignment.
A cracked or broken sewer line also becomes an easy entry route for pests. Roaches and rodents travel up compromised lines and floor drains, so unexplained signs of a cockroach problem near drains can point back to a damaged pipe.
Hidden leaks are another downstream effect: waste seeping into soil under a slab holds moisture, and that moisture can drive the same kind of persistent musty odor homeowners often blame on humidity.
If sewage exposure has gone on long enough, it is worth pairing the scope with a mold inspection.
Common Issues in Older Central Florida Homes
Pipe material tells you a lot about risk. Many older Central Florida homes still have cast iron or clay sewer lines, and some built between the 1940s and early 1970s have Orangeburg pipe, a tar-paper product that deforms and collapses with age.
Cast iron corrodes and scales from the inside; clay joints crack and invite roots. Add Florida’s sandy, shifting soil and heavy tree cover, and a line that looked fine on the surface can be failing underground. Age of the home and nearby mature trees are two of the strongest reasons to scope before you buy.
Why a Sewer Scope Matters When You’re Buying a Home
The whole point of a sewer scope is to find expensive problems while you still have leverage to do something about them. Sewer line repairs are not small: depending on the fix, they run from about $1,000 for a minor repair to $25,000 or more for a full replacement, and trenchless or dig-and-replace work in a mature neighborhood sits at the high end.
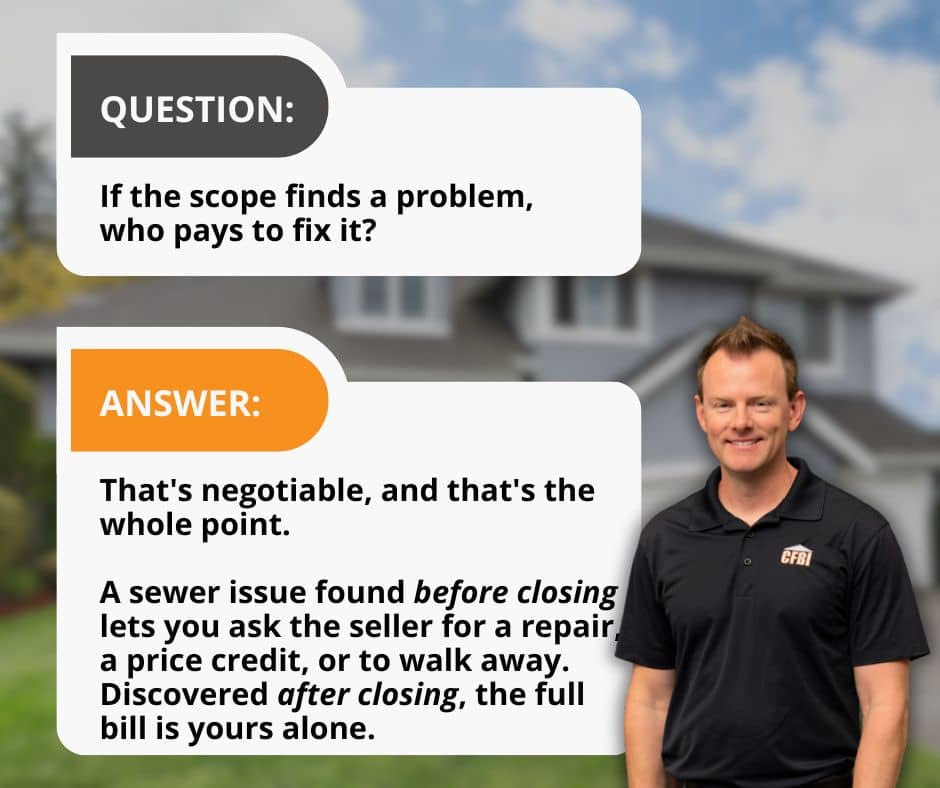
Because the underground line is outside a standard inspection, a buyer who skips the scope often discovers the damage only after moving in, when it is entirely their bill. A buyer who scopes during the due-diligence window has options: negotiate a repair, ask for a credit, or walk away.
For a small upfront cost, you trade an unknown for a documented picture of one of the most expensive systems in the house. This is the same reason a scope belongs alongside the rest of your due diligence, right there with the main inspection and any specialty testing.
How Much Does a Sewer Scope Cost, and How Long Does It Take?
A standalone sewer scope typically costs between $100 and $500 nationally, and it is often less when added to a full home inspection because the inspector is already on site. The exact price depends on your location, line length, and access. For current Central Florida pricing, see CFBI’s pricing and rates or contact our office.
On timing, most inspections wrap in 30 to 60 minutes. A short, accessible line with a clean cleanout goes fast; a long run or a hard-to-find access point takes longer.
Related Questions to Explore
Do I need a sewer scope if the home is newer?
Newer homes are lower risk, but not zero risk. Poor installation, settling, and construction debris left in the line all show up in newer builds. If the home is under about 10 years old with no mature trees nearby, a scope is optional. Older than that, or with big trees near the line, it is worth doing.
Is a sewer scope worth it?
For most buyers, yes. A scope costs a few hundred dollars at most and can flag a repair that costs tens of thousands. Even when the line comes back clean, you get a recorded baseline of its condition, which is useful documentation to keep.
Can a sewer scope damage my pipes?
No. The camera is small, flexible, and designed to travel through the pipe without force. A trained inspector will not push through a hard obstruction or a collapsed section, which protects both the equipment and your line. If the camera cannot pass a certain point, that itself is a finding worth investigating.
How often should you get a sewer scope?
Beyond the home-purchase scope, a good rule of thumb is every few years for older homes, homes with recurring drain issues, or properties with large trees near the line. If you have had backups or slow drains, scope sooner rather than waiting for the next failure.
When to Call a Professional
Call a licensed inspector for a sewer scope any time you are buying a home, especially an older one or one with mature landscaping, and whenever you notice warning signs in a home you already own: repeated drain clogs, gurgling toilets, sewage odors, unusually lush or soggy patches in the yard, or slow drains across multiple fixtures.
These often trace back to the line. A camera inspection tells you exactly what is wrong and where, so any repair is targeted instead of guesswork. It also takes an inspector with the right equipment and the certification to read what the camera shows, which is not part of a standard visual home inspection.
Conclusion
A sewer scope turns the most expensive guess in a home purchase into a documented answer. For a small cost, you find out whether the line under the property is sound or hiding a five-figure repair, while you still have room to negotiate.
If you are buying, selling, or just want peace of mind on an older Central Florida home, schedule a sewer scope inspection with CFBI’s certified team. Contact us today to set up an appointment or ask a question.