A house inspection checklist lists the parts of a home you should look at before you buy: the roof, foundation, plumbing, electrical system, HVAC, and more. Use it at showings to spot problems early and to know what a licensed inspector will cover later.
At Central Florida Building Inspectors (CFBI), our team has served Central Florida buyers since 1988. This guide shows what to check, which red flags matter most in Florida homes, and when to call a pro.
Print it, bring it along, and use the sections below to learn what each item means.
What Is a House Inspection Checklist?
A house inspection checklist is a room-by-room and system-by-system list of things to check in a home. Buyers use it to prepare for showings and to ask better questions. Inspectors use their own, more detailed lists during a full inspection.
Your checklist is a screening tool. It helps you notice stains, cracks, odd smells, and worn parts. It does not replace a professional inspection. A home inspection is a limited visual exam done by a licensed inspector.
Florida licenses home inspectors as individuals, not companies.
Two other terms get mixed up with a home inspection:
House Inspection Checklist: Exterior, Structure, and Interior
This first half covers the shell of the home. Walk the outside, then check the structure, the attic, and the living areas, and take photos of anything that looks off.
Exterior, Roof, and Grounds
Start outside. The exterior shows how well the home has been kept up, and the roof is one of the costliest parts to fix.
Look for missing, curled, or cracked roof shingles or tiles, and ask how old the roof is.
Check gutters and downspouts. Water should flow away from the house.
Look at siding, trim, and paint for cracks, rot, or soft spots.
Check that the ground slopes away from the foundation.
Look at the driveway, walkways, fences, and decks for damage.
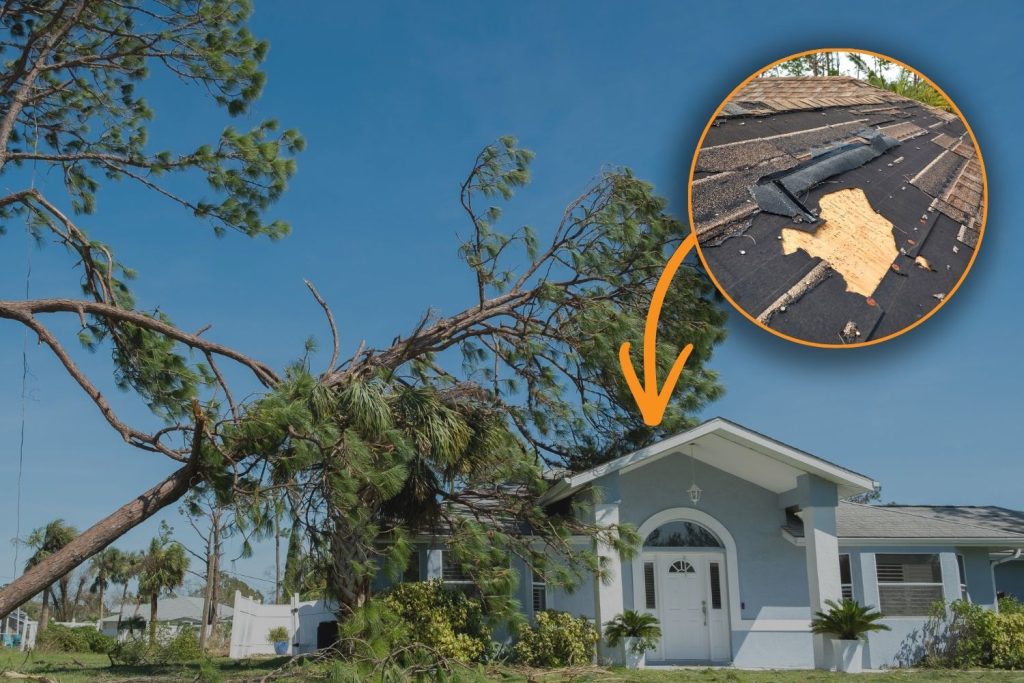
Note any large trees close to the roof or the house.
Foundation and Structure
The foundation holds the whole home up. Structural problems are costly, so look closely.
Look for cracks in the foundation, walls, or ceilings. Wide, stair-step, or growing cracks need a pro.
Check for doors and windows that stick or do not close well. This can point to shifting.
Look for sloped floors or gaps between walls and floors.
If the home has a crawl space, look for standing water, damp soil, or damaged support beams.
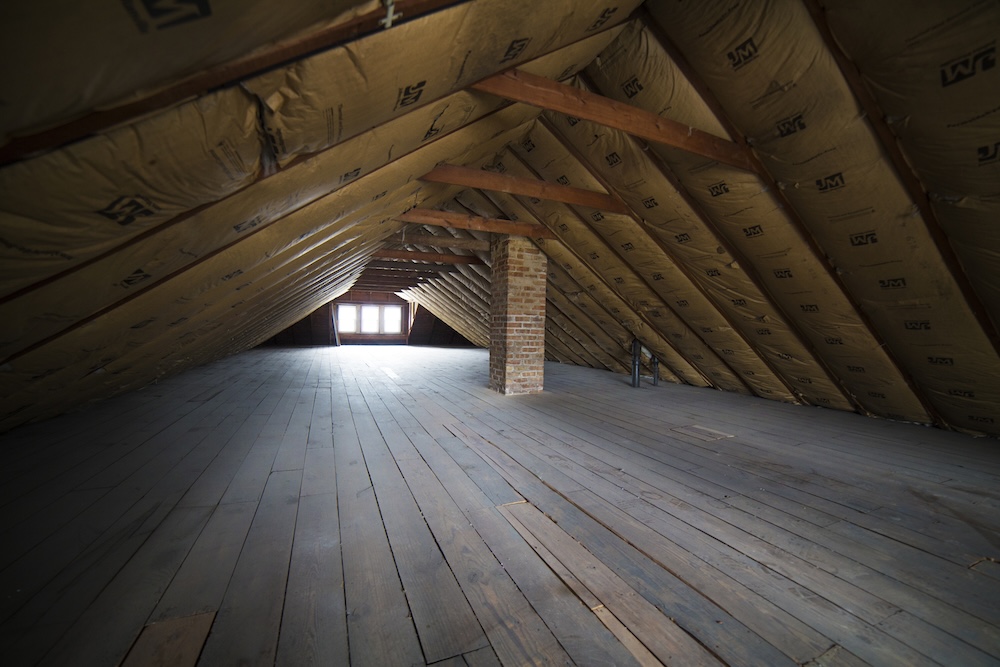
Attic and Insulation
The attic tells you a lot about the roof and the home’s energy use.
Look for water stains on the underside of the roof deck, one of the most common signs of a hidden roof leak.
Check that insulation is even and dry, not flattened or wet.
Look for signs of pests, such as droppings or chewed material.
Make sure vents are not blocked.
Interior Rooms, Windows, and Doors
Interior details often show signs of past water damage or settling.
Look for stains, bubbling paint, or peeling wallpaper on walls and ceilings.
Open and close every window and door. Check the seals and the locks.
Check floors for soft spots, buckling, or uneven areas.
Note any musty smell. It can point to hidden moisture or mold.
House Inspection Checklist: Plumbing, Electrical, and Home Systems
Next, check the systems that keep the home running. Problems here are often hidden, so look for clues such as stains, odd sounds, and weak performance.
Plumbing
Plumbing leaks can hide behind walls for years before they show up.
Run every faucet and flush every toilet. Check water pressure and drain speed.
Look under sinks for drips, stains, or rust.
Check the water heater for age, rust, and leaks at the base.
Note the pipe material where you can see it, and ask the inspector about older pipe types.
Electrical System
Electrical problems can be a fire risk, so note anything unusual and leave repairs to a licensed pro.
Test light switches and outlets in each room.
Look at the electrical panel for rust, burn marks, or a messy layout.
Check for outlets near water, such as in kitchens and bathrooms, that have GFCI protection.
Look for flickering lights, warm outlets, or buzzing sounds.
Ask the inspector about older wiring types, such as aluminum wiring, in homes built decades ago.
Heating and Cooling (HVAC)
In Central Florida, the air conditioner works hard for most of the year. A failing system is a big expense.
Ask how old the HVAC system is and when it was last serviced.
Turn the system on and check that each room gets cool air.
Look at the ductwork and vents for dirt, damage, or signs of moisture.
Check the drain line and the area around the air handler for rust and for signs of an air conditioner leaking water.
Kitchen and Bathrooms
These rooms use the most water, so they are common places for leaks.
Check cabinets under sinks for water damage or warped wood.
Look at caulk and grout around tubs and showers for gaps or black spots.
Run the exhaust fans and make sure they vent properly.
Test the appliances that come with the home.
Safety Devices
These items are quick to check and important for your family.
Make sure smoke alarms are in bedrooms and hallways, and that they work.
Check for carbon monoxide alarms near sleeping areas, especially if the home has gas appliances.
Look for railings on stairs, porches, and balconies.
Test the garage door’s auto-reverse feature.
Red Flags at a Glance
Use this table to decide what to do when you spot a problem.
What you see
What it may mean
Next step
Wide or growing cracks in walls or foundation
Settling or structural movement
Ask for a full inspection and a structural opinion
Water stains on ceilings or walls
Roof or plumbing leak
Ask the seller about repairs, then have an inspector check
Musty smell or black spots
Moisture or mold
Consider a mold inspection
Sticking doors and windows
Shifting or humidity
Note it and ask your inspector to look closer
Old or rusty electrical panel
Safety or capacity concern
Have a licensed electrician review it
Weak airflow or warm air from vents
HVAC problem
Ask for service records and an HVAC check
Florida Items to Add to Your Checklist
Florida homes face weather and pests that homes in other states do not. Add these to your list.
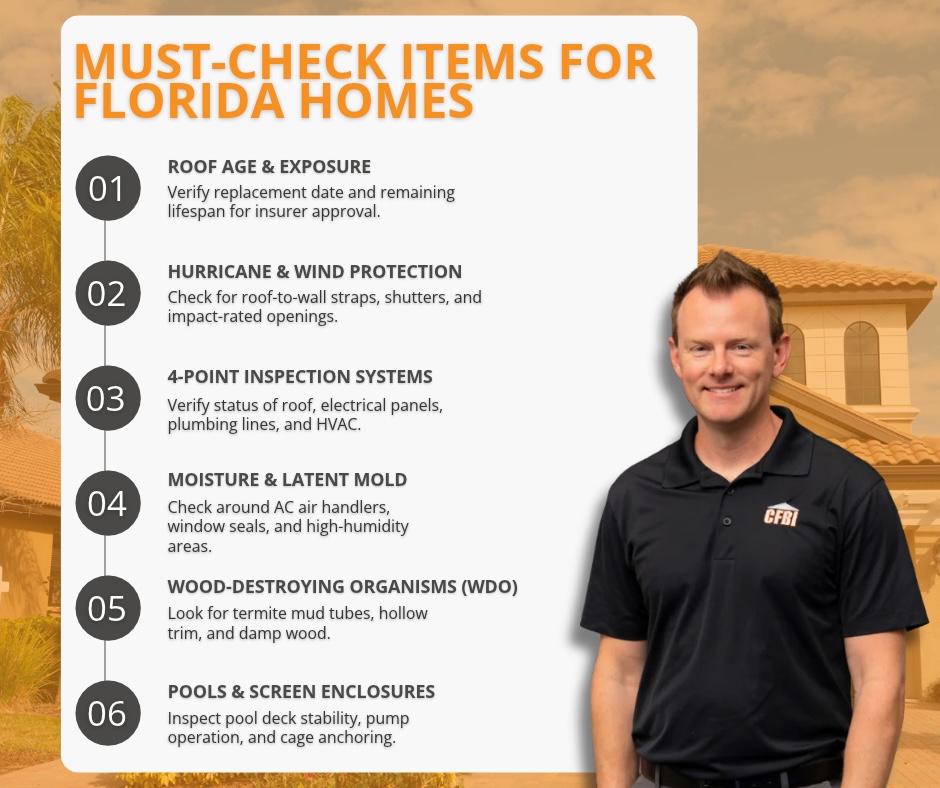
Roof age and condition. Sun, heavy rain, and storms wear roofs down. Ask when the roof was last replaced, and ask your insurance agent what they need to see.
Wind and hurricane protection. Look for roof straps, impact-rated windows, and shutters. A wind mitigation inspection documents these features, and some buyers use the report when they shop for insurance.
Insurance-related checks. Insurance companies often ask for a 4-point inspection on older homes. It covers the roof, electrical, plumbing, and HVAC.
Moisture and mold. Humidity makes leaks and mold more likely. Look for stains, soft drywall, and musty rooms, especially near bathrooms, windows, and the air handler.
Termites and wood damage. Look for mud tubes, hollow-sounding wood, and sawdust-like droppings. A wood-destroying organism (WDO) inspection checks for termites and other wood damage.
Pools. If the home has a pool, check the deck, the pump, and the screen enclosure, and ask about leak history.
What to Do During the Home Inspection
Plan to attend the inspection. It gives you a chance to see problems in person and ask questions.
Bring your checklist and notes. Share any concerns from your showings with the inspector.
Bring a notepad or phone. Take photos of problems the inspector points out.
Stay out of the way. Let the inspector work, then ask questions at the end of each area.
Plan for time. Most inspections take three to five hours, depending on the size, age, and condition of the home.
You should get a written report with photos. CFBI delivers reports within 24 hours, and we include thermal imaging and drone roof checks at no extra charge when they apply.
What to Do With Your Inspection Report
Read the whole report, then sort problems into three groups:
Safety and structure: Foundation, roof, electrical, and gas issues come first.
Water and moisture: Leaks, damage, and mold can spread, so address them early.
Maintenance and cosmetic items: Small repairs you can handle after closing.
Next, get repair quotes for the big items. Then talk with your real estate agent about your options. You can ask the seller to repair the problems, lower the price, or give you a credit. You can also walk away if your contract has an inspection contingency and the problems are too big. Review the contingency terms in your contract with your agent or a real estate attorney.
Related Questions to Explore
What do home inspectors look for? Home inspectors look at the condition of a home’s major systems and parts. That includes the roof, foundation, plumbing, electrical, HVAC, attic, walls, windows, and doors. In a pre-purchase home inspection, they write down what is damaged, worn, or unsafe.
What does a home inspection consist of? A home inspection is a visual check of a home’s accessible areas, from the roof to the foundation. The inspector tests major systems, looks for damage, and writes a report with photos. It is not a guarantee, and it does not check anything hidden behind walls.
What should a buyer do during a home inspection? Attend the inspection, walk the home with the inspector, and ask questions. Take notes and photos. Ask the inspector which problems are urgent and which can wait.
What should you ask a home inspector? Ask about the home’s biggest concerns, the age of the roof and major systems, and which repairs come first. The best questions to ask a home inspector also cover what the inspection did not check.
What should you bring to a home inspection? Bring this checklist, a notepad or phone, and any questions from your showings. If you have the seller’s disclosure or past repair records, bring those too. Wear comfortable shoes, since you may walk the whole property.
Can you buy a home without an inspection? You can, but it is risky. Without an inspection, you take on problems you cannot see, such as roof damage, leaks, or electrical faults. An inspection lets you negotiate or walk away with full information.
When to Call a Professional
A checklist helps you spot warning signs. It cannot test a roof, measure moisture inside a wall, or check electrical safety. Call a licensed inspector when you:
Find cracks, leaks, or mold during a showing.
Are about to make an offer and want to know the home’s true condition.
Need a 4-point or wind mitigation report for insurance.
Want a closer look at termites, mold, radon, a sewer line, or a pool.
CFBI inspectors hold Florida home inspector licenses and serve Orlando, Tampa, Volusia County, Lake and Sumter counties, Ocala, and the surrounding areas.
A garage vent fan pulls hot, damp, or fume-filled air out of your garage and sends it outside. In Central Florida, most garages need some kind of airflow plan because summer heat and humidity build up fast.
At Central Florida Building Inspectors, we have inspected homes across the region since 1988, and our inspectors look at the garage on every home inspection.
This guide shows you how to choose a fan, size it, and place it safely. It also covers what an inspector checks in an attached garage. Use the table of contents to jump to any section.
What Is a Garage Vent Fan and How Does It Work?
A garage vent fan is a powered exhaust fan that moves air from inside the garage to the outdoors. As the fan pushes air out, fresh air is pulled in through gaps, vents, or an open door.
That moving air does three jobs. It cools the space, it carries off moisture, and it clears out fumes from cars, paint, gas cans, and lawn equipment.
A few terms get mixed up with garage vent fans, so here is a quick sort:
Garage vent fan or garage exhaust fan: a powered fan that pushes air outside.
Passive vent: a louver or gable vent with no motor. Air moves through it on its own, so it works slowly.
Attic fan: a fan that cools an attic, not a garage.
Shop fan or floor fan: a fan that stirs the air in the room but does not remove it.
Do You Need a Garage Vent Fan?
Most garages benefit from one, and an attached garage needs more care than a detached one. Heat, moisture, and fumes all collect in a closed garage, and an attached garage shares walls with your living space.
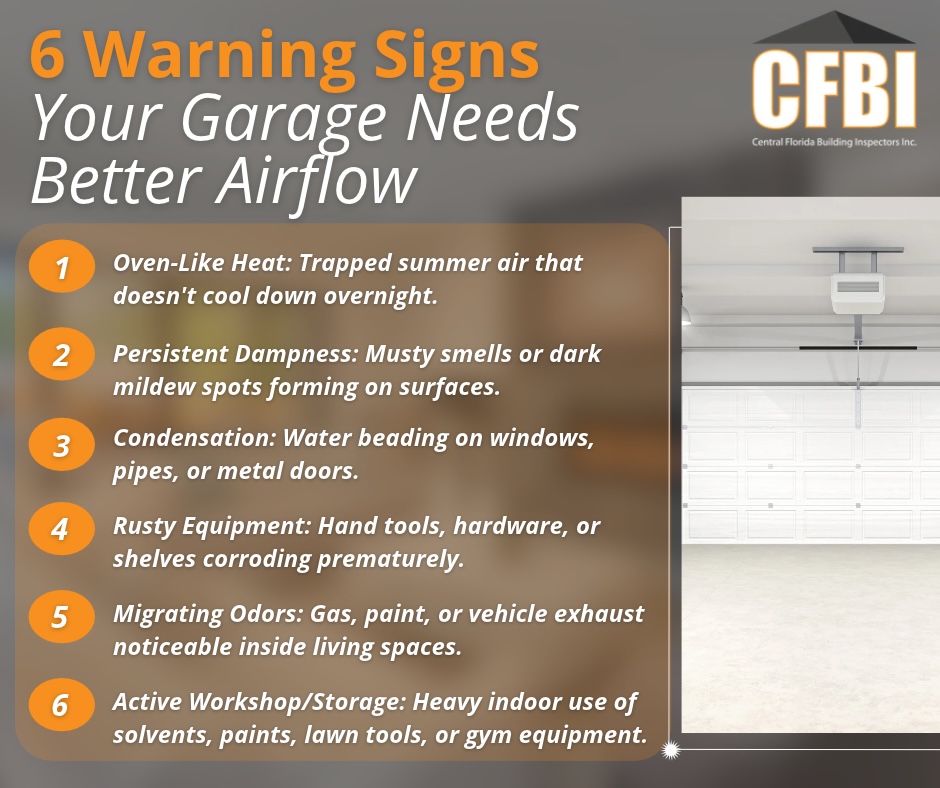
Look for these signs that your garage needs better airflow:
The garage feels like an oven in summer.
You notice a musty or damp smell.
Water beads on windows, pipes, or the garage door.
Tools and shelves show rust.
You smell gas, paint, or exhaust in the house after you spend time in the garage.
You use the garage as a workshop, gym, or storage room for paint and chemicals.
Damp air also feeds mold, and mold can affect your health, so dark spots or a musty smell deserve a closer look.
Types of Garage Vent Fans
The best garage vent fan depends on your walls, your roof, and how you use the space. This table compares the common choices.
Fan type
Best for
Watch out for
Wall-mounted exhaust fan
Most garages with an outside wall
Needs a clear wall space and a spot for the exterior hood
Gable-mounted fan
Garages with a gable end wall near the roof peak
Needs a cut in the gable and wiring up high
Ridge or roof vent with a fan
Garages with attic space above
Needs a roof cut and a sealed roof patch
Window fan
Garages with a window and a tight budget
Blocks the window and is less secure
Solar-powered fan
Sunny spots where wiring is hard
Weaker on cloudy days and at night
Passive louver or soffit vent
Adds steady background airflow
Moves little air without a fan
Here are a few features worth a look:
Ducted or ductless: a ducted fan sends air through a pipe to an outside hood. A ductless fan sits right in the wall.
Backdraft damper: a flap that closes when the fan is off. It keeps hot air, pests, and rain out.
Thermostat or humidistat: turns the fan on when the garage gets hot or damp.
Timer or motion sensor: runs the fan when you are in the garage and for a while after you leave.
Quiet operation: helpful if the garage shares a wall with a bedroom.
Third-party ratings: look for fans with tested airflow numbers from a group such as HVI, or an ENERGY STAR label.
A ceiling fan or floor fan moves air around, but it does not remove it. Use one of those along with a vent fan, not in place of one.
How to Size a Garage Vent Fan
To size a garage vent fan, find the volume of your garage, pick how many times per hour you want the air replaced, and divide by 60. The answer is the airflow you need, measured in cubic feet per minute (CFM).
The formula looks like this:
CFM = (length × width × height × air changes per hour) ÷ 60
Here is an example for a two-car garage that measures 20 feet by 20 feet with an 8-foot ceiling:
Volume: 20 × 20 × 8 = 3,200 cubic feet.
At 6 air changes per hour: 3,200 × 6 ÷ 60 = 320 CFM.
At 10 air changes per hour: 3,200 × 10 ÷ 60 = about 533 CFM.
Those air change numbers are examples. A hot garage needs more airflow than a garage that only needs help with fumes. A workshop with paint or solvents may need more still.
A Department of Energy-backed Building America guide from PNNL gives a useful reference point for attached garages. It ties a minimum of 70 CFM to the EPA Indoor airPLUS program for a garage exhaust fan.
Under that program, the fan vents straight outdoors and runs whenever the garage is in use. A motion sensor or timer keeps it going for at least an hour after the garage is empty. Treat 70 CFM as a floor for fume control, not a target for cooling a hot garage.
Do not forget replacement air. A fan can only push air out if air can come in. If your garage is sealed tight, add an intake vent low on the wall opposite the fan, or open a window or the garage door while the fan runs. Never pull replacement air from the house.
Where to Put a Garage Vent Fan and How to Install It Safely
Put the fan high on an outside wall, as far as you can from the intake vent. That layout pulls fresh air across the whole garage. Heat rises, so a high spot also removes the hottest air first.
Follow these steps:
Pick the wall. Choose an exterior wall, not the wall or ceiling you share with the house.
Check behind it. Look for studs, wires, pipes, and anything else that sits where you plan to cut.
Vent outdoors. Send the air outside through an exterior hood with a damper. Never vent into an attic, a soffit, a crawl space, or the house.
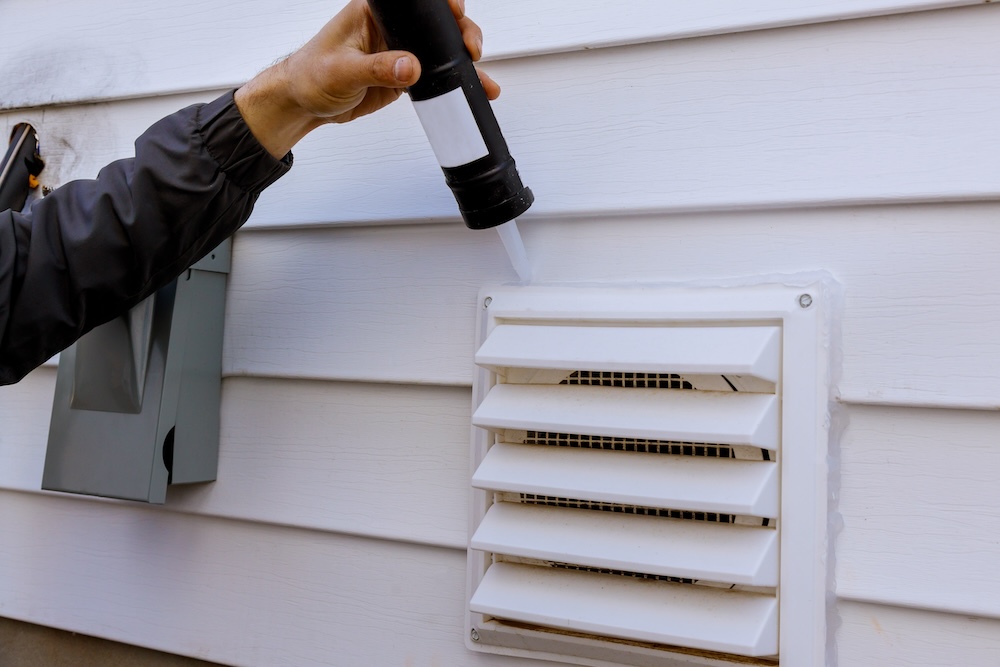
Seal the opening. Caulk around the duct and the hood so water and pests stay out.
Add intake air. Place an intake vent or louver on the opposite side of the garage.
Wire it the right way. If the fan needs a new circuit or a switch, hire a licensed electrician. A plug-in fan on a safe outlet is a simpler option.
If your garage has a finished ceiling or a bonus room above it, stop and read the next section before you cut anything.
What Home Inspectors Check in an Attached Garage
In an attached garage, an inspector looks at how well the garage is sealed off from the house. Fumes and carbon monoxide can travel from the garage into living space, so the barrier between the two matters more than any fan.
Here is what we look at:
Fire separation: the wall and ceiling shared with the house should be solid, with no holes, gaps, or missing drywall. Building codes call for a fire-rated barrier here.
The door to the house: it should close tightly, seal with weatherstripping, and ideally close on its own. The PNNL guide recommends a self-closing, weatherstripped door as a way to keep garage air out of the home.
Penetrations: pipes, wires, and ducts that pass through the shared wall or ceiling should be sealed.
No ducts in the garage: HVAC ducts and return air should not run through or draw from the garage.
Fan placement: a vent fan should sit on an outside wall and exhaust outdoors.
Carbon monoxide alarms: the house should have working alarms on each level and near bedrooms.
Some energy programs go a step further. They test the wall between the garage and the house with a blower door. The PNNL guide describes a pass when the garage holds a pressure of more than 45 Pascals against a house held at 50 Pascals.
The U.S. Department of Energy has also sponsored research on air transfer between the garage and living space, aimed at keeping garage air out of living areas. A good air barrier does more to protect your family than a bigger fan.
A vent fan does not make it safe to run a car in a closed garage. Carbon monoxide can build up to dangerous levels fast. Open the garage door first, then start the engine, and drive out right away.
Garage Ventilation in Florida’s Heat and Humidity
In Florida, garage ventilation is mostly about heat and moisture. Summer sun heats the roof and walls, and humid air settles on cool surfaces.
A few habits help in our climate:
Pick a fan with a humidistat so it runs during damp spells, not just hot ones.
Run the fan in the morning and evening when the outside air is cooler than the garage.
Keep wet items, like coolers and pool gear, out of the garage or dry them first.
Check for musty smells after heavy rain. Moisture can point to a leak.
If you store items that hate humidity, such as paper, fabric, or electronics, consider a sealed storage bin.
Do not turn a hot garage into a conditioned space without a plan. Cooling a garage with a window unit or a mini-split changes how moisture moves in the building. Ask a pro before you try it.
Garage fumes are not the only air concern in a home. Radon is a separate issue that seeps up from the soil, and the common signs of radon look different from garage fume problems.
Related Questions to Explore
Do garages need ventilation? Yes, most garages do. A garage traps heat, moisture, and fumes from cars and stored items. Some airflow, even from passive vents, helps. An attached garage needs the most care, since it shares walls with your living space.
How many CFM do I need to ventilate a garage? Multiply the length, width, and height of the garage, then multiply by the air changes per hour you want, and divide by 60. A 20-by-20-foot garage with an 8-foot ceiling needs about 320 CFM at 6 air changes per hour. Fume control alone can take less. Heat removal takes more.
How do you ventilate a garage with no windows? Use a wall-mounted exhaust fan on an outside wall and add an intake louver on the opposite wall. A thermostat or timer lets the fan run on its own. Do not rely on the door to the house for replacement air.
Does an insulated garage need ventilation? Yes. Insulation holds heat and moisture in, so an insulated garage can get stuffy fast. Add a fan and an intake path. If you plan to heat or cool the garage, talk to a pro about moisture first.
Can you vent a bathroom fan into the garage? No. A bathroom fan should send moist air outdoors. Venting it into a garage adds moisture and can lead to mold and rot. It also moves air through a space that is meant to stay separate from your home.
How do you ventilate a garage in Florida? Use a wall-mounted fan on a humidistat or thermostat, add an intake vent on the opposite wall, and keep the wall shared with the house sealed. Plan for both heat and humidity. Check for musty smells after storms.
When to Call a Professional
Call a pro when the job goes beyond swapping a plug-in fan. These are good times to bring in help:
You need to cut into a fire-rated wall or ceiling. The cut can weaken the barrier between the garage and the house. A pro can seal it the right way.
You need new wiring. Hire a licensed electrician for a new circuit, switch, or hardwired fan.
You need a gable or roof cut. A bad cut can lead to leaks.
You smell fumes in the house. The air barrier may have gaps.
A carbon monoxide alarm sounds. Get everyone outside right away and call 911.
You see mold or water stains. The source of the moisture needs to be found and fixed.
You are buying a home with an attached garage. A pre-purchase home inspection checks the garage, the fire barrier, the door to the house, and the rest of the home in one visit.
Central Florida Building Inspectors serves Central Florida, Volusia County, Lake, Sumter, and Marion counties, and the Tampa area. Our reports include photos and arrive within 24 hours.
Conclusion
A good garage vent fan keeps your garage cooler, drier, and cleaner. Remember these points:
Size the fan with the CFM formula and plan for replacement air.
Mount it on an outside wall and vent it outdoors.
Protect the barrier between the garage and the house, because it matters more than the fan.
Have questions about your garage or a home you want to buy? Schedule a home inspection with our team, and we will take a close look at it.
Wind mitigation matters for Florida homes because it does two things at once: it documents the features that help your house survive a hurricane, and it unlocks insurance discounts that Florida law requires insurers to offer.
A wind mitigation inspection records those features on a state form, and for most Central Florida homeowners it pays for itself in the first year through lower premiums.
If your homeowners insurance keeps climbing, this is one of the few inspections that can actually bring the bill back down.
What Is a Wind Mitigation Inspection?
A wind mitigation inspection is a focused evaluation that documents the wind-resistant construction features of your home. The inspector records what they find on Florida’s Uniform Mitigation Verification Inspection Form, the OIR-B1-1802, which is the standard document insurers accept statewide. You hand that completed form to your insurance company, and they apply any credits your home qualifies for.
A few things set it apart from a regular inspection:
It is not pass or fail. The form only records the features your home already has. A weaker result means no discount, never a penalty or a higher premium.
It is not a code inspection or a repair list. The inspector is documenting, not grading.
The report is good for up to five years, as long as you have not made structural changes to the roof or openings.
For a home in Orlando or anywhere across Central Florida, that form is the key that opens the door to mandated insurance savings.
Why Wind Mitigation Matters for Florida Homes
Here is where the importance comes in. Florida is one of the most hurricane-exposed states in the country, and it is also in the middle of a homeowners insurance crisis. Wind mitigation sits right at the center of both problems.
It lowers your insurance premium
Under Florida Statute 627.0629, insurers are required to offer discounts, credits, or deductible reductions to homeowners whose houses have wind-resistant features. This is not a favor your insurer chooses to do; it is state law.
Since October 2023, residential insurers also have to post their discount information on their websites. A wind mitigation inspection is how you prove your home qualifies, and the credits can stack across several features at once.
It reflects how well your home handles a storm
The same features that earn you a discount are the ones that keep your roof on and the water out during a hurricane. A hip roof, a properly strapped roof-to-wall connection, and impact-rated windows are not just line items on a form; they are the difference between minor damage and a destroyed home when a storm comes through. The inspection gives you an honest picture of where your home stands.
It tells you what to upgrade next
If your home earns few credits today, the report shows you exactly which features would earn more. That turns a vague worry about storm safety into a clear, prioritized list, and some of those upgrades may qualify for separate grant programs like My Safe Florida Home.
What Do Inspectors Check in a Wind Mitigation Inspection?
The inspection focuses on seven construction features that determine how your home performs in high wind. Each one can carry its own insurance credit.
Roof covering. Whether the shingles or tiles meet current Florida building code for wind resistance.
Roof deck attachment. How the plywood or sheathing is fastened to the trusses, since nail type and spacing matter under uplift.
Roof-to-wall connection. Whether the roof is tied to the walls with toe nails, clips, single wraps, or double wraps. This is often the single biggest credit.
Roof geometry. The shape of the roof. Hip roofs, which slope on all four sides, resist wind far better than gable roofs and earn the strongest credit.
Secondary water resistance. Whether there is a sealed barrier under the roof covering that keeps water out if the shingles blow off.
Opening protection. Whether windows, doors, and garage doors are protected by impact-rated glass or shutters.
Home and roof age. Newer construction built to stricter codes generally performs better.
The inspector documents each feature with photos and records it on the form. Undocumented features earn nothing, which is why the inspection has to be done by a qualified inspector, not self-reported.
How Does the Wind Mitigation Inspection Process Work?
The process is quick and low-effort on your end. Here is what it looks like from start to savings:
Schedule the inspection. Book with a qualified Central Florida inspector. You do not need to prepare the house, though clear access to the attic and electrical panel helps.
The inspection. Most single-family homes take about 30 to 45 minutes. The inspector examines the roof, attic, and openings, and photographs each qualifying feature.
Receive the form. You get the completed OIR-B1-1802 with supporting photos, usually within a day or two.
Submit it to your insurer. Send the form to your insurance agent or company, and they apply any credits your home qualifies for to your policy.
That is the whole cycle. One short visit, one form, and the credits stay in place for up to five years.
How Much Can You Save, and What Does It Cost?
A wind mitigation inspection in Central Florida typically runs a modest flat fee, and the savings usually dwarf it.
Cost: generally around $75 to $150 for a standard single-family home.
Savings: commonly several hundred dollars a year, and often $1,000 or more, depending on your insurer, your home, and how many features qualify.
The exact number depends on your specific policy and home, so treat any figure as an estimate rather than a promise. Still, for most homeowners, the math is simple: a one-time fee, valid for up to five years, against annual savings that often exceed it in the first billing cycle. Ask your insurance agent what each credit is worth on your policy before you assume the inspection will not help.
Wind Mitigation vs. 4-Point Inspection: What Is the Difference?
These two get confused constantly, and they are often ordered together, but they do opposite jobs.
A wind mitigation inspection documents wind-resistant features to earn you insurance discounts. It works in your favor and cannot raise your rate.
A 4-point inspection assesses the condition and age of your roof, electrical, plumbing, and HVAC systems, usually on older homes, so an insurer can decide whether to write or renew a policy at all.
One is about savings, the other is about insurability. If you are buying an older Central Florida home, you may need both, and your inspector can handle them in a single visit.
Related Questions to Explore
Does wind mitigation actually lower my insurance?
Yes, in most cases. Florida law requires insurers to offer credits for qualifying wind-resistant features, and the wind mitigation form is how you document them. The size of the discount depends on your home and insurer, but for many homeowners the savings are significant.
How long is a wind mitigation inspection good for?
The form is valid for up to five years, as long as you do not make structural changes to the roof or openings. You do not need a new inspection every year.
Can a wind mitigation inspection raise my premium?
No. The inspection can only earn credits or earn nothing. A home with few qualifying features simply gets no discount; it never triggers a surcharge.
Do I need a wind mitigation inspection on a new home?
Often yes, and it usually pays off. Newer homes built to current code tend to have strong wind-resistant features, which means more credits to claim. Many builders provide a form at closing, but an independent inspection confirms it.
What if my home does not qualify for many credits?
That result is still useful. The form shows which features are missing, so you know exactly what to upgrade to earn credits later, whether that is a roof replacement, roof-to-wall straps, or impact-rated openings. Some of those improvements may also qualify for state grant programs, and you can have the home re-inspected once the work is done.
When to Call a Professional
A wind mitigation inspection is not something you can do yourself, because the credits only count when a qualified inspector documents the features on the state form.
If your homeowners premium has gone up, if you are buying or refinancing a home in Central Florida, or if you have replaced your roof or added shutters and want the credit for it, that is the moment to schedule one.
It is also worth doing simply to understand how your home would hold up in a hurricane, before the next one is on the forecast.
Conclusion
Wind mitigation matters because it connects the two things every Florida homeowner cares about right now: staying safe in a storm and getting insurance costs under control. A single inspection documents the features your home already has, earns the discounts state law entitles you to, and shows you where you stand for the next hurricane season.
A sewer scope is a video inspection of the underground lateral sewer line that carries waste from your house to the city main or your septic tank. An inspector feeds a small waterproof camera on a flexible cable through a cleanout or drain access point and watches a live feed, looking for cracks, blockages, and root intrusion that a standard home inspection never sees.
For anyone buying a Central Florida home, it is one of the cheapest ways to avoid a five-figure repair surprise after closing.
What Is a Sewer Scope?
A sewer scope is a camera inspection of your home’s lateral sewer line: the pipe you own that runs from your foundation out to the municipal sewer main or a septic tank. A waterproof camera on a flexible push cable travels the length of that pipe while the inspector reviews the footage in real time, recording the condition of the line and marking where any problems sit.
The reason this matters is simple. A standard pre-purchase home inspection covers what an inspector can see and reach: the roof, visible plumbing fixtures, the electrical panel, HVAC, and structure. It does not include the pipe buried three or four feet underground. A sewer scope fills that gap. You may also hear it called a sewer camera inspection or a sewer line inspection, and they all describe the same process.
How a Sewer Scope Inspection Works
The process is quick, non-invasive, and involves no digging. Here is what happens on site:
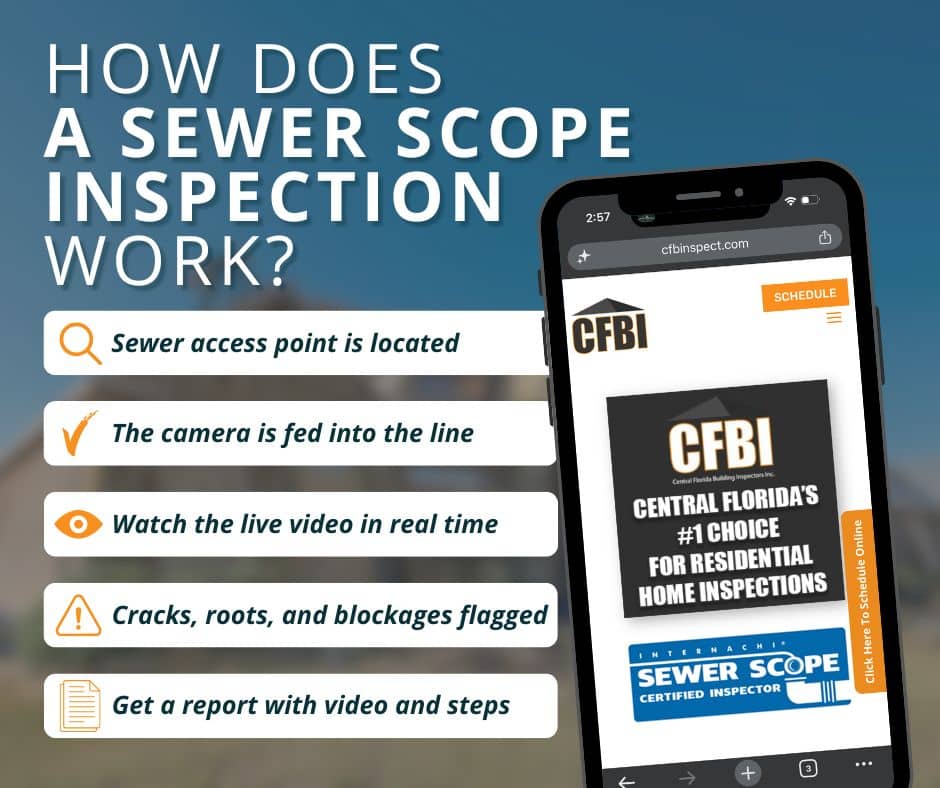
Locate the access point. The inspector finds a cleanout or a suitable drain opening that connects to the main line.
Feed the camera. A waterproof camera mounted on a flexible cable is pushed through the pipe toward the municipal connection or septic inlet.
Review the live feed. The inspector watches a monitor in real time, noting the location of anything unusual along the run.
Deliver the report. After the run, you receive a written report with recorded video, still images, and a plain-language summary of what was found and what it means.
Most inspections take roughly 30 to 60 minutes depending on the length of the line and how easy the access point is to reach. CFBI’s inspectors follow InterNACHI’s sewer scope inspection standards, the same national standards our team is certified under.
What Problems a Sewer Scope Finds
A sewer scope catches damage long before it becomes a backup in your bathroom. The most common findings fall into a few categories:
Tree root intrusion. Roots seek out moisture and work into the pipe through joints and small cracks, then grow until they choke the line. This is the single most common issue inspectors find.
Cracks, breaks, and collapses. Ground movement, age, and soil pressure crack pipe walls. Left alone, a hairline crack becomes a full break or collapse.
Bellies (sagging sections). When a section of pipe sinks, waste and debris pool there instead of flowing through, causing repeat clogs.
Blockages. Grease, debris, and foreign objects restrict flow.
Corrosion and offset joints. Older metal pipe corrodes from the inside, and shifting soil pulls joints out of alignment.
A cracked or broken sewer line also becomes an easy entry route for pests. Roaches and rodents travel up compromised lines and floor drains, so unexplained signs of a cockroach problem near drains can point back to a damaged pipe.
Hidden leaks are another downstream effect: waste seeping into soil under a slab holds moisture, and that moisture can drive the same kind of persistent musty odor homeowners often blame on humidity.
If sewage exposure has gone on long enough, it is worth pairing the scope with a mold inspection.
Common Issues in Older Central Florida Homes
Pipe material tells you a lot about risk. Many older Central Florida homes still have cast iron or clay sewer lines, and some built between the 1940s and early 1970s have Orangeburg pipe, a tar-paper product that deforms and collapses with age.
Cast iron corrodes and scales from the inside; clay joints crack and invite roots. Add Florida’s sandy, shifting soil and heavy tree cover, and a line that looked fine on the surface can be failing underground. Age of the home and nearby mature trees are two of the strongest reasons to scope before you buy.
Why a Sewer Scope Matters When You’re Buying a Home
The whole point of a sewer scope is to find expensive problems while you still have leverage to do something about them. Sewer line repairs are not small: depending on the fix, they run from about $1,000 for a minor repair to $25,000 or more for a full replacement, and trenchless or dig-and-replace work in a mature neighborhood sits at the high end.
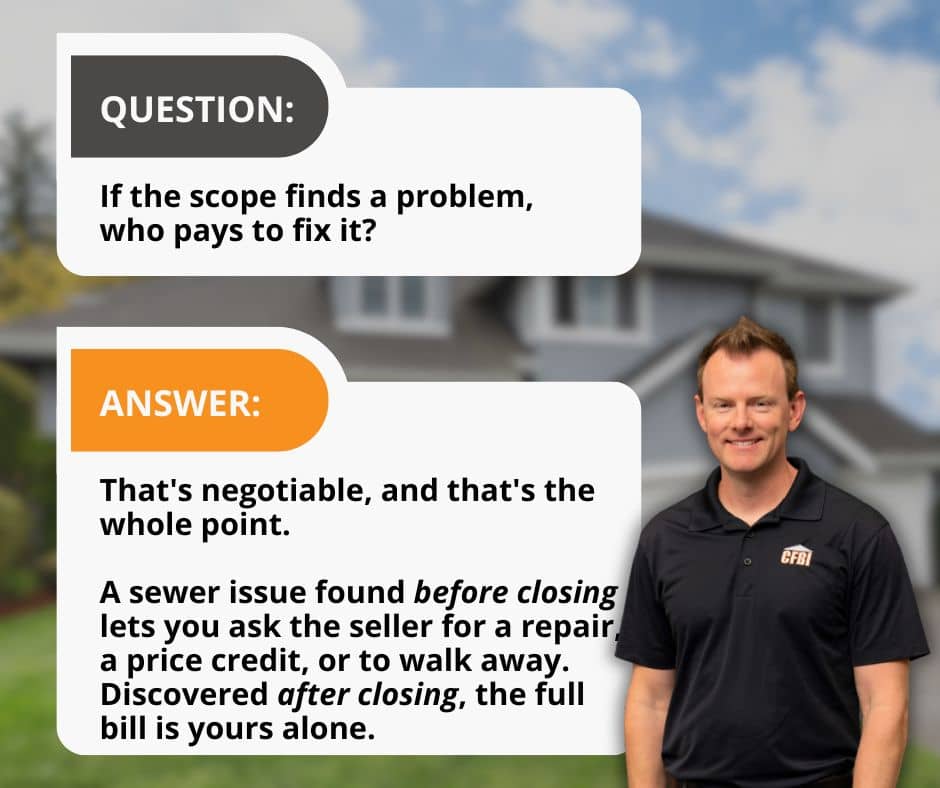
Because the underground line is outside a standard inspection, a buyer who skips the scope often discovers the damage only after moving in, when it is entirely their bill. A buyer who scopes during the due-diligence window has options: negotiate a repair, ask for a credit, or walk away.
For a small upfront cost, you trade an unknown for a documented picture of one of the most expensive systems in the house. This is the same reason a scope belongs alongside the rest of your due diligence, right there with the main inspection and any specialty testing.
How Much Does a Sewer Scope Cost, and How Long Does It Take?
A standalone sewer scope typically costs between $100 and $500 nationally, and it is often less when added to a full home inspection because the inspector is already on site. The exact price depends on your location, line length, and access. For current Central Florida pricing, see CFBI’s pricing and rates or contact our office.
On timing, most inspections wrap in 30 to 60 minutes. A short, accessible line with a clean cleanout goes fast; a long run or a hard-to-find access point takes longer.
Related Questions to Explore
Do I need a sewer scope if the home is newer?
Newer homes are lower risk, but not zero risk. Poor installation, settling, and construction debris left in the line all show up in newer builds. If the home is under about 10 years old with no mature trees nearby, a scope is optional. Older than that, or with big trees near the line, it is worth doing.
Is a sewer scope worth it?
For most buyers, yes. A scope costs a few hundred dollars at most and can flag a repair that costs tens of thousands. Even when the line comes back clean, you get a recorded baseline of its condition, which is useful documentation to keep.
Can a sewer scope damage my pipes?
No. The camera is small, flexible, and designed to travel through the pipe without force. A trained inspector will not push through a hard obstruction or a collapsed section, which protects both the equipment and your line. If the camera cannot pass a certain point, that itself is a finding worth investigating.
How often should you get a sewer scope?
Beyond the home-purchase scope, a good rule of thumb is every few years for older homes, homes with recurring drain issues, or properties with large trees near the line. If you have had backups or slow drains, scope sooner rather than waiting for the next failure.
When to Call a Professional
Call a licensed inspector for a sewer scope any time you are buying a home, especially an older one or one with mature landscaping, and whenever you notice warning signs in a home you already own: repeated drain clogs, gurgling toilets, sewage odors, unusually lush or soggy patches in the yard, or slow drains across multiple fixtures.
These often trace back to the line. A camera inspection tells you exactly what is wrong and where, so any repair is targeted instead of guesswork. It also takes an inspector with the right equipment and the certification to read what the camera shows, which is not part of a standard visual home inspection.
Conclusion
A sewer scope turns the most expensive guess in a home purchase into a documented answer. For a small cost, you find out whether the line under the property is sound or hiding a five-figure repair, while you still have room to negotiate.
If you are buying, selling, or just want peace of mind on an older Central Florida home, schedule a sewer scope inspection with CFBI’s certified team. Contact us today to set up an appointment or ask a question.
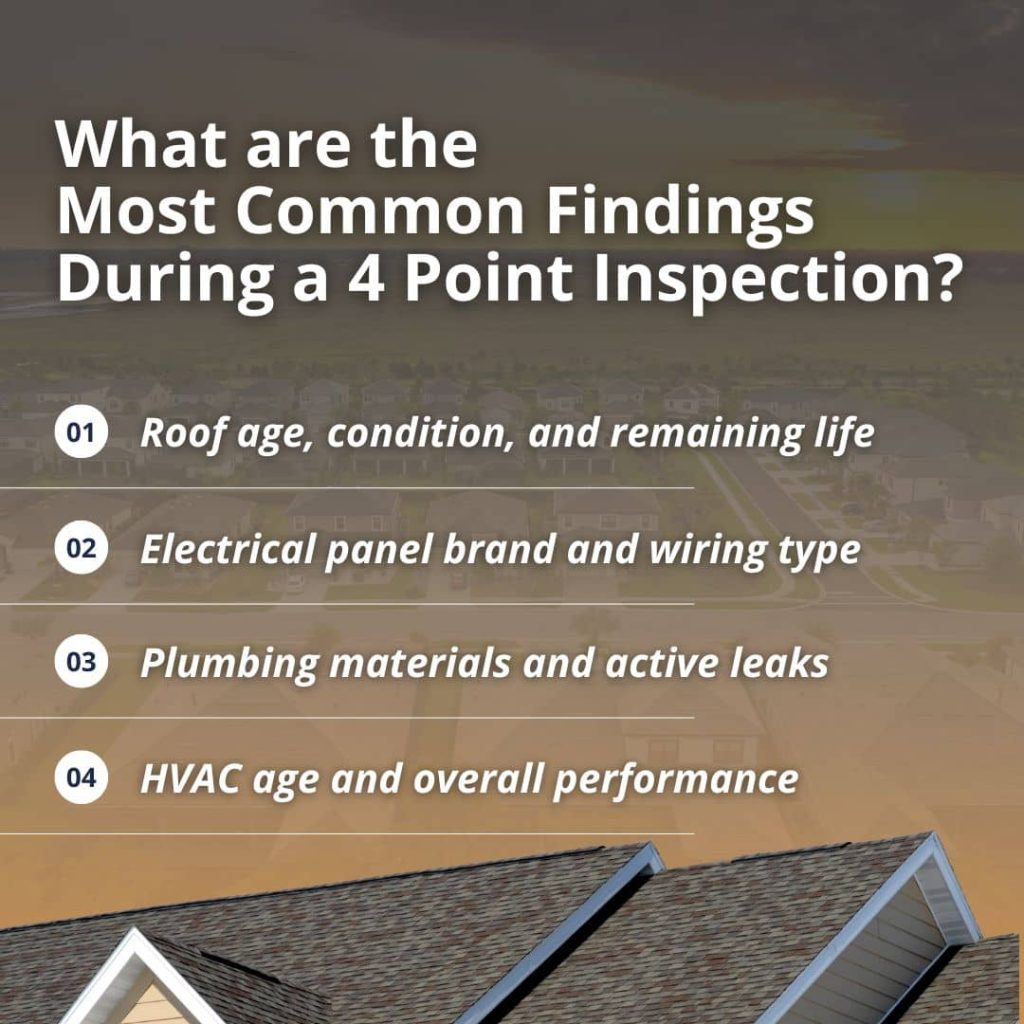
The most common findings on a 4-point inspection involve the roof, electrical system, plumbing, and HVAC: the four systems Florida insurers use to decide whether to write or renew a homeowners policy.
Older homes in Central Florida frequently turn up at least one issue, and knowing what inspectors typically document prepares you for what comes next. This post breaks down what CFBI inspectors find most often on each of the four systems, and what those findings mean for your coverage.
What Does a 4 Point Inspection Actually Cover?
A 4-point inspection is a focused evaluation of four systems: the roof, electrical system, plumbing, and HVAC. It is not a full home inspection. The inspector is not evaluating every accessible component of the property. They are documenting the condition, age, and materials of these four systems so your insurer can make an underwriting decision.
Florida insurers require this inspection for most homes 20 to 30 years old or older.
Some carriers now request it on homes as young as 15 years, particularly in the Central Florida market, where the insurance landscape has tightened considerably. The completed report is submitted on a standardized form.
Typically, the Citizens Property Insurance form, or a carrier-specific version for insurers like State Farm, which has its own 4-point inspection requirements.
The inspector photographs every section of each system, including the electrical panel with the cover removed. That documentation is what your insurer reviews. For a full overview of what the inspection includes and when you need one, see our 4-point insurance inspection page.
Roof Findings
The roof is the most common source of findings on a 4-point inspection in Florida, and it is the system insurers scrutinize most closely. Hurricanes, intense UV exposure, and heavy seasonal rainfall wear roofs down faster here than in most of the country.
Age and Limited Remaining Life
The most frequent roof finding is simply age. Most Florida insurers want to see a roof with at least 3 to 5 years of remaining useful life. Inspectors estimate remaining life based on visible wear, material type, and installation date. A 20-year-old asphalt shingle roof in Central Florida may only have a few years left, even if it has not started leaking yet.
Tile and metal roofs generally get more favorable treatment because of their longer lifespans, but any roof with widespread granule loss, curling, or significant weathering will be flagged regardless of material.
Some insurers will decline coverage once a roof falls below their minimum remaining life threshold. Others will offer coverage at a higher premium or with a roof exclusion attached.
Missing Shingles, Leaks, and Visible Damage
Beyond age, inspectors document active signs of deterioration: missing or broken shingles, staining on the roof decking, sagging sections, and any evidence of water intrusion at penetration points like vents, chimneys, and skylights. Poor flashing is a common finding that homeowners overlook. It is a frequent source of slow leaks that cause damage long before anyone notices inside the home.
Active leaks are flagged regardless of roof age. If the inspector documents evidence of water intrusion, most carriers will require proof of repair before issuing the policy.
Electrical Findings
Electrical findings matter to insurers because electrical failures are a leading cause of residential fires. The National Fire Protection Association (NFPA) consistently identifies electrical malfunctions among the top causes of home fires in the United States, which is why the electrical section of a 4-point inspection gets close attention.
Problem Panel Brands
Certain electrical panel brands have documented safety defects and are flagged by most Florida carriers. The most common are:
Federal Pacific Electric (FPE) panels: Known to fail to trip during an overload, which creates a fire risk. Most standard carriers will not write a policy until the panel is replaced.
Zinsco panels: Similar issue to FPE: breakers can fail to trip or weld themselves in place. Also, an automatic flag with most insurers.
Challenger and Sylvania panels: Flagged by some carriers, though not as universally as FPE and Zinsco.
Fuse boxes: Common in homes built before the 1960s. Most insurers require a breaker panel before they will write a policy.
With these panel types, replacement is the only fix. An electrician cannot simply repair an FPE or Zinsco: the entire panel needs to be replaced.
Outdated Wiring Types
Two wiring types generate the most concern on 4-point inspections in Florida:
Knob-and-tube wiring is found in homes built before the 1940s. It is ungrounded and was not designed to handle modern electrical loads. Most insurers will not write a policy on a home with active knob-and-tube wiring. Some will accept coverage if the wiring has been fully deactivated and replaced, but the inspector needs to clearly document that.
Aluminum branch wiring, common in homes built during the 1960s and 1970s, expands and contracts at a different rate than the devices it connects to. Over time, that creates loose connections, which can overheat. Insurers typically flag aluminum branch wiring or require an electrician to install CO/ALR-rated devices at every outlet and switch before coverage is issued.
Double-Tapped Breakers
A double-tapped breaker (two wires sharing a single breaker terminal designed for one) is one of the more common findings on older panels. It is often inexpensive to fix, and most carriers will not deny coverage for this issue alone. It does, however, add to the overall picture of the electrical system’s condition and will appear in the report.
Plumbing Findings
Water damage is the most common insurance claim in Florida, which is why inspectors pay close attention to plumbing materials even when there is no visible leak at the time of the inspection.
Polybutylene Pipes
Polybutylene piping is one of the most significant plumbing findings an inspector can document. It was widely used in homes built from the late 1970s through the mid-1990s and was pulled from the market after widespread reports of failures. The material degrades from the inside out, which means it can look intact on the surface and fail suddenly.
Most Florida insurers will not write a policy on a home with polybutylene plumbing. Those that will typically attach a water damage exclusion, which is a significant gap in coverage. If polybutylene shows up on an inspection report, repiping is the standard path to getting standard coverage.
For more on how plumbing materials affect your 4-point inspection for insurance coverage, see our homeowner’s guide.
Galvanized Pipes, Active Leaks, and Water Heater Age
Galvanized steel pipes, common before copper became standard, corrode from the inside over time. Inspectors look for rust staining at joints, discoloration, and reduced water pressure as signs of deterioration. The pipes themselves may still be holding, but their remaining useful life is a concern for insurers.
Active leaks (even minor ones visible under a sink or at the water heater connections) are documented on the report. An insurer that sees an existing leak may require repair and a re-inspection before writing the policy.
Water heater age is also noted. A water heater over 15 to 18 years old will often raise premiums or be flagged as a condition of coverage, particularly if there is corrosion or sediment buildup visible at the connections.
HVAC Findings
Florida HVAC systems run harder than those in almost any other state. Year-round use accelerates wear, and most residential systems have a useful life of 15 to 20 years. When a system approaches or passes that range, it shows up as a finding on the inspection report.
Inspectors document the age and condition of both the air handler and the condenser unit. An aging but operational system typically results in a higher premium rather than a coverage denial. Signs of deferred maintenance (dirty coils, refrigerant leaks, rusted components, or poor airflow) add to the concern.
A system that is clearly non-functional or has been disconnected can lead to coverage being denied or conditioned on repair.
The HVAC finding most homeowners underestimate is how much a worn system signals the overall maintenance history of a property. Insurers read a neglected HVAC as a sign that other systems may have been treated the same way.
What Findings Mean for Your Insurance Coverage
Not every finding on a 4-point inspection has the same consequence. There are two categories worth understanding before you walk into the process.
Findings that typically block coverage until the issue is corrected include: Federal Pacific or Zinsco panels, knob-and-tube or aluminum branch wiring, polybutylene plumbing, a roof the inspector documents as having fewer than 3 years of remaining life, and active documented leaks.
Findings that typically raise your premium rather than blocking coverage include: an aging but functional HVAC, a roof with 5 to 8 years of life remaining, galvanized pipes without active leaks, a water heater in the 15 to 18 year range, and a double-tapped breaker without other electrical concerns.
Knowing which category your home falls into before you apply for coverage gives you time to negotiate, repair, or find the right carrier.
You can also request a wind mitigation inspection at the same time: unlike the 4 point, a favorable wind mitigation report can actually lower your premium.
Related Questions to Explore
Can you fail a 4-point inspection in Florida? A 4-point inspection does not produce a simple pass or fail result. The inspector documents the condition of four systems, and the insurer decides what to do with that information.
Findings involving certain panel brands, wiring types, or plumbing materials often result in coverage being denied until repairs are made. Other findings raise your premium without blocking coverage. The distinction depends on the severity of the finding and the insurer’s underwriting guidelines.
The inspector photographs each system, and the findings are submitted on a standardized form: either the Citizens form or a carrier-specific version. See the service page for more on what the report includes.
Is a 4-point inspection the same as a home inspection? No. A full home inspection covers 300 to 500 items across every accessible component of the property. A 4-point inspection covers only the four systems relevant to insurance underwriting. If you are buying an older Florida home, you need both. The 4-point tells your insurer whether they will write the policy. The full inspection tells you the condition of the property.
How do I prepare for a 4-point inspection? Address known issues before scheduling. Have a licensed roofer assess any roof over 15 years old. Confirm your electrical panel brand and have a licensed electrician evaluate it if you are not sure.
Fix visible plumbing leaks and check your water heater’s age from the manufacturer’s data plate. Schedule an HVAC tune-up so the system can be documented as operational. Proactive repairs result in a cleaner report and more carrier options.
When to Call a Professional
If you are buying or currently own a home in Central Florida that is 20 years old or older, a 4-point inspection should be scheduled before your insurance application or renewal deadline, not after. Waiting until the insurer requests it leaves no time to address findings that come up.
CFBI has completed 4-point inspections across the greater Orlando area since 1988. Our state-licensed inspectors know the exact format each carrier requires, including the Citizens form and State Farm’s separate documentation standards. If you are unsure which form your insurer needs, get in touch before scheduling, and we can confirm.
If a previous inspection flagged a system, get the repair completed by a licensed contractor first. Once the work is done, schedule a re-inspection so the updated report is ready to submit.
Conclusion
The most common 4-point inspection findings in Florida involve roofs with limited remaining life, electrical panels with documented safety defects, plumbing materials that insurers consider high-risk, and HVAC systems approaching the end of their useful life. Most of these findings are fixable: the key is knowing about them early enough to act.
Key takeaways:
The roof generates more findings than any other system on Florida 4-point inspections
Panel brand matters as much as wiring type: Federal Pacific and Zinsco are red flags
Polybutylene plumbing almost always blocks standard coverage until the home is repiped
Ready to schedule your inspection? Trust Central Florida Building Inspectors for a fast, accurate report your insurer will accept.
Short-sales often catch a buyer’s attention because of price. When a listing appears below market value, it is natural to wonder whether it could be a smart opportunity. But these deals come with risks that many buyers do not fully understand until the process is already underway. So what are the risks of buying a short-sale home?
The biggest risks are usually not obvious during a showing. They involve the condition of the property, limited seller responsibility, financing and insurance hurdles, and uncertainty around repairs. In Central Florida, climate and insurance requirements can add even more complexity.
This guide explains the most common risks associated with short-sale homes, what buyers should be cautious about, and why professional inspections are especially important before moving forward.
What a Short-Sale Really Means for Buyers
A short-sale occurs when a homeowner sells their property for less than the remaining mortgage balance, and the lender agrees to accept the lower amount. Because the lender must approve the sale, short sales typically involve longer timelines and stricter terms.
For buyers, this often means:
Extended waiting periods for approval
Limited communication with the seller
Reduced flexibility during negotiations
Properties sold strictly as-is
In many cases, the seller is already under financial stress. As a result, routine maintenance and repairs are often delayed or ignored, which directly affects the condition of the home.
Deferred Maintenance Is One of the Most Common Risks
Deferred maintenance is one of the biggest risks buyers face with short-sale homes. When homeowners struggle financially, repairs are often postponed for months or even years.
Deferred maintenance may include:
Roof leaks that were never repaired
Plumbing issues that worsened over time
HVAC systems that went without service
Electrical concerns that were ignored
Water damage that spread unnoticed
These problems may not be immediately visible during a walkthrough. Paint, flooring, or staging can hide underlying issues. A professional inspection helps uncover the true condition of the home beneath the surface.
Short-Sale Homes Are Commonly Sold As-Is
Most short-sale properties are sold as-is, meaning the seller and lender are unlikely to make repairs or offer credits after the inspection.
Safety or system issues may still be present at closing
Understanding what repairs may be needed before purchase is critical when buyers cannot rely on the seller to address issues.
Limited Access and Occupancy Issues
Short-sale homes may be vacant, partially occupied, or inconsistently maintained. In some cases, sellers no longer live in the home or have limited involvement in the process.
Limited access increases risk because buyers may only get one opportunity to fully evaluate the home. A thorough inspection during that window becomes even more important.
Utility Shutoffs Create Hidden Inspection Risks
In short-sale situations, utilities may be shut off due to nonpayment. This limits what can be evaluated during an inspection and increases uncertainty.
Without utilities, inspectors may not be able to fully assess:
Moisture problems can affect structural components, indoor air quality, and long-term livability. Inspections help identify visible signs of moisture intrusion and conditions that increase mold risk.
Unknown Repair History and Unpermitted Work
Short-sale homes often come with limited documentation. Sellers may not provide records of past repairs, upgrades, or improvements.
A professional inspection helps identify visible workmanship concerns and red flags that suggest deeper problems.
Financing and Insurance Complications Are a Major Risk
One of the most overlooked risks of buying a short-sale home involves financing and insurance approval. Even if a buyer is willing to handle repairs, lenders and insurance providers may still see the property as higher risk.
In Florida, insurance companies often require additional inspections before issuing a policy. These inspections help insurers evaluate risk, but they do not guarantee approval.
Just as important, insurance carriers do not all review inspection results the same way. One insurer may accept a home with certain conditions, while another may require repairs, higher premiums, or decline coverage entirely. This variability adds another layer of uncertainty for buyers.
Why 4-Point Inspections Matter
A 4-point inspection focuses on four major systems: roof, electrical, plumbing, and HVAC. Insurance companies commonly request this inspection for older homes or properties with higher perceived risk.
Short-sale homes are more likely to raise concerns in these areas due to deferred maintenance, aging systems, or incomplete repairs. A 4-point inspection helps document current system conditions, but insurers ultimately decide how they interpret those findings.
In some cases, the inspection may trigger repair requests. In others, it may simply affect premium pricing or coverage terms.
How Wind Mitigation Inspections Fit In
Wind mitigation inspections evaluate features that may reduce wind damage, such as roof shape, attachment methods, and protective construction details. These inspections can influence insurance eligibility and premium discounts.
For short-sale homes, missing or outdated wind-resistant features may limit available coverage options or increase costs. Even when wind mitigation features are present, insurers may apply different standards when reviewing the same report.
Understanding this variability early helps buyers plan realistically and avoid surprises late in the process.
By identifying insurance-related concerns early and understanding that insurers evaluate risk differently, buyers can better determine whether a short sale is financially viable before moving forward.
Common Short Sale Risks and Buyer Impact
Risk Area
Why It Matters
Deferred maintenance
Higher repair costs
As-is sale terms
Limited negotiation
Utility shutoffs
Hidden system issues
Moisture damage
Long-term structural risk
Insurance requirements
Coverage delays or denials
This overview helps buyers see how short sale risks often overlap and compound.
Why Short Sale Inspections Require Extra Attention
Inspecting a short-sale home requires a careful, detail-focused approach. Inspectors must look for signs of long-term neglect and conditions that affect safety, insurability, and livability.
Highlighting conditions that may affect insurance or financing
This approach helps buyers decide whether a short sale aligns with their budget, risk tolerance, and long-term plans.
Related FAQs to Explore
How do I know if a home has been poorly maintained over time? Patterns such as recurring water damage, aging systems, or inconsistent repairs often point to long-term maintenance issues. A professional inspection helps identify whether problems are isolated or part of a larger pattern.
How do inspection findings affect long-term ownership costs? Inspection results help buyers anticipate future repairs, maintenance needs, and potential upgrades, which directly impact budgeting after closing.
What should buyers understand about homes sold as-is? As-is terms shift responsibility to the buyer. Inspections become the primary way to understand property condition before committing to repairs and ongoing upkeep.
How does Florida’s climate impact home conditions over time? Heat, humidity, and storms increase wear on roofs, HVAC systems, and building materials. Homes that were not consistently maintained are more likely to show moisture-related issues.
When to Book With a Home Inspector
Buying a short-sale home increases uncertainty, which makes inspection timing and quality even more important.
A professional inspection helps buyers understand true property condition, insurance considerations, and potential repair costs before committing to the purchase.
Conclusion
Short-sale homes can offer opportunities, but they also come with real risks. Deferred maintenance, as-is terms, limited access, moisture concerns, and insurance complications are common issues buyers must be prepared for, especially in Central Florida.
Understanding these risks early helps buyers avoid costly surprises and make informed decisions. A professional home inspection provides the clarity needed to decide whether a short sale is a smart investment or a financial burden waiting to happen. Book yours with CFBI today.