The biggest benefit of a sewer scope inspection is simple: it shows you the one part of a home that no standard inspection covers, the buried sewer line, before a hidden problem becomes your problem.
A camera runs the length of the pipe and reveals root intrusion, cracks, bellies, and corroded or collapsed sections that would otherwise stay invisible until they back up into the house. For buyers of older Central Florida homes, that hour of video can be the difference between a smooth closing and a surprise repair bill running into the thousands.
Here is what a sewer scope covers, what it costs, and why it matters so much in Florida.
What Is a Sewer Scope Inspection?
A sewer scope inspection is a video inspection of the lateral sewer line, the privately owned pipe that runs from the home’s foundation out to the city sewer main, an HOA tap, or a septic tank.
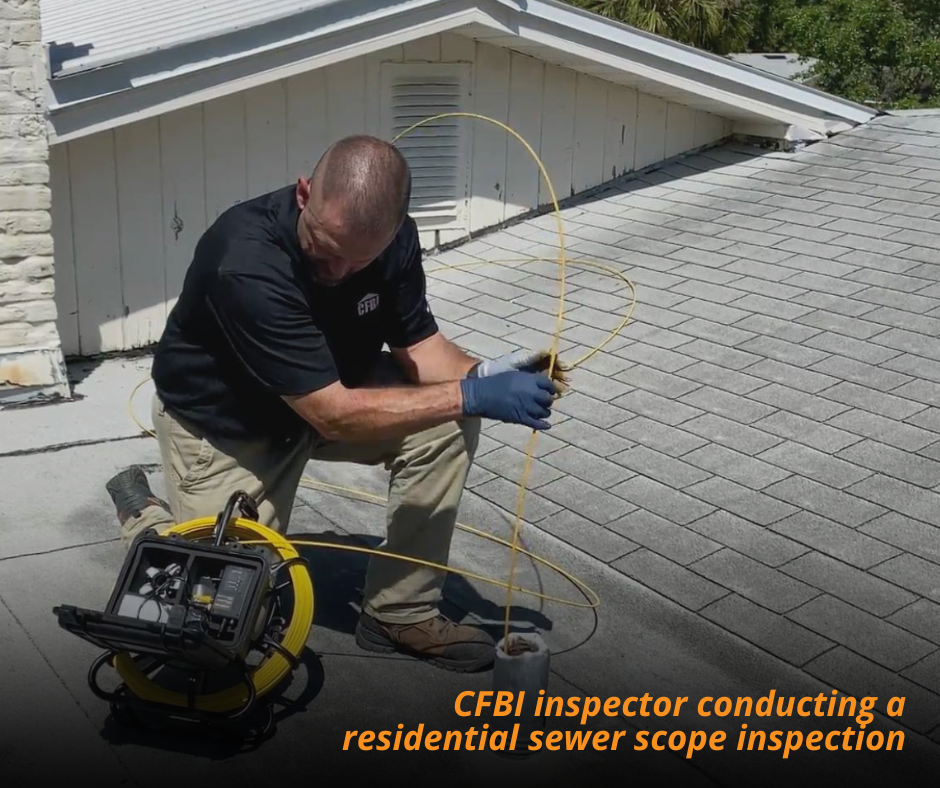
A waterproof camera on a flexible cable is fed through a cleanout or drain access point, and the inspector watches a live feed of the pipe’s interior from end to end.
The key thing to understand is that this line is yours to maintain and repair, and a standard home inspection does not cover it. Home inspectors follow standards of practice that specifically exclude the underground sewer line, so unless you order a sewer scope as a separate service, that pipe is a blind spot in your purchase.
A sewer scope is the only practical way to see its true condition without digging up the yard.
The Benefits of a Sewer Scope Inspection
A sewer scope pays for itself by turning an expensive unknown into a documented, negotiable fact. Here are the benefits that matter most.
1) It catches tree root intrusion early
Roots are the number one enemy of a sewer line in Florida. They find their way into the smallest crack or joint, then grow into a dense mass that snags waste and eventually blocks the pipe. A camera spots root intrusion long before it causes a backup, so you can address it on your terms instead of during an emergency.
2) It reveals the true condition of aging pipe
Older Central Florida homes were often plumbed with cast iron, clay tile, or Orangeburg pipe, all of which degrade with age. A scope shows exactly what material you are dealing with and how far gone it is: flaking and corrosion in cast iron, open joints in clay, or the soft, collapsing walls of Orangeburg. That is information you cannot get any other way short of excavation.
3) It finds breaks, bellies, and blockages before you close
The camera reveals cracks, offset joints, collapsed sections, and bellies, which are low spots where the pipe sags and waste collects. Any of these can cause slow drains, recurring clogs, or sewage backups. Finding them before closing means they become the seller’s problem, not a repair you discover a month after moving in.
4) It gives you real negotiating leverage
A documented sewer defect is one of the strongest bargaining chips a buyer has. Because a sewer line repair or replacement can run from a couple thousand dollars to well over ten thousand, a clear video showing the problem lets you request a credit, a price reduction, or a completed repair before you sign.
Homeowners insurance typically does not cover these lines, so catching the issue up front is the only real protection you have.
How Does a Sewer Scope Inspection Work?
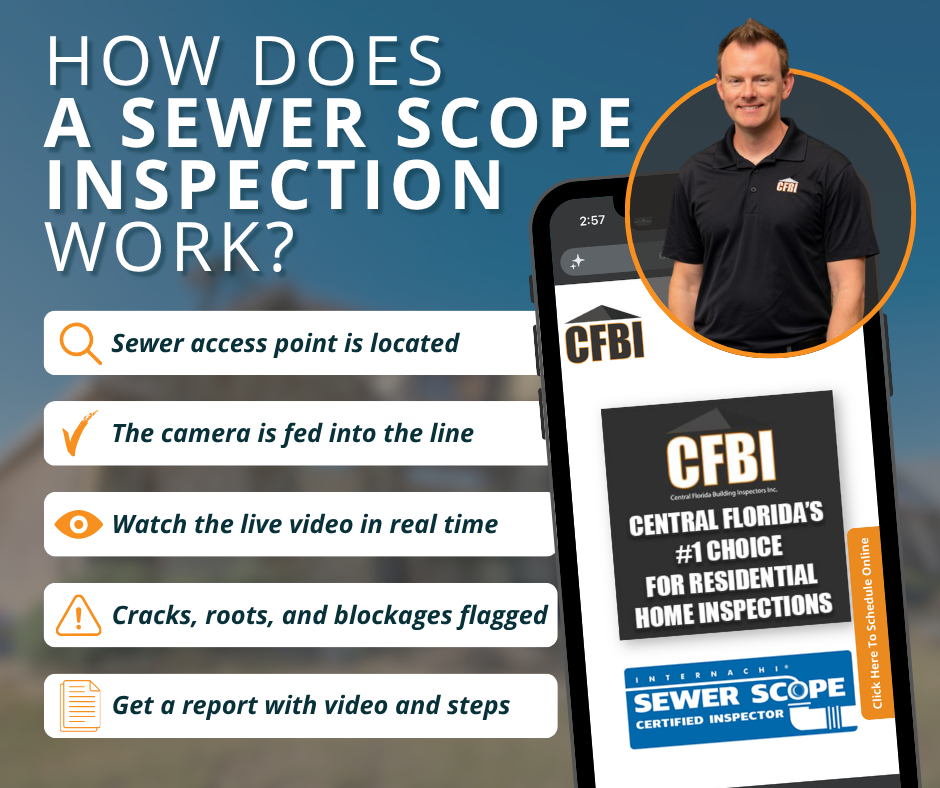
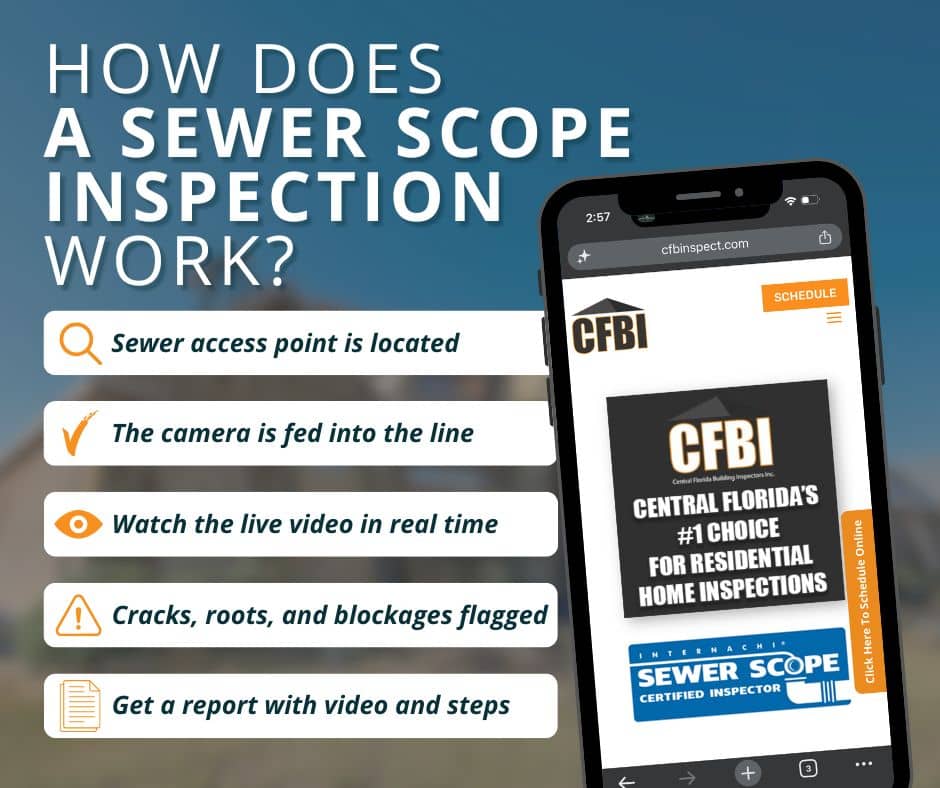
The process is quick and completely non-invasive. Here is what it looks like:
Locate access. The inspector finds a cleanout or a suitable drain access point. Clear access is what makes the job possible, so it helps to know where your cleanout is.
Run the camera. A waterproof camera on a long, flexible cable is pushed through the line while the inspector watches a live monitor, recording the footage as it goes.
Identify defects. As the camera travels, the inspector notes the pipe material, its condition, and any problems, and can often mark the approximate location and depth of a defect.
Deliver the report. You receive a written report with video or images documenting what was found, which is exactly what you need for negotiation or for planning a repair.
Most inspections take only about 20 to 30 minutes. Here is a quick reference for what the camera can reveal:
What the camera finds
What it means for you
Tree root intrusion
Blockages and cracked joints; regrows in 1 to 3 years if untreated
Cracks and offset joints
Leaks, soil erosion, and entry points for roots
Bellies (low spots)
Standing waste, recurring clogs, and slow drains
Corrosion / deteriorated pipe
Aging cast iron or Orangeburg near the end of its life
Collapsed or broken sections
Immediate failure risk and the most expensive repair category
Blockages and debris
Backups waiting to happen; may signal a deeper problem
Why Central Florida Homes Are Especially at Risk
Florida’s conditions are unusually hard on sewer lines, which is what makes a scope so worthwhile here. The sandy soil, high water table, and year-round growing season combine to attack pipes from every direction.
Root pressure never lets up in a climate where trees grow all year. Live oaks, which shade so many Orlando-area neighborhoods, along with palms, ficus, and camphor, send aggressive roots dozens of feet toward the moisture inside a sewer line. Any mature tree within roughly ten to fifteen feet of the pipe is a real threat.
Age is the other factor. Many homes built before the mid-1980s still have their original cast iron, clay, or Orangeburg pipe, and cast iron in particular is prone to corrosion and cracking in homes built before 1975. Orangeburg, a tar-paper pipe used in some mid-century construction, deteriorates and collapses readily in wet Florida soil.
If you are buying an older home in Central Florida, there is a real chance the sewer line is at or past the end of its service life, and a scope is the only way to know.
How Much Does a Sewer Scope Inspection Cost?
A sewer scope is inexpensive relative to what it protects you from. Pricing depends on access and property, so treat these as ranges rather than quotes.
Item
Typical range
Sewer scope inspection
Roughly $125 to $350
Common sewer line repair
Around $2,500 and up
Full line replacement
$2,000 to $10,000 or more
Set a small one-time inspection fee against a repair that can climb into five figures, and the math is straightforward. Because access can affect the job, and because CFBI does not quote a flat price online, the best move is to contact us for a quote on your specific property.
Sewer Scope Inspection vs. Home Inspection
These get confused often, so here is the clean version. A general home inspection evaluates the house and its visible, accessible systems, and it explicitly does not include the buried sewer line. A sewer scope is a separate, specialized service that films the inside of that line. A sewer scope is also different from a septic inspection, which evaluates the tank and drain field. A scope films the pipe running to the tank or the city main, and it is worth doing whether your home is on city sewer or septic.
The takeaway: if you want to know the condition of the sewer line, you have to ask for the scope specifically. It is never bundled into the standard inspection by default.
Related Questions to Explore
Is a sewer scope inspection worth it?
For an older home, almost always. One inspection can reveal root intrusion, cracks, or a failing pipe that would cost thousands to fix, giving you the leverage to negotiate before closing or to walk away. Homeowners insurance generally will not cover the sewer line, so the scope is your main safeguard.
Do I need a sewer scope inspection on a new construction home?
It is still worth considering. New lines can hide installation debris, poor slope, or damage from the build, and catching a defect while it is under warranty is far easier than discovering it later.
What are the signs of a sewer line problem?
Slow drains throughout the house, gurgling toilets, sewage odors, recurring clogs, and patches of unusually lush grass over the pipe can all point to a sewer line issue. A scope confirms what is actually happening inside.
How long does a sewer scope inspection take?
Usually about 20 to 30 minutes, assuming there is clear access to a cleanout. The inspector records the run and provides the footage in the report.
When to Call a Professional
A sewer scope is not a do-it-yourself task. It takes a proper camera, a trained eye to tell a harmless scuff from a structural crack, and experience reading the pipe materials common in Central Florida homes.
The right time to schedule one is when you are under contract on a home, especially anything built before the mid-1980s or with large trees near the sewer line.
Existing owners should also consider a scope after repeated backups, before buying, or simply to know the condition of a line that has been in the ground for decades. Bringing in a qualified inspector before closing is what turns a hidden risk into a documented, fixable fact.
Conclusion
The benefits of a sewer scope inspection come down to visibility and leverage. It shows you the one system every other inspection skips, catches root intrusion and pipe failure before they become emergencies, and gives you documentation to negotiate with or a clear plan to act on.
In Central Florida, where sandy soil, relentless roots, and aging cast iron and Orangeburg pipe put sewer lines under constant stress, that visibility is well worth the modest cost.
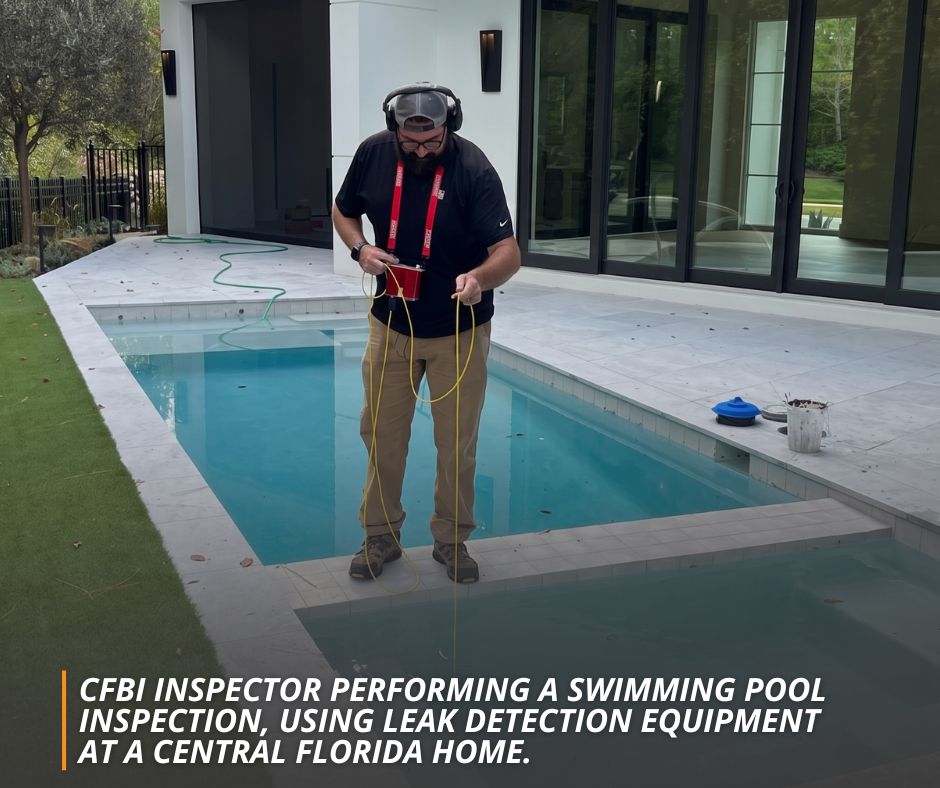
A pool inspection is a professional evaluation of a swimming pool’s structure, equipment, electrical systems, and safety features, done before you buy a home so you know the condition of one of the most expensive things in the backyard. It is usually a separate add-on to a standard home inspection, not part of it.
This checklist walks through exactly what a licensed inspector examines, what falls outside the inspection, and what it costs, so you know what you are paying for and what the report should tell you.
What Is the Scope of a Pool Inspection?
A pool inspection is a visual, operational evaluation of the pool and its systems by a qualified inspector. It confirms the shell and deck are sound, the equipment runs, the electrical is safe, and the required safety barriers are in place. The goal is to catch expensive or dangerous problems before closing, while you still have room to negotiate.
Most buyers assume the pool is part of the home inspection. It usually is not. A standard home inspection covers the house itself, and the pool is typically excluded or offered as a specialty add-on because it takes different equipment and training to evaluate. If a pool matters to your purchase, ask for a dedicated pool inspection in writing so it is not skipped.
Buyers are not the only ones who benefit. Sellers use a pre-listing pool inspection to fix problems before they surface in a buyer’s report and stall the deal, and existing owners use one to catch small issues before they turn into expensive repairs. In Central Florida, where pools run close to year-round, this matters more than it does in colder states.
Equipment rarely gets a winter rest, and constant sun, humidity, and salt air wear on finishes, screen enclosures, and metal hardware faster than most buyers expect.
The Pool Inspection Checklist
A thorough pool inspection follows the same logic every time: structure first, then the systems that keep it running, then the features that keep people safe. Here is what a licensed inspector examines, grouped by system. This mirrors InterNACHI’s pool inspection checklist, the national standard our inspectors are certified under.
Pool structure and interior finish
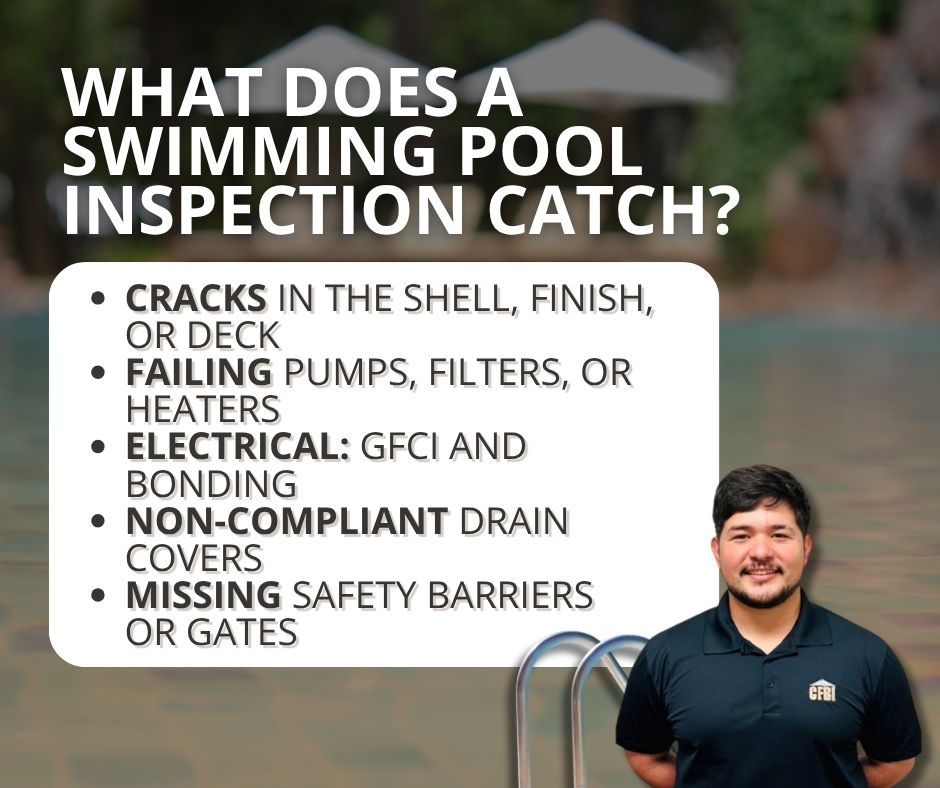
Interior surface (plaster, pebble, tile, fiberglass, or vinyl liner) for cracks, hollow spots, staining, and wear
Waterline tile and grout for looseness or missing pieces
Visible shell cracks that could point to structural movement or leaks
Signs of past patching or resurfacing
Cracks in the shell are not always cosmetic. A hairline surface crack is common, but a structural crack can signal soil movement under the pool, the same forces that cause warning signs of foundation cracks in a house. An inspector notes the location and pattern so you know whether it is minor or worth a specialist’s look.
The finish type also tells the inspector what to expect. Plaster and pebble surfaces show their age through rough spots, etching, and staining, and typically need resurfacing every 10 to 15 years. Fiberglass shells can develop surface blisters or spider cracks in the gelcoat. Vinyl liners tear and fade and have the shortest lifespan.
Resurfacing a pool is not cheap, often several thousand dollars and up, so knowing where the finish sits in its life cycle is real information when you are negotiating a price.
Deck, coping, and safety barriers
Coping (the cap around the pool edge) for cracks, separation, and trip hazards
Deck surface for cracking, settling, and drainage that runs toward the pool instead of away
Safety barrier: a fence at least four feet high, or an approved alternative
Self-closing, self-latching gates and any door or pool alarms
Florida takes pool safety seriously. Under Florida’s Residential Swimming Pool Safety Act, a residential pool must have at least one approved safety feature, such as a barrier, an approved cover, or self-latching gates and door alarms. An inspector flags where the pool falls short so you know what a compliant fix would take.
Pump, filter, and circulation equipment
Pump and motor operation, noise, and leaks
Filter type and condition (sand, cartridge, or DE)
Heater operation, if present
Salt chlorine generator cell, if the pool is a saltwater system
Valves, timers, automation panels, skimmers, and return jets
Visible plumbing for leaks and proper water circulation
Equipment is where the surprise costs hide. A pool pump replacement runs several hundred dollars, a heater can be well over a thousand, and a salt cell, common on Central Florida pools, is a wear item that needs periodic replacement. An inspector confirms each component actually runs and flags anything near the end of its life, so you are not discovering a dead heater the first cold week after closing.
Dead or weak circulation is a red flag. When a pump or filter is not moving water, the pool turns stagnant, and in Florida a stagnant pool quickly becomes a mosquito breeding ground. If the equipment is not running during the inspection, that is worth investigating before you close.
Electrical safety: GFCI and bonding
GFCI (ground-fault) protection on pool receptacles and equipment
Equipotential bonding of metal components to prevent shock
Underwater light and wet-niche condition
Panel and any sub-panel serving the pool
Water and electricity are the most dangerous combination at a pool, so this section matters more than any other. Missing GFCI protection or improper bonding is a serious safety defect, not a maintenance item.
Drains and anti-entrapment covers
Main drain and suction outlet covers for compliance with anti-entrapment standards
Signs of missing, cracked, or outdated drain covers
Modern anti-entrapment drain covers exist to prevent swimmers, especially children, from being trapped by suction. An inspector confirms the covers are present and compliant.
Screen enclosure and surrounding area
Screen cage structure, fasteners, and corrosion (common in Florida’s humidity and salt air)
Screen panels for tears and gaps
Enclosure roof and any attachment to the house
What a Pool Inspection Does Not Cover
Knowing the limits keeps expectations realistic. A standard pool inspection is visual and operational, so it generally does not include:
Water chemistry testing. Balancing chlorine, pH, and alkalinity is a maintenance task, not part of the structural and safety inspection.
Underground leak location. An inspector can flag signs of a leak, but pinpointing an underground pipe leak usually requires a separate leak-detection test.
A guarantee of future performance. The report reflects condition on the day of the inspection, not a warranty that equipment will keep running.
If any of these matter to you, ask up front so you can arrange the right specialty test.
How Much Does a Pool Inspection Cost, and How Long Does It Take?
A standalone pool inspection typically runs between $125 and $300 nationally, and it is often less when bundled with a full home inspection since the inspector is already on site. Price depends on the pool’s size, type, and equipment. For current Central Florida pricing, see CFBI’s pricing and rates or contact our office.
A few things push the price toward the higher end: a spa or attached hot tub, a saltwater system, a heater, a screen enclosure, and older equipment that takes longer to evaluate. Weigh that against what it protects you from. A single missed defect, a cracked shell, a failing heater, or a non-compliant safety barrier costs far more to fix than the inspection costs to catch it.
On timing, most pool inspections take 30 to 60 minutes. A small, well-maintained pool goes quickly; a larger pool with a heater, spa, and screen enclosure takes longer.
Related Questions to Explore
Does a standard home inspection include the pool?
Usually not. A standard home inspection focuses on the house, and the pool is typically excluded or offered as a specialty add-on. If the home has a pool, request a dedicated pool inspection in writing so it is not overlooked.
How much does a pool inspection cost?
Most standalone pool inspections run $125 to $300, and less as an add-on to a full home inspection. Pool size, equipment, and whether there is a spa or heater all affect the price.
How long does a pool inspection take?
Typically 30 to 60 minutes, depending on the pool’s size and equipment. It is often done at the same visit as the home inspection, which is why buyers ask how long a home inspection takes overall.
Is it worth inspecting a green or neglected pool?
Yes, and arguably more so. A green or stagnant pool often hides equipment failures, structural problems, and safety issues, and it can be an active mosquito source. An inspection tells you whether the pool is restorable or a costly liability before you commit.
When to Call a Professional
Call a licensed inspector for a pool inspection any time you are buying a home with a pool, especially an older pool, a screened enclosure, or a pool that looks neglected.
Warning signs in a pool you already own are worth a professional look too: cracks in the shell or deck, equipment that will not run, tripped breakers around the pool, a barrier or gate that does not self-latch, or water you cannot keep clear.
A qualified inspector has the training to tell a cosmetic issue from a structural or safety defect, and the report gives you documentation to act on, whether that means negotiating a repair or planning maintenance.
Conclusion
A pool can be the best part of a Central Florida home or its most expensive surprise, and the only way to know which before closing is a real inspection. This checklist is what a professional covers: structure, equipment, electrical, drains, and safety.
If you are buying, selling, or want a straight answer on the condition of your pool, schedule a swimming pool inspection with CFBI’s certified team. Contact us today to book or ask a question.
A sewer scope is a video inspection of the underground lateral sewer line that carries waste from your house to the city main or your septic tank. An inspector feeds a small waterproof camera on a flexible cable through a cleanout or drain access point and watches a live feed, looking for cracks, blockages, and root intrusion that a standard home inspection never sees.
For anyone buying a Central Florida home, it is one of the cheapest ways to avoid a five-figure repair surprise after closing.
What Is a Sewer Scope?
A sewer scope is a camera inspection of your home’s lateral sewer line: the pipe you own that runs from your foundation out to the municipal sewer main or a septic tank. A waterproof camera on a flexible push cable travels the length of that pipe while the inspector reviews the footage in real time, recording the condition of the line and marking where any problems sit.
The reason this matters is simple. A standard pre-purchase home inspection covers what an inspector can see and reach: the roof, visible plumbing fixtures, the electrical panel, HVAC, and structure. It does not include the pipe buried three or four feet underground. A sewer scope fills that gap. You may also hear it called a sewer camera inspection or a sewer line inspection, and they all describe the same process.
How a Sewer Scope Inspection Works
The process is quick, non-invasive, and involves no digging. Here is what happens on site:
Locate the access point. The inspector finds a cleanout or a suitable drain opening that connects to the main line.
Feed the camera. A waterproof camera mounted on a flexible cable is pushed through the pipe toward the municipal connection or septic inlet.
Review the live feed. The inspector watches a monitor in real time, noting the location of anything unusual along the run.
Deliver the report. After the run, you receive a written report with recorded video, still images, and a plain-language summary of what was found and what it means.
Most inspections take roughly 30 to 60 minutes depending on the length of the line and how easy the access point is to reach. CFBI’s inspectors follow InterNACHI’s sewer scope inspection standards, the same national standards our team is certified under.
What Problems a Sewer Scope Finds
A sewer scope catches damage long before it becomes a backup in your bathroom. The most common findings fall into a few categories:
Tree root intrusion. Roots seek out moisture and work into the pipe through joints and small cracks, then grow until they choke the line. This is the single most common issue inspectors find.
Cracks, breaks, and collapses. Ground movement, age, and soil pressure crack pipe walls. Left alone, a hairline crack becomes a full break or collapse.
Bellies (sagging sections). When a section of pipe sinks, waste and debris pool there instead of flowing through, causing repeat clogs.
Blockages. Grease, debris, and foreign objects restrict flow.
Corrosion and offset joints. Older metal pipe corrodes from the inside, and shifting soil pulls joints out of alignment.
A cracked or broken sewer line also becomes an easy entry route for pests. Roaches and rodents travel up compromised lines and floor drains, so unexplained signs of a cockroach problem near drains can point back to a damaged pipe.
Hidden leaks are another downstream effect: waste seeping into soil under a slab holds moisture, and that moisture can drive the same kind of persistent musty odor homeowners often blame on humidity.
If sewage exposure has gone on long enough, it is worth pairing the scope with a mold inspection.
Common Issues in Older Central Florida Homes
Pipe material tells you a lot about risk. Many older Central Florida homes still have cast iron or clay sewer lines, and some built between the 1940s and early 1970s have Orangeburg pipe, a tar-paper product that deforms and collapses with age.
Cast iron corrodes and scales from the inside; clay joints crack and invite roots. Add Florida’s sandy, shifting soil and heavy tree cover, and a line that looked fine on the surface can be failing underground. Age of the home and nearby mature trees are two of the strongest reasons to scope before you buy.
Why a Sewer Scope Matters When You’re Buying a Home
The whole point of a sewer scope is to find expensive problems while you still have leverage to do something about them. Sewer line repairs are not small: depending on the fix, they run from about $1,000 for a minor repair to $25,000 or more for a full replacement, and trenchless or dig-and-replace work in a mature neighborhood sits at the high end.
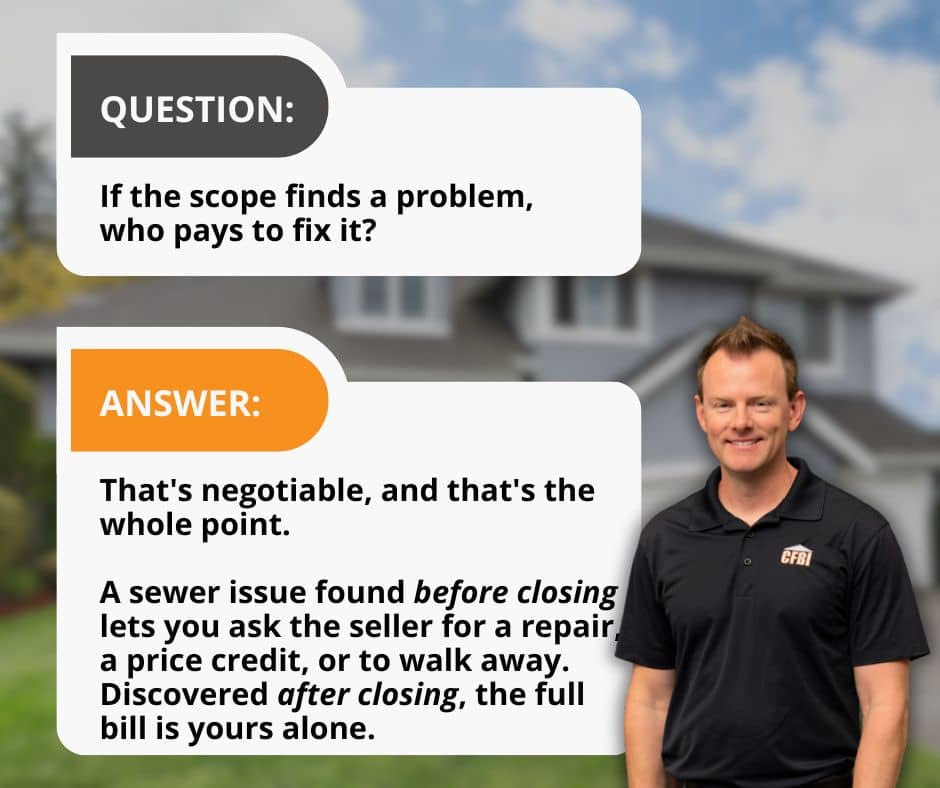
Because the underground line is outside a standard inspection, a buyer who skips the scope often discovers the damage only after moving in, when it is entirely their bill. A buyer who scopes during the due-diligence window has options: negotiate a repair, ask for a credit, or walk away.
For a small upfront cost, you trade an unknown for a documented picture of one of the most expensive systems in the house. This is the same reason a scope belongs alongside the rest of your due diligence, right there with the main inspection and any specialty testing.
How Much Does a Sewer Scope Cost, and How Long Does It Take?
A standalone sewer scope typically costs between $100 and $500 nationally, and it is often less when added to a full home inspection because the inspector is already on site. The exact price depends on your location, line length, and access. For current Central Florida pricing, see CFBI’s pricing and rates or contact our office.
On timing, most inspections wrap in 30 to 60 minutes. A short, accessible line with a clean cleanout goes fast; a long run or a hard-to-find access point takes longer.
Related Questions to Explore
Do I need a sewer scope if the home is newer?
Newer homes are lower risk, but not zero risk. Poor installation, settling, and construction debris left in the line all show up in newer builds. If the home is under about 10 years old with no mature trees nearby, a scope is optional. Older than that, or with big trees near the line, it is worth doing.
Is a sewer scope worth it?
For most buyers, yes. A scope costs a few hundred dollars at most and can flag a repair that costs tens of thousands. Even when the line comes back clean, you get a recorded baseline of its condition, which is useful documentation to keep.
Can a sewer scope damage my pipes?
No. The camera is small, flexible, and designed to travel through the pipe without force. A trained inspector will not push through a hard obstruction or a collapsed section, which protects both the equipment and your line. If the camera cannot pass a certain point, that itself is a finding worth investigating.
How often should you get a sewer scope?
Beyond the home-purchase scope, a good rule of thumb is every few years for older homes, homes with recurring drain issues, or properties with large trees near the line. If you have had backups or slow drains, scope sooner rather than waiting for the next failure.
When to Call a Professional
Call a licensed inspector for a sewer scope any time you are buying a home, especially an older one or one with mature landscaping, and whenever you notice warning signs in a home you already own: repeated drain clogs, gurgling toilets, sewage odors, unusually lush or soggy patches in the yard, or slow drains across multiple fixtures.
These often trace back to the line. A camera inspection tells you exactly what is wrong and where, so any repair is targeted instead of guesswork. It also takes an inspector with the right equipment and the certification to read what the camera shows, which is not part of a standard visual home inspection.
Conclusion
A sewer scope turns the most expensive guess in a home purchase into a documented answer. For a small cost, you find out whether the line under the property is sound or hiding a five-figure repair, while you still have room to negotiate.
If you are buying, selling, or just want peace of mind on an older Central Florida home, schedule a sewer scope inspection with CFBI’s certified team. Contact us today to set up an appointment or ask a question.
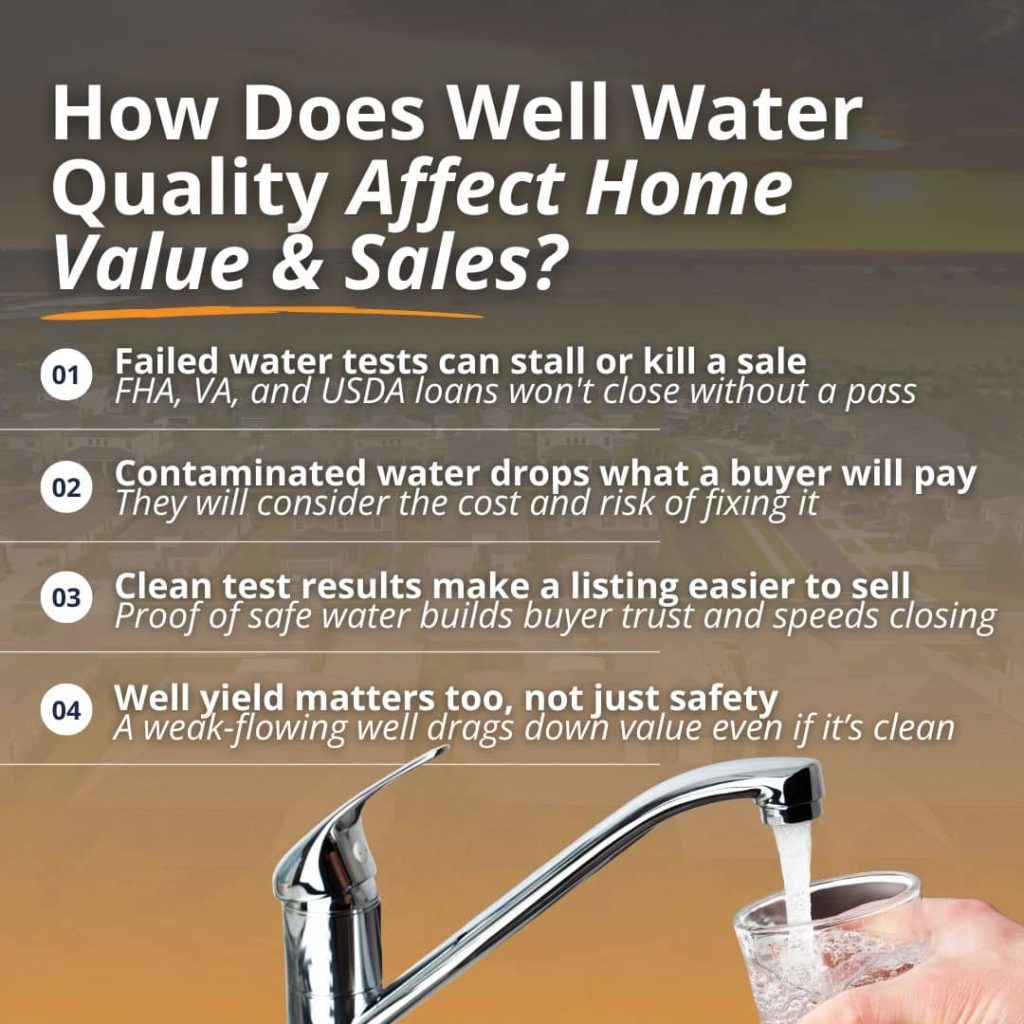
Well water quality has a direct effect on what a home is worth and how smoothly it sells. Clean, safe well water protects a property’s value and reassures buyers, while contaminated water can lower the price, delay closing, or end a deal entirely. For homes bought with an FHA, VA, or USDA loan, a passing water test is not optional, because the lender requires it before closing.
If you are buying or selling a home with a private well in Central Florida, here is how water quality shapes the sale and what you can do to stay ahead of it.
Why Does Well Water Quality Affect a Home’s Value?
A home is only as valuable as it is livable, and safe drinking water is part of that. A property with clean, well-maintained well water holds its value and appeals to today’s health-conscious buyers.
A home with contaminated water or a failing well is worth far less than a comparable property, because the buyer inherits the cost and the risk of fixing it. In the most serious cases, a home without a reliable source of safe water is considered uninhabitable, and the value drops sharply.
Buyers actually weigh two things when it comes to a well. The first is quality, meaning whether the water is safe to drink. The second is quantity, meaning whether the well produces enough water for the household. Both affect value. A well that tests clean and delivers a steady flow supports the full appraised value of the home. A well with bacteria, high nitrates, or a weak yield becomes a bargaining chip that pulls the price down.
Documented proof of good water works in your favor. Because private wells are not regulated the way city water is, the responsibility for proving the water is safe falls on the homeowner. That means a recent, clean water test carries real weight with buyers and helps a listing stand out from comparable homes.
How Does Well Water Quality Affect a Home Sale?
Water quality does not just affect price. It affects whether the sale closes at all. Water testing problems are one of the most common reasons FHA and VA closings get delayed. When a test comes back with bacteria, high nitrates, or another issue, the deal can stall while the seller arranges treatment, the parties renegotiate, or the buyer walks away.
Here is how a water issue usually plays out during a sale:
The water is tested as part of the buyer’s due diligence or a loan requirement.
Results come back. A clean result keeps the timeline on track. A failed result starts the clock on a fix.
The seller addresses the problem, for example, shock chlorination for bacteria or a treatment system for nitrates, and the water is retested.
If the fix works and there is enough time, the sale moves forward. If not, the buyer can renegotiate or use an inspection contingency to walk away.
For buyers, this is why water testing belongs in your due diligence from the very start. It helps to understand what a well inspection can reveal about your water quality before you commit to a property. Catching problems early keeps you in control of the timeline instead of racing a closing deadline.
Well Water Testing Requirements for FHA, VA, and USDA Loans
If a buyer is financing a home with a government-backed loan and the property uses a private well, the lender requires a water test before closing. The exact rules vary by program.
Loan program
Standard the water must meet
Who collects the sample
Good to know
FHA
Local health authority standard, or EPA drinking water standards if no local one exists (HUD Minimum Property Requirements)
Independent third party
No passing test, no approval
VA
VA Minimum Property Requirements; may require connecting to public water if it is available and affordable
Disinterested third party (not buyer, seller, or agent)
Test is valid for 90 days
USDA
EPA minimum thresholds
Independent third party
Required when the financed home uses a well
All three programs typically test for total coliform bacteria, E. coli, nitrates, nitrites, and lead. The common thread is simple: no passing test, no loan approval.
That third-party rule matters in practice. Because the sample cannot be collected by anyone involved in the sale, a licensed home inspector is often the one who collects it as part of professional well water quality testing and sends it to a state-certified lab. That keeps the result clean, neutral, and acceptable to the lender.
What Central Florida Buyers and Sellers Should Know
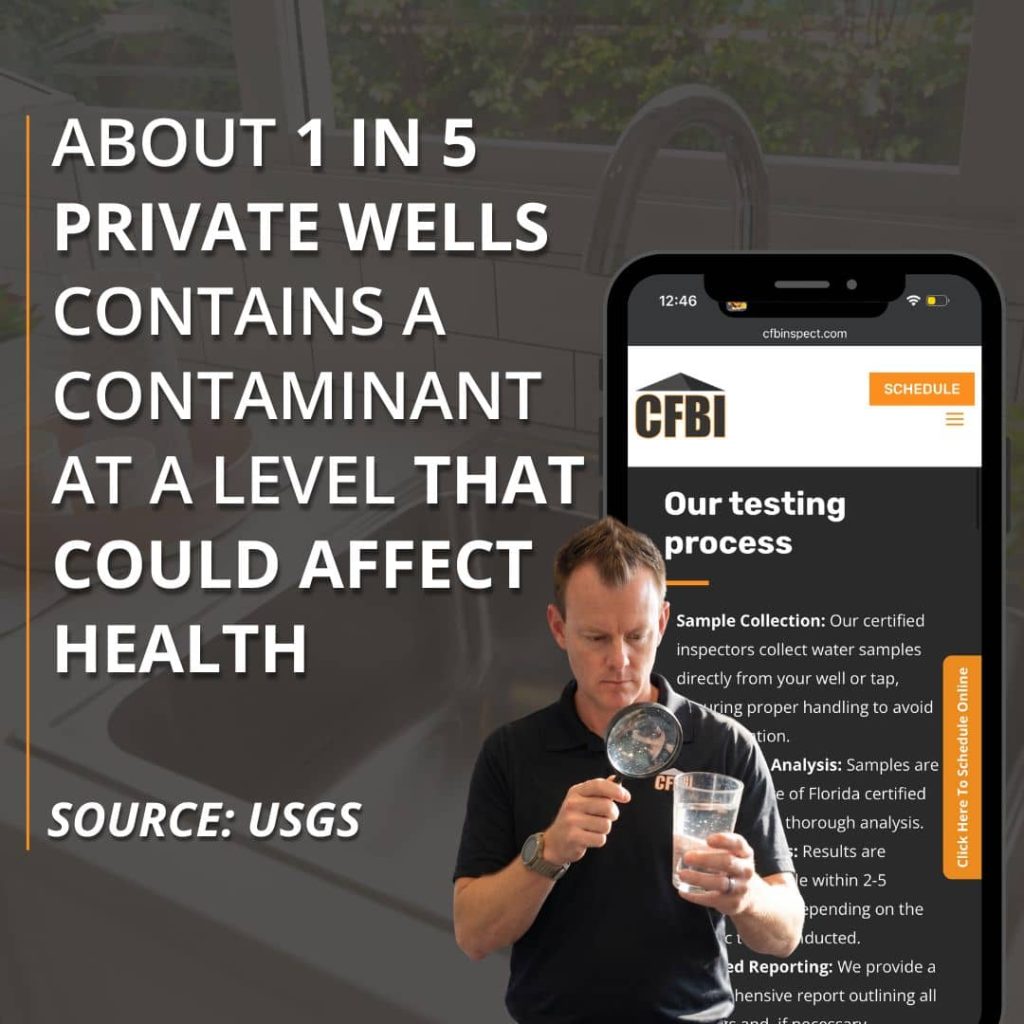
Central Florida sits on porous limestone, which makes the groundwater that feeds private wells especially vulnerable to contamination. Agricultural runoff from groves and farms, nearby septic systems, and the region’s frequent heavy rain can all push contaminants into a well.
The most common problems around Orlando and the surrounding counties include bacteria, nitrates, hard water, iron, and a sulfur or rotten-egg smell.
Florida does not require ongoing well testing once you have closed and moved in, which surprises a lot of homeowners. The Florida Department of Health recommends testing private well water every year for bacteria and nitrates, and the EPA makes the same annual recommendation.
For buyers, that means a single passing test at closing is a starting point, not a lifetime guarantee. Plan to test yearly once the home is yours.
For sellers in Orange, Seminole, Lake, and Osceola counties, a recent clean water test is one of the easiest ways to build buyer trust and keep a deal moving. It shows the water has been cared for and removes a common last-minute surprise that can stall a closing.
Common Well Water Contaminants That Affect Value
A well water test can flag several contaminants, and each one affects safety, livability, and value in a different way.
Contaminant
Where it comes from
Why it matters
Total coliform & E. coli
Surface water intrusion, a cracked well cap, nearby septic
Signals a contamination pathway and fails most loan tests
Nitrates & nitrites
Fertilizer, agricultural runoff, septic systems
Health risk, especially for infants, and common in farm areas
Lead
Older plumbing and fixtures
Serious health risk, flagged on FHA and VA tests
Arsenic & heavy metals
Naturally occurring in some groundwater
Long-term health risk
Iron & manganese
Naturally occurring minerals
Staining, metallic taste, and appliance wear
Low pH (acidic) & sulfur
Local geology and decaying organic matter
Corrosion, rotten-egg odor, and shorter equipment life
Some of these you can taste or smell. Many you cannot, which is why testing is the only reliable way to know what is in the water. Water quality also affects the equipment that delivers it, since sediment and minerals influence how long a well pump lasts.
A buyer is inheriting both the water and the system behind it, so both deserve a look before closing.
What Should Sellers and Buyers Do?
A little preparation keeps a water issue from derailing a sale. Here is where each side should focus.
If you are selling
If you are buying
Test the water before you list
Add a water test to your inspection contingency
Keep records of past tests and well work
Use a neutral third party to collect the sample
Treat and retest any issues early
Ask for the well log, age, and depth
Share clean results with buyers up front
Budget for annual testing after you move in
The theme on both sides is the same: test early and keep records. Time is what turns a small water problem into a deal-breaker, and good documentation is what keeps a buyer confident.
Related Questions to Explore
Does well water lower a home’s value? Not on its own. Clean, safe well water does not lower value, and many buyers prefer it. What lowers value is poor water quality or a failing well, because the buyer takes on the cost and the health risk. Documented proof of clean water can actually be a selling point.
Do you need a water test to sell a house with a well? Florida does not require a test simply to sell, but if the buyer uses an FHA, VA, or USDA loan, a passing test is required before closing. Many sellers test before listing anyway to avoid last-minute delays.
Who can collect the water sample during a home sale? For VA and most lender-required tests, the sample must be collected by a neutral third party, not the buyer, seller, or agent. A licensed home inspector or local health authority typically handles it.
How often should well water be tested in Florida? The Florida Department of Health and the EPA both recommend testing private well water at least once a year for bacteria and nitrates, and more often if you notice a change in the water’s taste, smell, or color.
What happens if the well water fails the test? The sale does not have to fall through. The seller can install treatment, the parties can renegotiate, or the buyer can request repairs. The key is leaving enough time before closing to address it and retest.
When to Call a Professional
If you are buying or selling a home with a private well in Central Florida, have the water tested by a licensed professional rather than a store-bought kit, especially when a loan is involved. A professional collects the sample correctly, sends it to a state-certified lab, and delivers results that lenders will accept.
A pro can also spot well and equipment problems that a water sample alone will not reveal, like a cracked cap or an aging pump. Central Florida Building Inspectors has been inspecting Orlando-area homes since 1988 and can handle well water quality testing as part of your inspection.
Conclusion
Well water quality is not a small detail in a home sale. It can raise a property’s value and reassure buyers, or it can delay closing and cost thousands to fix. Whether you are listing a home with a well or buying one, testing the water early puts you in control of the timeline and the negotiation.
Schedule well water quality testing with Central Florida Building Inspectors and know exactly what is in the water before it affects the deal.
If you own a home in Central Florida, a wind mitigation inspection might be one of the most financially useful things you can do this year. Florida homeowners already deal with some of the highest insurance premiums in the country, and a wind mitigation inspection is one of the few tools that can actually bring those costs down.
Under Florida law, insurers are required to offer discounts to homeowners with verified wind-resistant features. A wind mitigation report is how you prove your home qualifies.
Here’s what a wind mitigation inspection covers, what inspectors look for, and why it matters whether you’re buying, selling, or just trying to lower your annual insurance bill.
What Is a Wind Mitigation Inspection?
A wind mitigation inspection is a focused assessment of a home’s construction features to determine how well it can hold up in hurricane-force winds.
This kind of inspection doesn’t cover every system in your house. The entire focus is on the structural and protective elements that affect how your home performs in a major wind event.
The results are captured on a standardized state form called the OIR-B1-1802, also known as the Uniform Mitigation Verification Inspection Form. Once complete, that form goes to your insurance carrier, who uses it to calculate any applicable discounts on your policy. The report is valid for up to five years, as long as no major changes are made to the structure.
This is not the same as a 4-point inspection. A 4-point inspection looks at the condition of your roof, electrical, plumbing, and HVAC systems to determine insurance eligibility. A wind mitigation inspection is only about wind resistance, and its goal is to lower what you pay, not to determine whether you can get covered at all.
A Note on the 2026 Form Update
The OIR-B1-1802 form was updated effective April 1, 2026. The new version reflects findings from a 2024 wind-loss study and updates the qualifying criteria and discount tables.
Reports completed before April 1, 2026, remain valid through their five-year window, but all new inspections now use the updated form. When scheduling, confirm your inspector is up to date on the new requirements.
What Does a Wind Mitigation Inspection Look For?
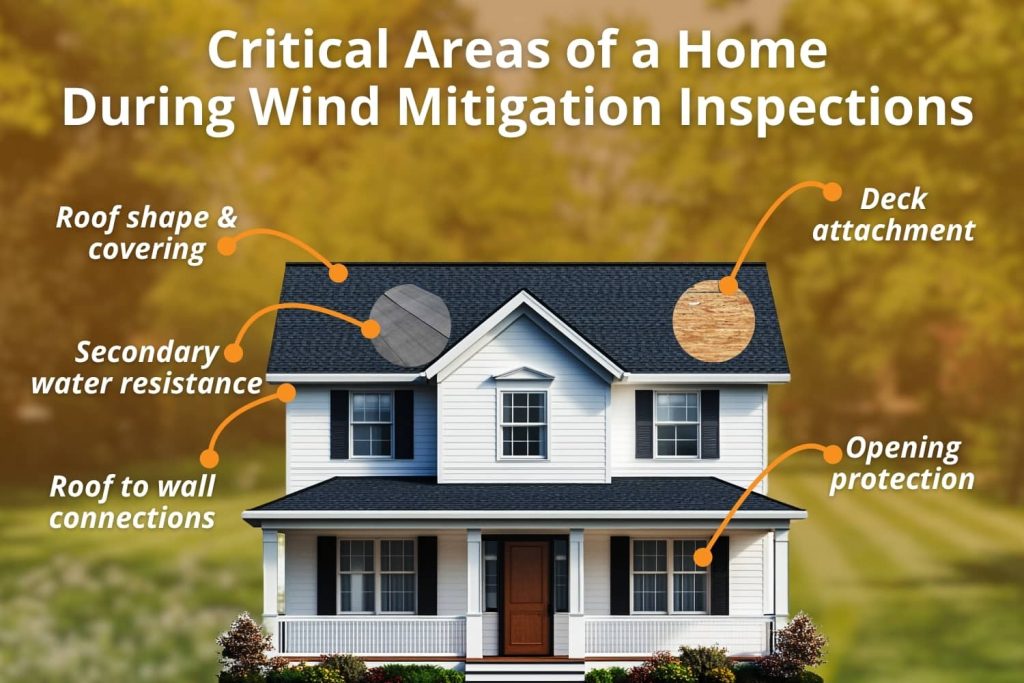
The OIR-B1-1802 form covers seven specific construction features. Each one affects how much of a discount your insurer can apply.
1. Building Compliance
The inspector documents when the home was permitted and built. That date determines which version of the Florida Building Code was in effect at construction.
Homes built after 2001 fall under stricter wind-resistance standards, and newer construction generally earns larger credits for wind mitigation.
It’s important to know that this is a date verification, not a code compliance inspection.
2. Roof Covering
The type of roofing material and the date of the last roof replacement are documented. This tells the insurer how current and code-compliant the roof covering is.
3. Roof Deck Attachment
This is how the plywood or OSB panels underneath your shingles or tiles are nailed to the roof framing. Tighter nail patterns and larger nails provide better resistance to the roof lifting off. Homes with stronger deck attachment earn more credit.
4. Roof-to-Wall Attachment
This looks at how the roof trusses connect to the exterior walls. Options range from basic toenails (the weakest) to clips, single wraps, and double wraps (the strongest). Double-wrap hurricane straps offer the best protection and earn the highest credit in this category.
5. Roof Shape
Hip roofs, which slope on all four sides, perform much better in high winds than gable roofs, which have flat triangular ends. Hip roofs can experience up to 40% lower wind pressure at the same wind speed.
This is a self-adhering membrane applied directly to the roof sheathing under the roof covering. It’s designed to keep water out if shingles are blown off during a storm.
Standard felt underlayment doesn’t qualify. When present and documented, SWR earns a solid credit and is common on roofs replaced in the last decade.
7. Opening Protection
This covers how well your windows, doors, skylights, and garage doors are protected from windborne debris. Impact-rated windows and doors, documented storm shutters, and reinforced garage doors all earn credits.
This is also the most all-or-nothing category: if even one opening lacks qualifying protection, the whole structure may receive no opening protection credit at all.
How Much Can You Save?
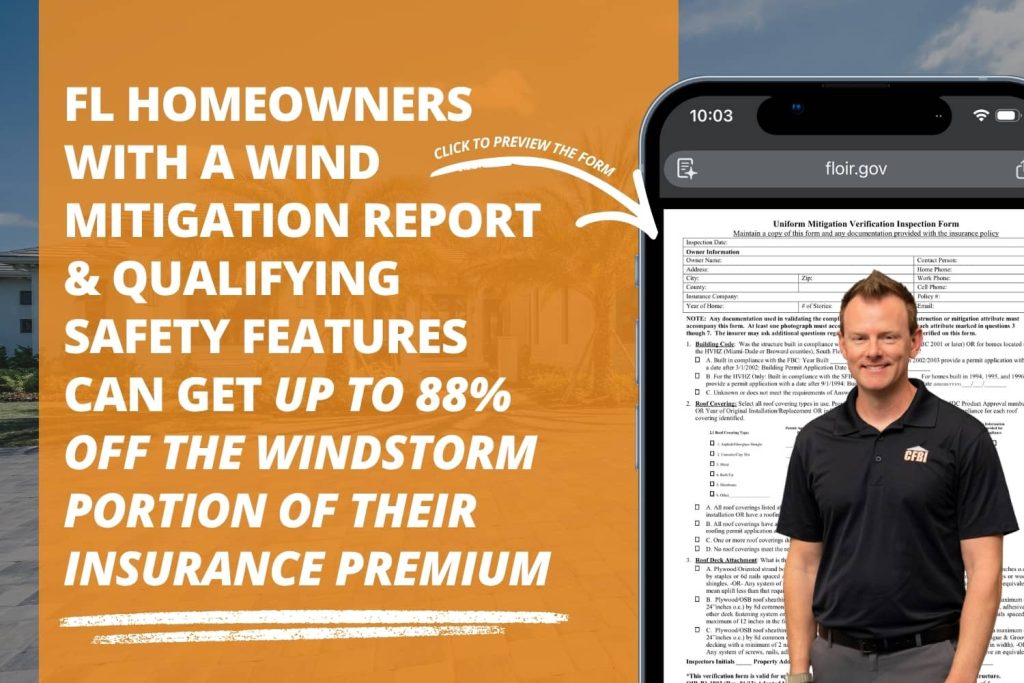
Savings vary based on which features your home has and which insurer you’re with. Florida law allows discounts of up to 88% off the windstorm portion of your policy, though the real-world impact for most Central Florida homeowners is more modest than that ceiling.
Homes that score well across multiple categories, especially hip roof geometry, double-wrap straps, SWR, and full opening protection, tend to see the largest premium reductions. A home without many of those features may still earn something in the building code compliance category, particularly if it was built after 2001.
Most homeowners recoup the inspection cost within the first few months of a new or renewed policy. Since the report is valid for up to five years, the savings extend well beyond year one.
Who Should Get One?
Situation
Why It’s Worth It
You’ve never had one
You may be leaving discounts unclaimed on every renewal
You recently replaced your roof
New roofs often add SWR and stronger deck attachment
You added impact windows or shutters
Opening protection upgrades can unlock new credits
You’re buying a home
A current report clarifies insurance costs before closing
Your report is over five years old
Credits may have improved since your last inspection
You’re selling a home
A current report can be a selling point for insurance-aware buyers
For buyers especially: in the Orlando metro and surrounding areas, insurance costs have a real impact on the total cost of owning a home.
Having a current wind mitigation report before closing gives you and your agent a clearer picture of what to expect.
What Happens After the Inspection?
Once the inspection is done, your inspector provides the completed OIR-B1-1802 form with photos documenting each credited feature. You submit that to your insurance agent or carrier, who applies the appropriate discounts to your policy.
Keep a copy of the report. It’s valid for up to five years, and if you switch carriers in that window, you can typically submit the same report to your new insurer without scheduling a new one. If you make significant upgrades like a new roof or impact windows, a fresh inspection can capture those improvements and potentially increase your credits.
One important note: Florida insurers won’t accept forms completed by an inspector whose license can’t be verified. An invalid form can cost you your discounts entirely, which is why choosing a licensed, trusted inspector matters.
Related Questions to Explore
What is a 4-point inspection, and how is it different from wind mitigation? A 4-point inspection evaluates the condition of a home’s roof, electrical, plumbing, and HVAC systems. Insurers use it to decide whether they’ll cover an older home at all. Wind mitigation is about how wind-resistant the home is, and it’s used to calculate discounts on an existing policy. Many homeowners schedule both at the same time to save on trip costs.
Do new construction homes in Central Florida need a wind mitigation inspection? Yes, and new construction often earns strong credits because it’s built to current Florida Building Code standards, which require tighter roof connections, stronger deck attachment, and better opening protection than older codes. Scheduling a new construction inspection lets you start claiming those credits right away.
What does a pre-listing inspection cover, and how can it help sellers? A pre-listing inspection is a full home inspection done before a property hits the market. It gives sellers a clear picture of the home’s condition and helps avoid surprises during a buyer’s inspection that could slow down or kill a contract. In Central Florida, pairing it with a current wind mitigation report is a strong combination, since buyers here are very aware of what insurance is going to cost them.
What is a sewer scope inspection, and when should you get one? A sewer scope uses a camera to inspect the main sewer line from the house to the street. It’s a good idea when buying older homes, homes with large trees near the sewer line, or any property with a history of slow drains or backups. It’s a quick add-on that can catch serious issues before they become your problem after closing.
When to Call a Professional
If you own a home in the Orlando area or anywhere in Central Florida and haven’t had a wind mitigation inspection in the last five years, it’s worth scheduling one.
The same goes if you’ve recently replaced your roof, added impact windows, or had hurricane straps installed. Each of those upgrades has the potential to earn credits that your current policy may not reflect.
For buyers, adding a wind mitigation inspection to your general home inspection visit is a practical step before closing.
Knowing your home’s wind-resistant features and what they could mean for your annual premium is part of making a smart purchase in a state where insurance costs aren’t something you can ignore.
Conclusion
A wind mitigation inspection is one of the few things a Florida homeowner can do that pays off quickly and keeps paying off for years. It’s fast, affordable, and the report can follow your home through multiple insurance policies. Whether you’re buying, selling, or just overdue for an updated report, the information it delivers is worth having.
At Central Florida Building Inspectors, we perform wind mitigation inspections throughout the Orlando metro and surrounding Central Florida communities, along with full home inspections, 4-point inspections, mold and air quality testing, and a full range of residential and commercial inspection services.
Big changes are coming to Florida wind mitigation inspections. These changes could directly affect your insurance premiums. Whether you’re a first-time homeowner or a long-time resident, this update matters to you. Maybe you recently purchased a property. Maybe it’s been a few years since your last inspection. Either way, now is the time to pay attention. Understanding what’s changing - and acting on it - could put real money back in your pocket.
What Is a Wind Mitigation Inspection — and Why Does It Matter?
A wind mitigation inspection is a specialized assessment of your home’s construction features to determine how well it can withstand hurricane-force winds. In a state like Florida — where hurricane season runs from June 1 through November 30 and windstorm insurance is one of the biggest drivers of homeowner insurance costs — this inspection is one of the most financially powerful tools available to property owners.
Under Florida Statute §627.0629, insurance companies are legally required to offer premium discounts and deductible reductions to homeowners whose properties include verified wind-resistant construction features. Those discounts can reach up to 88% off the windstorm portion of your policy — savings that, for many Central Florida homeowners, translate to hundreds or even thousands of dollars per year.
The official document used to capture and report these features is the Uniform Mitigation Verification Inspection Form, OIR-B1-1802, administered by the Florida Office of Insurance Regulation (OIR).
Major Update: The New OIR-B1-1802 Form Takes Effect April 1, 2026
Here’s the most important news for Florida homeowners right now: the OIR has proposed a significant update to the 1802 form, with the new version set to take effect April 1, 2026.
The Florida Office of Insurance Regulation has proposed an amendment to Rule 69O-170.0115 to adopt a new version of form OIR-B1-1802. The new form updates the fixtures and construction techniques that qualify for discounts, taking into account a 2024 Residential Wind-Loss Mitigation Study — which updates research conducted years ago when the mitigation discount program was still in its infancy.
What does this mean for you? The updated discount tables and qualifying criteria reflect more current building science and real-world hurricane performance data. Some features may qualify for higher discounts; others may be evaluated differently. The full impact on individual premiums is still being determined, but one thing is clear: homeowners who get ahead of this change will be best positioned to maximize their savings.
Florida Statute §627.0629 requires the OIR to review and update the fixtures or construction techniques demonstrated to reduce windstorm damage — along with the related insurance discounts and deductible reductions — by January 1, 2025, and every five years after that. The April 2026 form rollout is a direct result of that mandated review.
The 7 Key Categories Evaluated on Form OIR-B1-1802
A licensed inspector completing the 1802 form evaluates your home across seven critical areas. Understanding these categories helps you know what to expect — and what upgrades might boost your discount tier:
1. Building Code Compliance — Was your home built to Florida Building Code 2001 or later? Homes constructed in 2002 or after generally receive automatic baseline credits. Homes in Miami-Dade and Broward counties are evaluated against the South Florida Building Code (SFBC-94) for High Velocity Hurricane Zone (HVHZ) compliance.
2. Roof Covering — The type and installation method of your roofing material. Products that meet Florida Product Approval standards score higher.
3. Roof Deck Attachment — How the plywood or OSB decking is fastened to the rafters or trusses. Homes with 8d ring-shank nails on 6-inch spacing perform significantly better in windstorm events.
4. Roof-to-Wall Connection — The weakest connection point between your roof and your walls is assessed. Single wraps, double wraps, clips, and structural anchors each correspond to different credit tiers.
5. Roof Shape — Hip roofs (sloped on all four sides) are the most wind-resistant design and typically earn the largest discounts. Gable roofs receive lower credits due to their increased vulnerability to wind uplift.
6. Secondary Water Resistance (SWR) — A self-adhering membrane applied beneath the roof covering that prevents water intrusion if shingles are blown off. This feature is increasingly important to insurers after recent hurricane seasons.
7. Opening Protection — Impact-rated windows, doors, skylights, and garage doors — or properly documented storm shutters — protect against windborne debris. This is the all-or-nothing category: if even one opening lacks protection, the entire structure may receive no discount.
How Long Is a Wind Mitigation Report Valid?
The Uniform Mitigation Verification Inspection Form (OIR-B1-1802) is valid for up to five years, provided no material changes are made to the structure or inaccuracies are found on the form.
This five-year clock matters. If your report is approaching expiration — or if you’ve had roof work, new windows, or other structural upgrades — it’s time to schedule a fresh inspection. With the new form taking effect April 1, 2026, renewing your inspection now (under the current form) or after the transition (under the updated form) will be an important strategic decision to discuss with your inspector and insurance agent.
Who Qualifies to Perform a Wind Mitigation Inspection in Florida?
Not just anyone can complete a legally valid 1802 form. Under Florida Statute §627.711, qualified inspectors include:
Licensed home inspectors (under §468.8314) who have completed at least 3 hours of OIR-approved hurricane mitigation training and passed a proficiency exam
Licensed general, building, or residential contractors
Licensed professional engineers or architects
Certified building code inspectors
Citizens Property Insurance reserves the right to verify any wind mitigation form completed by a qualified inspector by ordering an independent inspection, and will not accept forms where the inspector’s Florida license is not active or cannot be verified. This is why choosing a reputable, licensed inspection company matters — an invalid or improperly completed form could cost you your discounts entirely.
Free Inspections and Matching Grants: My Safe Florida Home Program
If you haven’t upgraded your home’s wind-resistant features because of cost concerns, there’s good news. In 2025, Florida expanded the My Safe Florida Home program with $280 million in new funding to help families afford wind mitigation upgrades, offering free inspections and matching grants for improvements like impact windows, doors, and roof upgrades.
This program provides a two-step pathway: first, receive a free wind mitigation inspection, then apply for a matching grant to fund qualifying home hardening improvements. Visit MySafeFLHome.com to check eligibility and availability.
Don’t Wait — Schedule Your Inspection Before the April 2026 Form Change
With the updated OIR-B1-1802 form set to take effect April 1, 2026, Central Florida homeowners have a narrow window to act strategically. Whether your goal is to lock in current discount tiers, document recent upgrades, or simply get ahead of the changes before hurricane season, a wind mitigation inspection is one of the highest-ROI steps you can take as a homeowner.
At Central Florida Building Inspectors (CFBI), our licensed inspectors are certified in wind mitigation assessments and stay current on all OIR form requirements and Florida Building Code updates. We serve homeowners throughout the greater Central Florida area with thorough, photo-documented 1802 inspections that insurers trust.