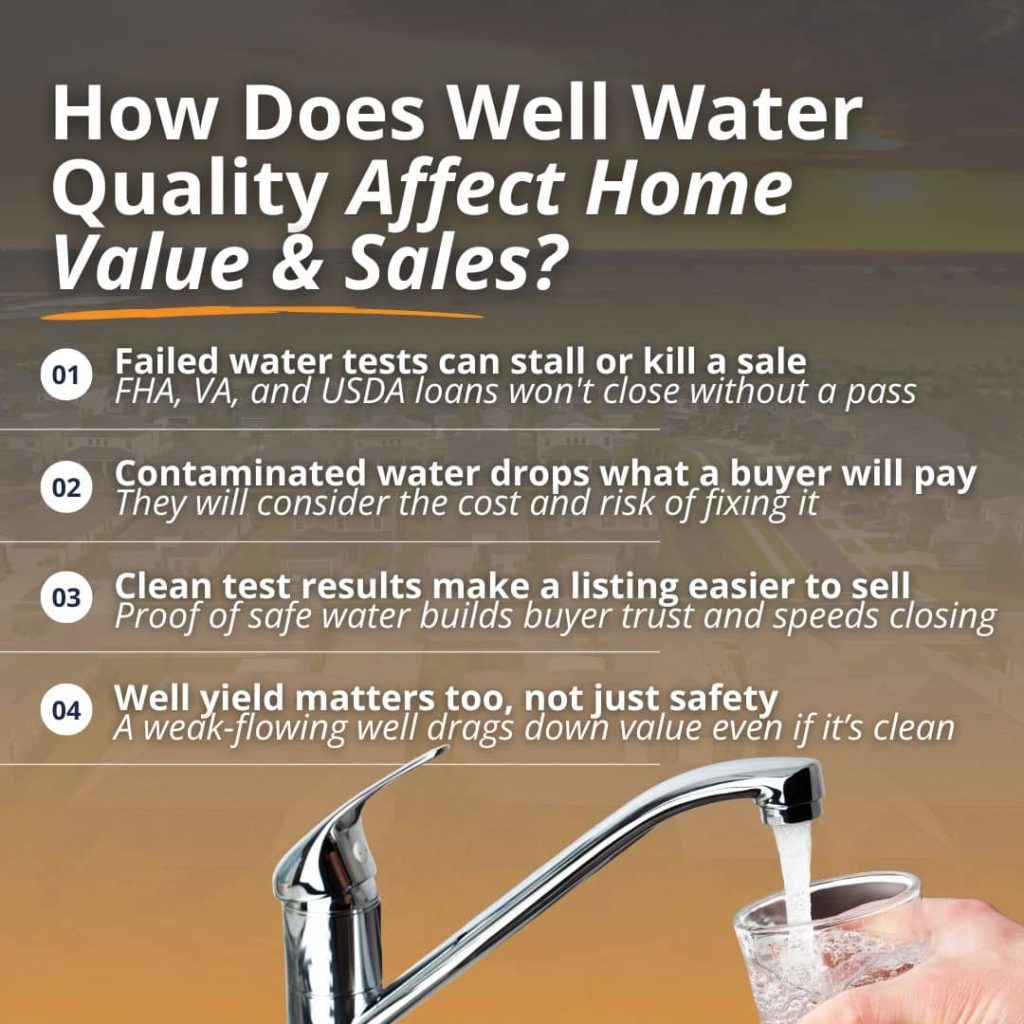
Well water quality has a direct effect on what a home is worth and how smoothly it sells. Clean, safe well water protects a property’s value and reassures buyers, while contaminated water can lower the price, delay closing, or end a deal entirely. For homes bought with an FHA, VA, or USDA loan, a passing water test is not optional, because the lender requires it before closing.
If you are buying or selling a home with a private well in Central Florida, here is how water quality shapes the sale and what you can do to stay ahead of it.
Why Does Well Water Quality Affect a Home’s Value?
A home is only as valuable as it is livable, and safe drinking water is part of that. A property with clean, well-maintained well water holds its value and appeals to today’s health-conscious buyers.
A home with contaminated water or a failing well is worth far less than a comparable property, because the buyer inherits the cost and the risk of fixing it. In the most serious cases, a home without a reliable source of safe water is considered uninhabitable, and the value drops sharply.
Buyers actually weigh two things when it comes to a well. The first is quality, meaning whether the water is safe to drink. The second is quantity, meaning whether the well produces enough water for the household. Both affect value. A well that tests clean and delivers a steady flow supports the full appraised value of the home. A well with bacteria, high nitrates, or a weak yield becomes a bargaining chip that pulls the price down.
Documented proof of good water works in your favor. Because private wells are not regulated the way city water is, the responsibility for proving the water is safe falls on the homeowner. That means a recent, clean water test carries real weight with buyers and helps a listing stand out from comparable homes.
How Does Well Water Quality Affect a Home Sale?
Water quality does not just affect price. It affects whether the sale closes at all. Water testing problems are one of the most common reasons FHA and VA closings get delayed. When a test comes back with bacteria, high nitrates, or another issue, the deal can stall while the seller arranges treatment, the parties renegotiate, or the buyer walks away.
Here is how a water issue usually plays out during a sale:
The water is tested as part of the buyer’s due diligence or a loan requirement.
Results come back. A clean result keeps the timeline on track. A failed result starts the clock on a fix.
The seller addresses the problem, for example, shock chlorination for bacteria or a treatment system for nitrates, and the water is retested.
If the fix works and there is enough time, the sale moves forward. If not, the buyer can renegotiate or use an inspection contingency to walk away.
For buyers, this is why water testing belongs in your due diligence from the very start. It helps to understand what a well inspection can reveal about your water quality before you commit to a property. Catching problems early keeps you in control of the timeline instead of racing a closing deadline.
Well Water Testing Requirements for FHA, VA, and USDA Loans
If a buyer is financing a home with a government-backed loan and the property uses a private well, the lender requires a water test before closing. The exact rules vary by program.
Loan program
Standard the water must meet
Who collects the sample
Good to know
FHA
Local health authority standard, or EPA drinking water standards if no local one exists (HUD Minimum Property Requirements)
Independent third party
No passing test, no approval
VA
VA Minimum Property Requirements; may require connecting to public water if it is available and affordable
Disinterested third party (not buyer, seller, or agent)
Test is valid for 90 days
USDA
EPA minimum thresholds
Independent third party
Required when the financed home uses a well
All three programs typically test for total coliform bacteria, E. coli, nitrates, nitrites, and lead. The common thread is simple: no passing test, no loan approval.
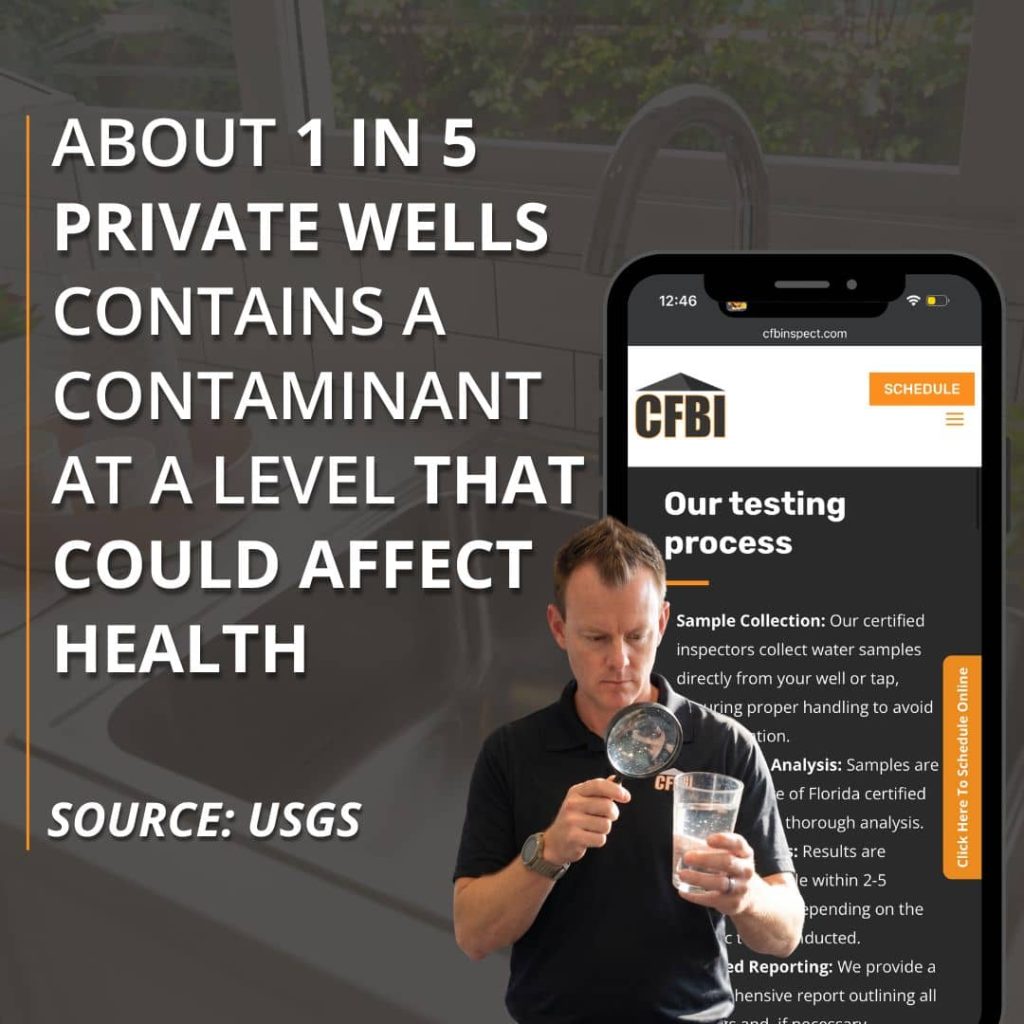
That third-party rule matters in practice. Because the sample cannot be collected by anyone involved in the sale, a licensed home inspector is often the one who collects it as part of professional well water quality testing and sends it to a state-certified lab. That keeps the result clean, neutral, and acceptable to the lender.
What Central Florida Buyers and Sellers Should Know
Central Florida sits on porous limestone, which makes the groundwater that feeds private wells especially vulnerable to contamination. Agricultural runoff from groves and farms, nearby septic systems, and the region’s frequent heavy rain can all push contaminants into a well.
The most common problems around Orlando and the surrounding counties include bacteria, nitrates, hard water, iron, and a sulfur or rotten-egg smell.
Florida does not require ongoing well testing once you have closed and moved in, which surprises a lot of homeowners. The Florida Department of Health recommends testing private well water every year for bacteria and nitrates, and the EPA makes the same annual recommendation.
For buyers, that means a single passing test at closing is a starting point, not a lifetime guarantee. Plan to test yearly once the home is yours.
For sellers in Orange, Seminole, Lake, and Osceola counties, a recent clean water test is one of the easiest ways to build buyer trust and keep a deal moving. It shows the water has been cared for and removes a common last-minute surprise that can stall a closing.
Common Well Water Contaminants That Affect Value
A well water test can flag several contaminants, and each one affects safety, livability, and value in a different way.
Contaminant
Where it comes from
Why it matters
Total coliform & E. coli
Surface water intrusion, a cracked well cap, nearby septic
Signals a contamination pathway and fails most loan tests
Nitrates & nitrites
Fertilizer, agricultural runoff, septic systems
Health risk, especially for infants, and common in farm areas
Lead
Older plumbing and fixtures
Serious health risk, flagged on FHA and VA tests
Arsenic & heavy metals
Naturally occurring in some groundwater
Long-term health risk
Iron & manganese
Naturally occurring minerals
Staining, metallic taste, and appliance wear
Low pH (acidic) & sulfur
Local geology and decaying organic matter
Corrosion, rotten-egg odor, and shorter equipment life
Some of these you can taste or smell. Many you cannot, which is why testing is the only reliable way to know what is in the water. Water quality also affects the equipment that delivers it, since sediment and minerals influence how long a well pump lasts.
A buyer is inheriting both the water and the system behind it, so both deserve a look before closing.
What Should Sellers and Buyers Do?
A little preparation keeps a water issue from derailing a sale. Here is where each side should focus.
If you are selling
If you are buying
Test the water before you list
Add a water test to your inspection contingency
Keep records of past tests and well work
Use a neutral third party to collect the sample
Treat and retest any issues early
Ask for the well log, age, and depth
Share clean results with buyers up front
Budget for annual testing after you move in
The theme on both sides is the same: test early and keep records. Time is what turns a small water problem into a deal-breaker, and good documentation is what keeps a buyer confident.
Related Questions to Explore
Does well water lower a home’s value? Not on its own. Clean, safe well water does not lower value, and many buyers prefer it. What lowers value is poor water quality or a failing well, because the buyer takes on the cost and the health risk. Documented proof of clean water can actually be a selling point.
Do you need a water test to sell a house with a well? Florida does not require a test simply to sell, but if the buyer uses an FHA, VA, or USDA loan, a passing test is required before closing. Many sellers test before listing anyway to avoid last-minute delays.
Who can collect the water sample during a home sale? For VA and most lender-required tests, the sample must be collected by a neutral third party, not the buyer, seller, or agent. A licensed home inspector or local health authority typically handles it.
How often should well water be tested in Florida? The Florida Department of Health and the EPA both recommend testing private well water at least once a year for bacteria and nitrates, and more often if you notice a change in the water’s taste, smell, or color.
What happens if the well water fails the test? The sale does not have to fall through. The seller can install treatment, the parties can renegotiate, or the buyer can request repairs. The key is leaving enough time before closing to address it and retest.
When to Call a Professional
If you are buying or selling a home with a private well in Central Florida, have the water tested by a licensed professional rather than a store-bought kit, especially when a loan is involved. A professional collects the sample correctly, sends it to a state-certified lab, and delivers results that lenders will accept.
A pro can also spot well and equipment problems that a water sample alone will not reveal, like a cracked cap or an aging pump. Central Florida Building Inspectors has been inspecting Orlando-area homes since 1988 and can handle well water quality testing as part of your inspection.
Conclusion
Well water quality is not a small detail in a home sale. It can raise a property’s value and reassure buyers, or it can delay closing and cost thousands to fix. Whether you are listing a home with a well or buying one, testing the water early puts you in control of the timeline and the negotiation.
Schedule well water quality testing with Central Florida Building Inspectors and know exactly what is in the water before it affects the deal.
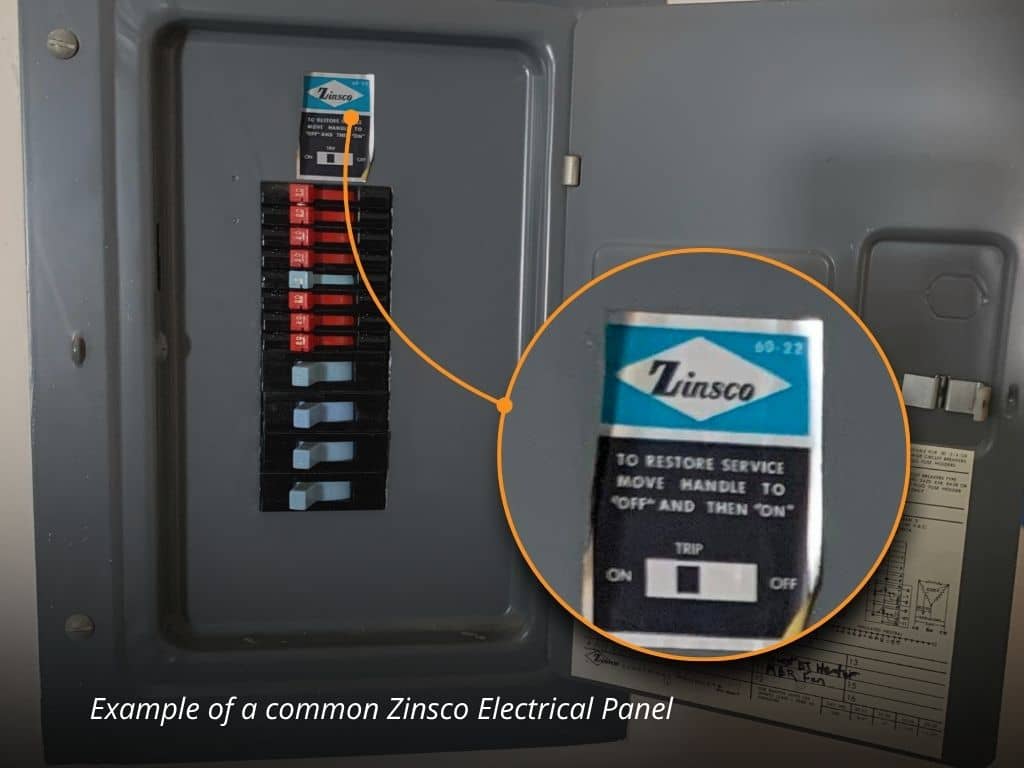
A Zinsco panel is an older brand of electrical panel that was installed in homes mostly from the 1950s through the mid-1970s. Inspectors flag it because the breakers can fail to trip during an overload or short circuit, which can lead to overheating, arcing, and in some cases a fire.
The danger is often hidden inside the panel, so a Zinsco can look fine and still be unsafe. If one turns up on your inspection, it is not a small note to ignore. It can affect your safety, your home insurance, and your sale. Here is what a Zinsco panel is, why it gets flagged, how to spot one, and what to do next.
What Is a Zinsco Panel?
A Zinsco panel is an old brand of electrical service panel, the metal box that holds your circuit breakers and sends power to every circuit in your home.
The Zinsco brand was popular for a few decades, and the panels were common in homes built or updated from the 1950s into the mid-1970s.
The company was sold to GTE-Sylvania in 1973, and panels kept rolling out under names that still included Zinsco. Production wound down by the mid-1970s, but the panels that were already made kept getting installed for years after that. That is why you can still find them in older homes today.
Zinsco panels were installed across the country and were especially common in the Western United States, but plenty of them ended up in Florida homes too. The brand showed up under a few different labels over the years, including Zinsco, GTE-Sylvania, Sylvania, and Magnetrip. That mix of names is part of why some homeowners do not realize what they have.
The problem is not the age alone. It is a design flaw that did not become clear until electricians and home inspectors had seen enough of these panels fail.
Why Are Zinsco Panels Considered a Safety Risk?
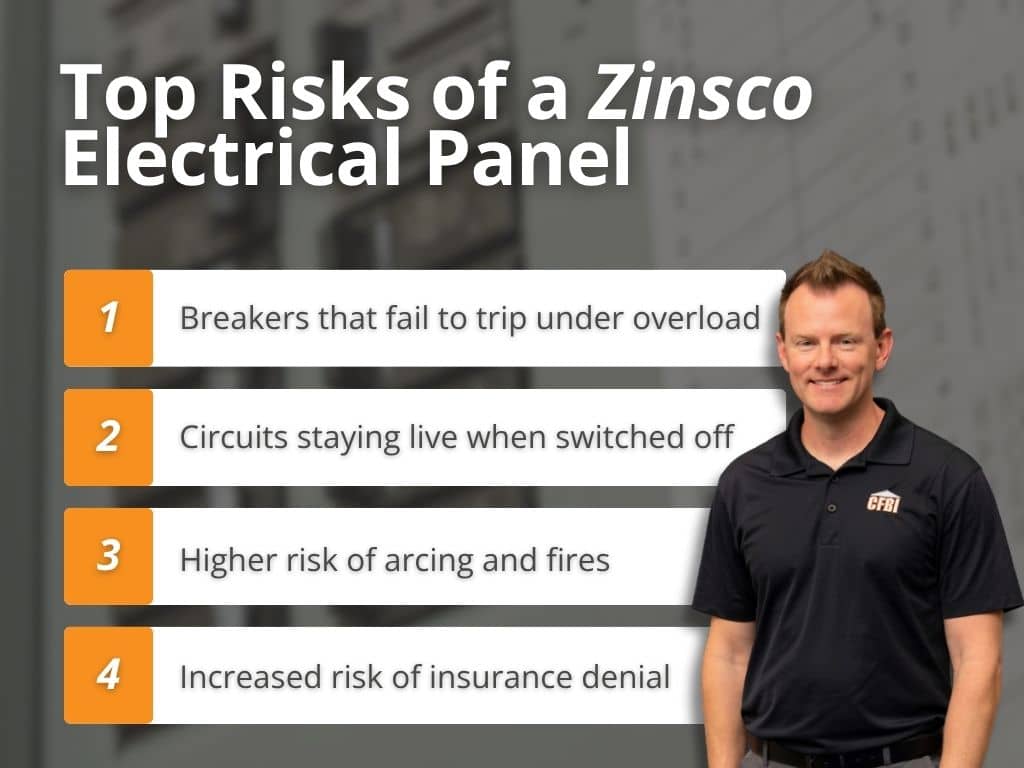
A breaker has one job. When a circuit pulls too much power or shorts out, the breaker is supposed to trip and cut the flow before the wiring overheats. A breaker that cannot do that turns a normal electrical problem into a fire risk. That is the core issue with Zinsco panels.
Breakers That Can Fail to Trip
Independent testing over the years has found that a large share of Zinsco breakers failed to trip the way they should, with some lab results putting the failure rate around a quarter or more of the breakers tested. When a breaker does not trip, power keeps flowing through an overloaded circuit. The wires heat up, and that heat is what starts fires inside walls.
What makes it worse is the design of the connection. Zinsco breakers attach to the panel’s bus bar with an aluminum clip. Over time, that clip and the bus bar expand and contract with heat, and the connection can loosen or corrode. A loose or corroded connection causes arcing, which is a small electrical fire jumping across a gap. The arcing can melt the breaker and even weld it to the bus bar.
Here is the part that surprises people. Once a breaker melts to the bus bar, flipping the handle to “off” may not actually cut the power. The circuit can stay live even when it looks shut down. That is both a fire hazard and a shock hazard for anyone working on the system.
The Damage You Cannot See
You cannot judge a Zinsco panel by looking at the outside. Even with the cover off, the breakers can look normal while the real damage is happening at the connection points behind them. A panel that has worked fine for thirty years can still be one overload away from a problem.
Modern energy demands make this harder on old panels. Homes today run far more devices than they did in the 1970s, and that extra load is exactly what pushes a weak Zinsco connection past its limit. These panels also no longer meet current safety standards and would not earn today’s UL listing, which is the safety certification modern panels carry.
How to Tell If You Have a Zinsco Panel
You can do a quick visual check yourself, as long as you only look and do not touch the breakers or remove the inner cover. Leave that to a licensed electrician.
What to look for
What it tells you
A name on the panel door or breakers
Look for Zinsco, GTE-Sylvania, Sylvania, or Magnetrip
Breaker handle colors
Red, blue, and green handles are a common Zinsco sign
Layout
A vertical row of color-coded breaker handles down the center of the panel
Age of the home
Homes built or rewired from the 1950s to mid-1970s are more likely to have one
If you spot these signs, do not start pulling breakers to investigate. The safest move is to have the panel evaluated by a licensed electrician or flagged during a professional inspection.
Why Do Home Inspectors Flag Zinsco Panels?
A home inspector will note a Zinsco panel on the report regardless of how it looks on the day of the inspection. That is not the inspector being overly cautious. It is the inspector doing the job correctly.
Two things drive that call. First, the known failure history means the panel is a recognized hazard even when it appears to be working. Second, the real danger lives inside the panel and behind the breakers, which is past the scope of a standard home inspection. An inspector can identify the brand and the risk, but confirming the internal condition takes a licensed electrician.
So the report will name the panel, explain the risk, and recommend a licensed electrician evaluate it. If you are buying the home, that note gives you room to ask questions and negotiate before you close. A thorough Orlando home inspection is built to catch exactly this kind of hidden issue. CFBI inspections also include infrared thermal imaging as part of our building inspection services, which can reveal heat building up in an electrical panel before it ever shows on the surface.
This is the same reason inspectors flag other problem panels. There are similar reasons why a Federal Pacific panel gets flagged during inspections, and the logic is nearly identical: a known design flaw that you cannot confirm from the outside.
What a Zinsco Panel Means for Your Florida Home Insurance
This is where a Zinsco panel hits hardest in Florida, and it is the part many homeowners do not see coming.
If your home is 20 years or older, your insurer will usually require a 4-point insurance inspection before they write or renew a policy. That inspection looks at four systems: roof, plumbing, HVAC, and electrical. On the electrical side, insurers specifically watch for known problem panels like Zinsco and Federal Pacific. A Zinsco panel is one of the findings that can get a policy denied or non-renewed.
For many carriers, a Zinsco panel is a hard stop. Some will refuse to write a new policy until the panel is replaced. Others may non-renew an existing policy once they learn about it. And if a panel goes unreported and later causes a fire, there is a real chance the claim gets denied.
Here is how that plays out in a sale:
The buyer’s inspection or 4-point flags the Zinsco panel.
The buyer tries to line up home insurance, and the carrier balks at the panel.
No insurance means no mortgage, because lenders require coverage to close.
The deal stalls until the panel is replaced or the parties renegotiate.
A Zinsco panel can quietly derail a closing even when the rest of the home is in great shape. Catching it early, before you are days from the closing table, is what keeps it from becoming an emergency.
What to Do If an Inspection Finds a Zinsco Panel
Do not panic, and do not try to fix or inspect it yourself. The next steps are straightforward.
Get a licensed electrician to evaluate it. They can confirm the internal condition and lay out your options. Many will do a safety check at little or no cost.
Plan for replacement, not repair. Because of the design flaw, the standard recommendation is to replace a Zinsco panel with a modern, UL-listed one rather than patch it. Replacement cost commonly runs from about $1,500 to $4,000 or more, depending on the amperage and what it takes to bring the system up to current code. Your electrician gives the real number.
Use it in your negotiation. If you are buying, a flagged panel is a fair point to raise with the seller on price or repairs.
Tell your insurer the truth. Once the panel is replaced with a compliant one, you clear the insurance hurdle and remove the hazard at the same time.
When to Call a Pro
Call a licensed electrician any time a Zinsco panel is confirmed or suspected. They are the only ones who should open the panel, test the breakers, or handle a replacement. Electrical panels carry serious shock and arc risk, and a Zinsco panel can be live even when it reads as off.
Call a professional home inspector before you buy an older Central Florida home, or before you list one. An inspection identifies a Zinsco panel and the other hidden issues that affect safety, insurance, and value, so you find out early instead of at the closing table. You can meet our licensed inspectors and see the certifications behind every CFBI report.
Related Questions
How can I tell if I have a Zinsco panel? Open the outer door of your panel and look for the name Zinsco, GTE-Sylvania, Sylvania, or Magnetrip on the label or breakers. Red, blue, and green breaker handles in a vertical row down the center are another common sign. Do not remove the inner cover or touch the breakers. Leave that to an electrician.
Are Zinsco panels illegal? No, they are not illegal to own, and there was never a formal recall. But they no longer meet current safety standards and are no longer approved for sale to the public, which is why inspectors flag them and insurers often require replacement.
Will a Zinsco panel fail a home inspection? A home inspection does not pass or fail a home. It reports conditions. A Zinsco panel will be noted as a safety concern with a recommendation to have a licensed electrician evaluate and likely replace it. On a 4-point inspection for insurance, a Zinsco panel can be the finding that gets a policy denied.
Does a Zinsco panel affect home insurance in Florida? Yes. Many Florida insurers will not write or renew a policy on a home with a Zinsco panel, and they watch for it on the 4-point inspection required for older homes. Replacing the panel usually clears the issue.
How much does it cost to replace a Zinsco panel? Replacement commonly ranges from about $1,500 to $4,000 or more, depending on the amperage of the new panel and whether the system needs updates to meet current code. A licensed electrician can give you an exact quote.
Conclusion
A Zinsco panel is an outdated electrical panel with a known design flaw that can keep its breakers from tripping when they should. Inspectors flag it because the risk is real and hidden, and Florida insurers treat it as a serious red flag that can stall a sale. The good news is that it is a fixable problem once you know it is there.
If you are buying or selling an older home in the Greater Orlando area, the smartest move is to have it checked by a licensed, certified team before a hidden panel becomes a closing-day surprise.
Contact CFBI to schedule your inspection and get a clear, detailed report you can act on.
If you own a home in Central Florida, a wind mitigation inspection might be one of the most financially useful things you can do this year. Florida homeowners already deal with some of the highest insurance premiums in the country, and a wind mitigation inspection is one of the few tools that can actually bring those costs down.
Under Florida law, insurers are required to offer discounts to homeowners with verified wind-resistant features. A wind mitigation report is how you prove your home qualifies.
Here’s what a wind mitigation inspection covers, what inspectors look for, and why it matters whether you’re buying, selling, or just trying to lower your annual insurance bill.
What Is a Wind Mitigation Inspection?
A wind mitigation inspection is a focused assessment of a home’s construction features to determine how well it can hold up in hurricane-force winds.
This kind of inspection doesn’t cover every system in your house. The entire focus is on the structural and protective elements that affect how your home performs in a major wind event.
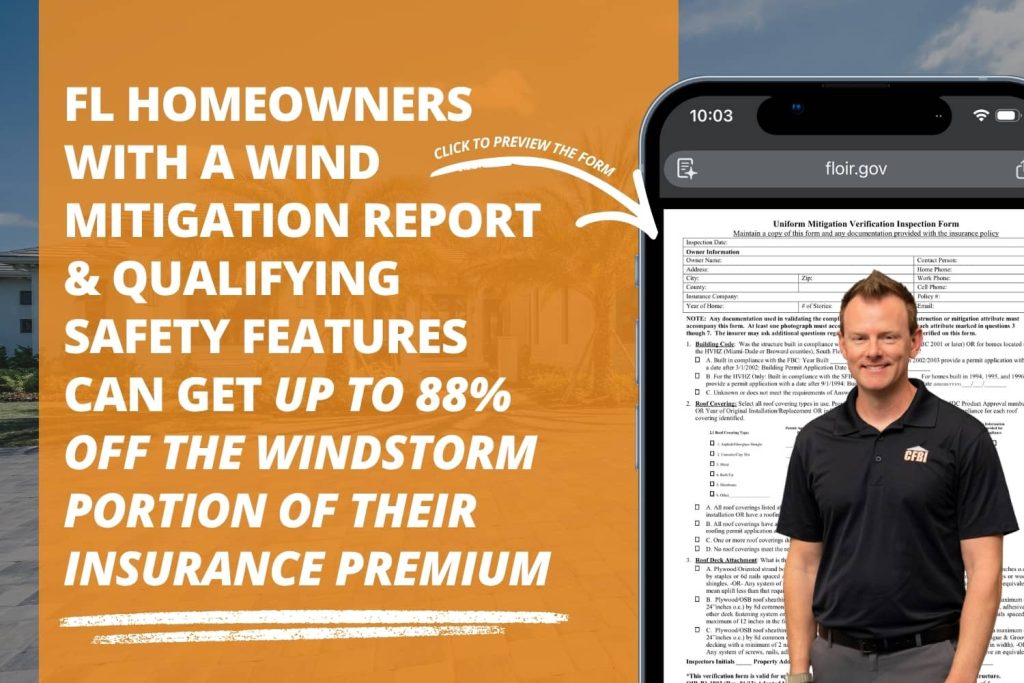
The results are captured on a standardized state form called the OIR-B1-1802, also known as the Uniform Mitigation Verification Inspection Form. Once complete, that form goes to your insurance carrier, who uses it to calculate any applicable discounts on your policy. The report is valid for up to five years, as long as no major changes are made to the structure.
This is not the same as a 4-point inspection. A 4-point inspection looks at the condition of your roof, electrical, plumbing, and HVAC systems to determine insurance eligibility. A wind mitigation inspection is only about wind resistance, and its goal is to lower what you pay, not to determine whether you can get covered at all.
A Note on the 2026 Form Update
The OIR-B1-1802 form was updated effective April 1, 2026. The new version reflects findings from a 2024 wind-loss study and updates the qualifying criteria and discount tables.
Reports completed before April 1, 2026, remain valid through their five-year window, but all new inspections now use the updated form. When scheduling, confirm your inspector is up to date on the new requirements.
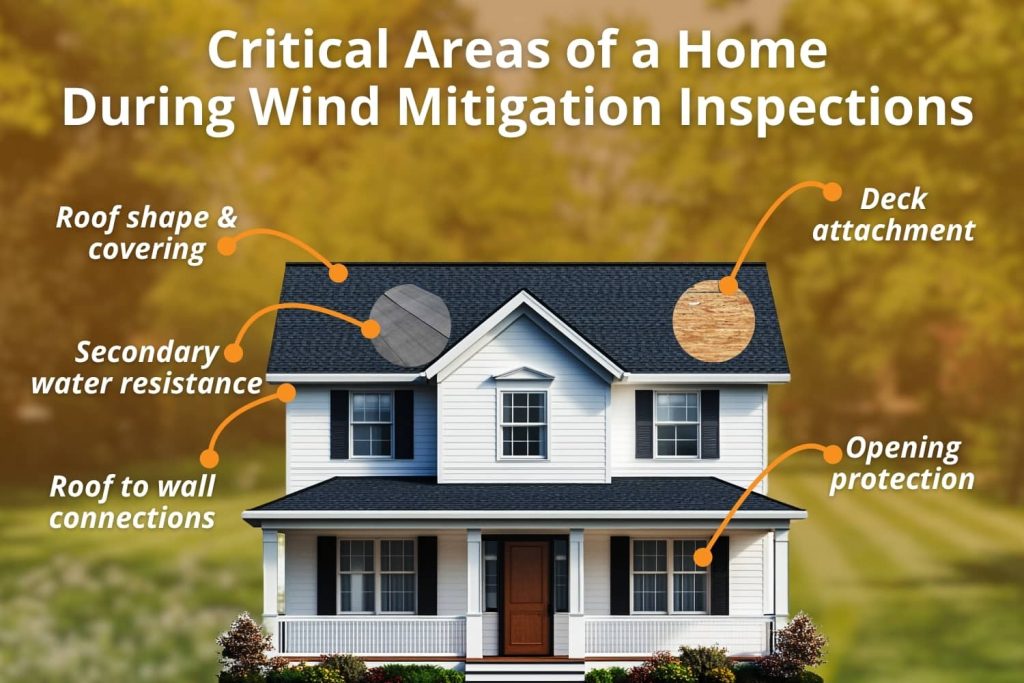
What Does a Wind Mitigation Inspection Look For?
The OIR-B1-1802 form covers seven specific construction features. Each one affects how much of a discount your insurer can apply.
1. Building Compliance
The inspector documents when the home was permitted and built. That date determines which version of the Florida Building Code was in effect at construction.
Homes built after 2001 fall under stricter wind-resistance standards, and newer construction generally earns larger credits for wind mitigation.
It’s important to know that this is a date verification, not a code compliance inspection.
2. Roof Covering
The type of roofing material and the date of the last roof replacement are documented. This tells the insurer how current and code-compliant the roof covering is.
3. Roof Deck Attachment
This is how the plywood or OSB panels underneath your shingles or tiles are nailed to the roof framing. Tighter nail patterns and larger nails provide better resistance to the roof lifting off. Homes with stronger deck attachment earn more credit.
4. Roof-to-Wall Attachment
This looks at how the roof trusses connect to the exterior walls. Options range from basic toenails (the weakest) to clips, single wraps, and double wraps (the strongest). Double-wrap hurricane straps offer the best protection and earn the highest credit in this category.
5. Roof Shape
Hip roofs, which slope on all four sides, perform much better in high winds than gable roofs, which have flat triangular ends. Hip roofs can experience up to 40% lower wind pressure at the same wind speed.
This is a self-adhering membrane applied directly to the roof sheathing under the roof covering. It’s designed to keep water out if shingles are blown off during a storm.
Standard felt underlayment doesn’t qualify. When present and documented, SWR earns a solid credit and is common on roofs replaced in the last decade.
7. Opening Protection
This covers how well your windows, doors, skylights, and garage doors are protected from windborne debris. Impact-rated windows and doors, documented storm shutters, and reinforced garage doors all earn credits.
This is also the most all-or-nothing category: if even one opening lacks qualifying protection, the whole structure may receive no opening protection credit at all.
How Much Can You Save?
Savings vary based on which features your home has and which insurer you’re with. Florida law allows discounts of up to 88% off the windstorm portion of your policy, though the real-world impact for most Central Florida homeowners is more modest than that ceiling.
Homes that score well across multiple categories, especially hip roof geometry, double-wrap straps, SWR, and full opening protection, tend to see the largest premium reductions. A home without many of those features may still earn something in the building code compliance category, particularly if it was built after 2001.
Most homeowners recoup the inspection cost within the first few months of a new or renewed policy. Since the report is valid for up to five years, the savings extend well beyond year one.
Who Should Get One?
Situation
Why It’s Worth It
You’ve never had one
You may be leaving discounts unclaimed on every renewal
You recently replaced your roof
New roofs often add SWR and stronger deck attachment
You added impact windows or shutters
Opening protection upgrades can unlock new credits
You’re buying a home
A current report clarifies insurance costs before closing
Your report is over five years old
Credits may have improved since your last inspection
You’re selling a home
A current report can be a selling point for insurance-aware buyers
For buyers especially: in the Orlando metro and surrounding areas, insurance costs have a real impact on the total cost of owning a home.
Having a current wind mitigation report before closing gives you and your agent a clearer picture of what to expect.
What Happens After the Inspection?
Once the inspection is done, your inspector provides the completed OIR-B1-1802 form with photos documenting each credited feature. You submit that to your insurance agent or carrier, who applies the appropriate discounts to your policy.
Keep a copy of the report. It’s valid for up to five years, and if you switch carriers in that window, you can typically submit the same report to your new insurer without scheduling a new one. If you make significant upgrades like a new roof or impact windows, a fresh inspection can capture those improvements and potentially increase your credits.
One important note: Florida insurers won’t accept forms completed by an inspector whose license can’t be verified. An invalid form can cost you your discounts entirely, which is why choosing a licensed, trusted inspector matters.
Related Questions to Explore
What is a 4-point inspection, and how is it different from wind mitigation? A 4-point inspection evaluates the condition of a home’s roof, electrical, plumbing, and HVAC systems. Insurers use it to decide whether they’ll cover an older home at all. Wind mitigation is about how wind-resistant the home is, and it’s used to calculate discounts on an existing policy. Many homeowners schedule both at the same time to save on trip costs.
Do new construction homes in Central Florida need a wind mitigation inspection? Yes, and new construction often earns strong credits because it’s built to current Florida Building Code standards, which require tighter roof connections, stronger deck attachment, and better opening protection than older codes. Scheduling a new construction inspection lets you start claiming those credits right away.
What does a pre-listing inspection cover, and how can it help sellers? A pre-listing inspection is a full home inspection done before a property hits the market. It gives sellers a clear picture of the home’s condition and helps avoid surprises during a buyer’s inspection that could slow down or kill a contract. In Central Florida, pairing it with a current wind mitigation report is a strong combination, since buyers here are very aware of what insurance is going to cost them.
What is a sewer scope inspection, and when should you get one? A sewer scope uses a camera to inspect the main sewer line from the house to the street. It’s a good idea when buying older homes, homes with large trees near the sewer line, or any property with a history of slow drains or backups. It’s a quick add-on that can catch serious issues before they become your problem after closing.
When to Call a Professional
If you own a home in the Orlando area or anywhere in Central Florida and haven’t had a wind mitigation inspection in the last five years, it’s worth scheduling one.
The same goes if you’ve recently replaced your roof, added impact windows, or had hurricane straps installed. Each of those upgrades has the potential to earn credits that your current policy may not reflect.
For buyers, adding a wind mitigation inspection to your general home inspection visit is a practical step before closing.
Knowing your home’s wind-resistant features and what they could mean for your annual premium is part of making a smart purchase in a state where insurance costs aren’t something you can ignore.
Conclusion
A wind mitigation inspection is one of the few things a Florida homeowner can do that pays off quickly and keeps paying off for years. It’s fast, affordable, and the report can follow your home through multiple insurance policies. Whether you’re buying, selling, or just overdue for an updated report, the information it delivers is worth having.
At Central Florida Building Inspectors, we perform wind mitigation inspections throughout the Orlando metro and surrounding Central Florida communities, along with full home inspections, 4-point inspections, mold and air quality testing, and a full range of residential and commercial inspection services.
Solar panels are showing up on rooftops all across Central Florida, and it makes sense. Long sunny summers, rising utility costs, and strong state incentives have pushed solar adoption well past the early-adopter crowd. But the solar panel is a significant investment, and like any major home system, they need inspection, not just admiration from the driveway.
Whether you are buying a home with an existing solar array, selling a property with panels installed, or simply want to know the condition of your own system, a solar panel inspection gives you the factual picture.
Here is what that process actually involves and why it matters in Florida.
Why Solar Panel Inspections Matter in Florida
Florida’s climate is ideal for solar energy production, but hard on the equipment itself. Intense UV exposure, high humidity, frequent thunderstorms, and hurricane-force winds all place ongoing stress on solar arrays and the systems that support them.
A solar panel inspection evaluates not just whether the panels produce power, but whether the entire system is structurally sound, safely wired, and performing at the level it should. In a state where rooftop solar appears in real estate transactions regularly, skipping that evaluation means accepting unknowns that tend to be expensive to discover after closing.
Buyers may inherit a system nearing the end of its productive life, improperly installed roof penetrations, or wiring that falls short of current code. Sellers benefit from a documented inspection that adds credibility to the system’s claimed value. For current homeowners, it serves as a maintenance checkpoint that protects a significant investment.
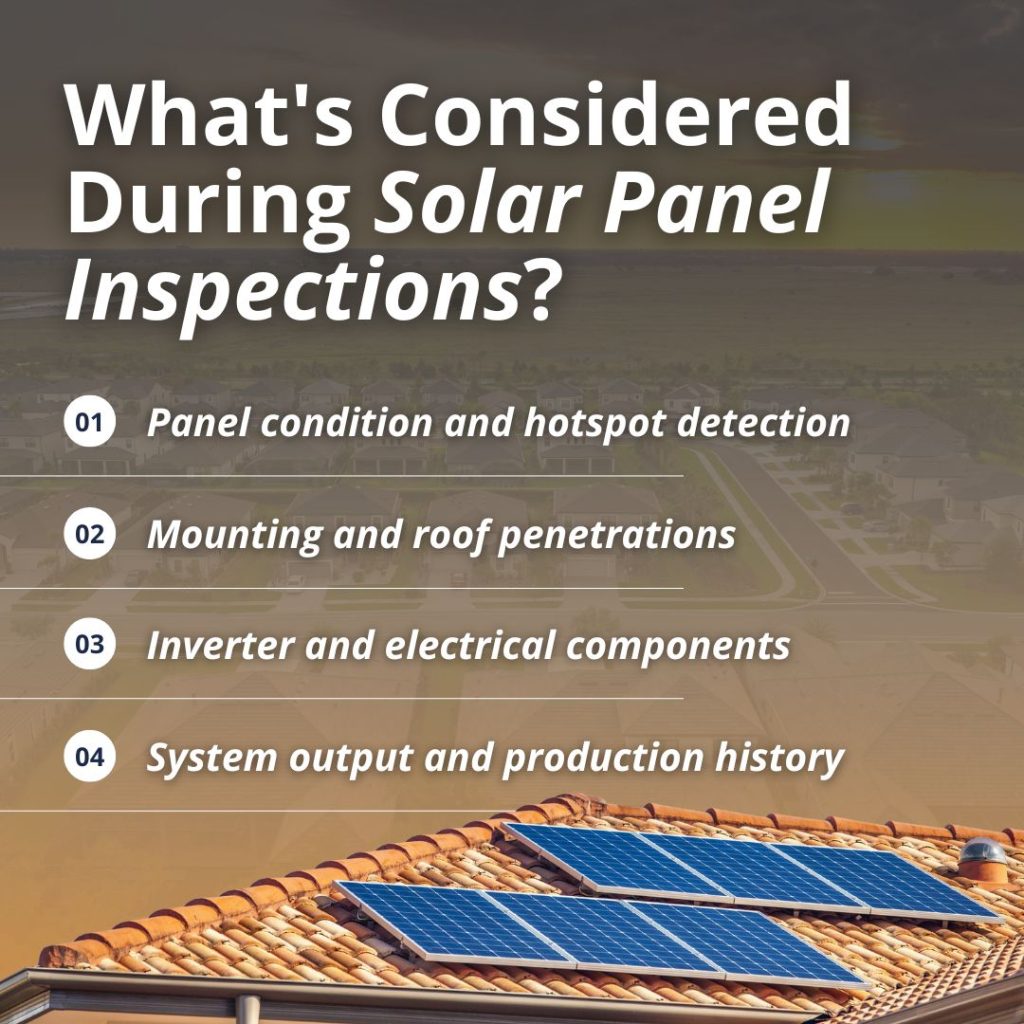
What Does a Solar Panel Inspection Cover?
A thorough solar panel inspection goes well beyond a visual glance at the panels. Here is what a qualified inspector evaluates…
Panel Condition and Performance
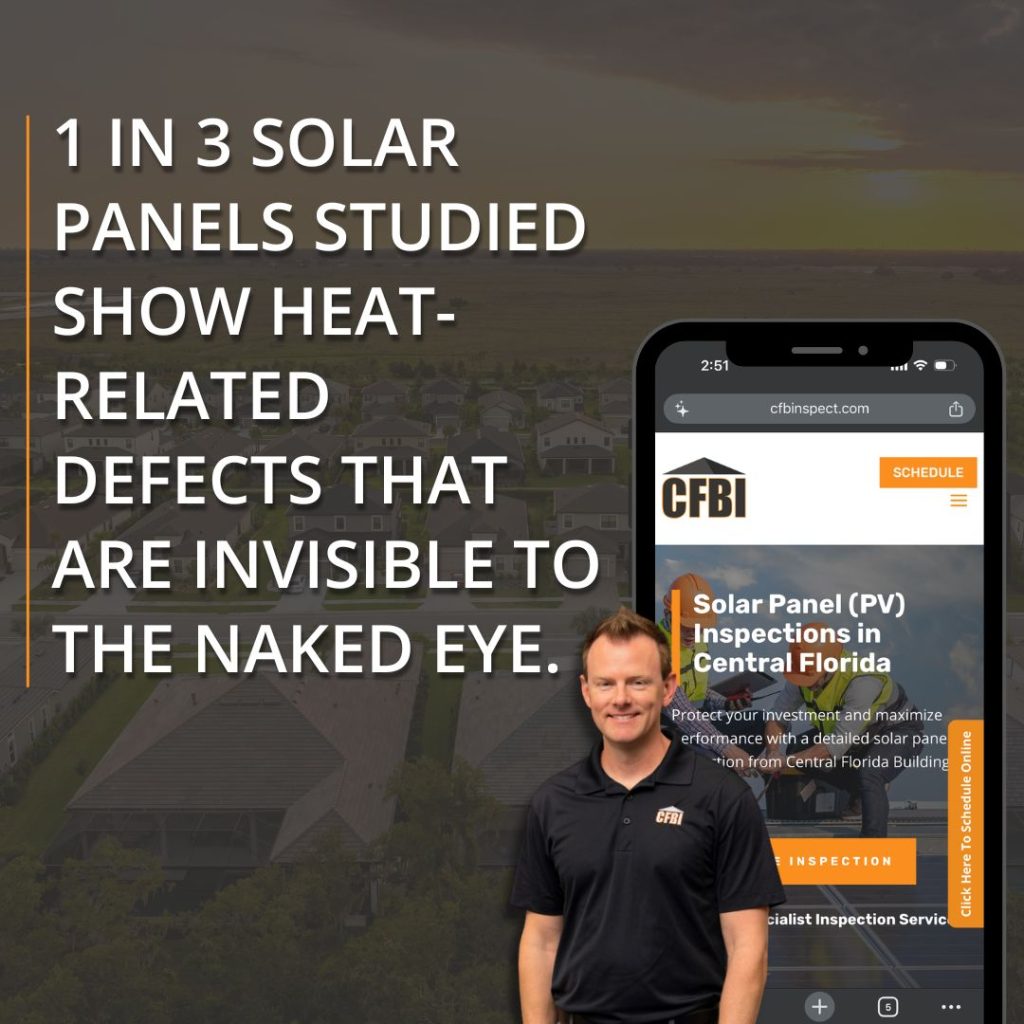
Inspectors examine each panel for physical damage, including cracks, delamination, discoloration, and soiling that affects output. Hotspots are a common finding in Florida arrays.
These are localized areas of heat caused by cell damage or shading, and they significantly reduce panel efficiency over time. Thermal imaging is a valuable tool here, revealing temperature anomalies across the array that are invisible to the naked eye.
Mounting and Structural Integrity
How panels attach to the roof matters as much as the panels themselves, particularly in a state where hurricane preparedness is a way of life. Inspectors check mounting hardware for corrosion, loose connections, and proper spacing.
Roof penetrations get evaluated for adequate sealing and signs of water intrusion, which is a critical concern in Florida, where any compromise in the roof assembly can lead to significant moisture damage.
Inverter and Electrical Components
The inverter converts DC power generated by the panels into AC power usable in the home. Inspectors evaluate the inverter’s condition, age, and error codes, along with disconnect switches, conduit runs, and wiring connections throughout the system.
Electrical deficiencies in solar installations rank among the more serious findings because they affect both system performance and safety.
Roof Condition Below the Array
Panels can obscure roof deterioration that would otherwise be visible during a standard inspection. The inspector examines accessible roof surfaces around and beneath the array for signs of wear, damage, or moisture intrusion that may have developed unseen.
This is especially relevant in older Florida homes where the roof and the solar installation may be at very different points in their lifespans.
System Output and Monitoring Data
Most modern solar systems track how much power they produce over time. When that data is available, the inspector reviews it to see whether the system is actually generating what it should be, based on its size and Florida’s sun exposure.
If the numbers are lower than expected, that gap is worth investigating. It could mean the panels are aging faster than normal, something nearby is casting shade on the array, or a component is not working the way it should. Any of those findings is worth resolving before a sale closes.
Solar Panels and Florida Real Estate Transactions
Solar systems add complexity to real estate transactions that a standard home inspection is not designed to address in depth. A few Florida-specific considerations are worth understanding before buying or selling.
Owned vs. leased systems: Many Florida homeowners installed solar under a lease or power purchase agreement rather than owning the system outright. In a sale, a leased system transfers to the buyer along with the contract obligations. Before closing, buyers need to understand the remaining term, monthly payments, and any transfer fees. An inspection clarifies physical condition regardless of ownership structure.
Insurance implications: Florida insurers have become increasingly attentive to rooftop solar in recent years. Installation method, panel condition, and roof integrity beneath the array can all affect insurability and premium rates. A documented inspection gives buyers and their agents clear information before those conversations begin.
4-point inspections: Many Florida insurance companies require a 4-point inspection for homes above a certain age before issuing coverage. The 4-point covers roof, electrical, plumbing, and HVAC systems. A solar panel inspection is separate and more detailed, but the two are often coordinated when a home has panels going through the insurance process simultaneously.
Situation
Why a Solar Inspection Matters
Buying a home with solar
Confirms system condition and identifies defects before closing
Selling a home with solar
Documents system value and reduces buyer uncertainty
Refinancing or insuring
Provides third-party condition assessment for lender or insurer
Routine owner maintenance
Identifies performance issues and extends system lifespan
How Long Do Solar Panels Last in Florida?
Most solar panels carry a manufacturer’s warranty of 25 years and are rated to produce at least 80 percent of their original output by the end of that period.
Real-world performance in Florida depends on installation quality, maintenance history, and the environmental stress the system has experienced.
Inverter Lifespan
Inverters typically have shorter lifespans than the panels themselves. String inverters often last 10 to 15 years, while microinverters and power optimizers tend to run somewhat longer.
A mid-system inverter replacement is a normal maintenance cost, but it is worth knowing about before buying a home with an older installation.
Degradation rates in Florida run slightly higher than in milder climates due to heat and UV intensity. A system that is 10 or more years old and has never been professionally evaluated is worth inspecting before assuming strong performance continues for another decade.
Related Questions
Does a standard home inspection evaluate solar panels? A standard home inspection covers visible and accessible components of the home’s major systems. Inspectors note solar panels in the report, but the evaluation is not in-depth. A dedicated solar inspection separately assesses panel condition, mounting, electrical components, and system output in full detail.
What is a 4-point inspection, and does it cover solar? A 4-point inspection evaluates four specific systems: roof, electrical, plumbing, and HVAC. Florida insurance companies commonly require it for older homes before issuing coverage. Solar panels fall outside the standard 4-point scope, though electrical components tied to the solar system may be noted where they affect the home’s overall electrical evaluation.
What does a wind mitigation inspection cover? A wind mitigation inspection evaluates how well a home resists wind damage, including roof shape, roof covering, roof deck attachment, and opening protection. Insurers use it to determine premium discounts. For homes with solar, the mounting method and roof penetration integrity can factor into how the roof assembly is evaluated.
What is thermal imaging, and how does it apply to solar inspections? Thermal imaging uses an infrared camera to detect temperature differences across surfaces. During a solar panel inspection, it identifies hotspots on the array that point to damaged cells or electrical issues. During a general home inspection, the same technology reveals moisture intrusion, insulation gaps, and electrical anomalies not visible to the naked eye.
Should buyers add a solar inspection to a pre-purchase home inspection? Yes. Solar systems affect the roof, electrical system, and potentially the insurance and financing terms of a transaction. Scheduling a dedicated solar inspection alongside the general home inspection gives buyers a complete picture of the property before they commit to closing.
When to Call a Professional
Schedule a solar panel inspection from CFBI when:
You are buying a home with an existing solar installation and want to know its true condition before closing
You are selling a home with solar and want documented third-party confirmation of system quality
Your panels are more than five years old and have never received a professional evaluation
You have noticed a drop in energy production or received alerts from your monitoring system
You are refinancing or updating homeowner’s insurance and need a current condition assessment
CFBI provides solar panel inspections throughout Central Florida, including Orlando and the Tampa and Gulf Coast region. Our inspectors evaluate solar systems as part of a comprehensive property review, giving buyers, sellers, and homeowners the information they need to move forward with confidence.
Conclusion
A solar installation is one of the most significant additions a homeowner can make to a Florida property. It affects energy costs, roof integrity, insurance terms, and resale value all at once. A thorough inspection gives everyone involved a clear, documented picture of what the system is doing and what condition it is actually in.
For buyers, sellers, and homeowners throughout Central Florida, CFBI’s solar panel inspection service delivers the detailed evaluation that a major investment deserves. Schedule your inspection today.
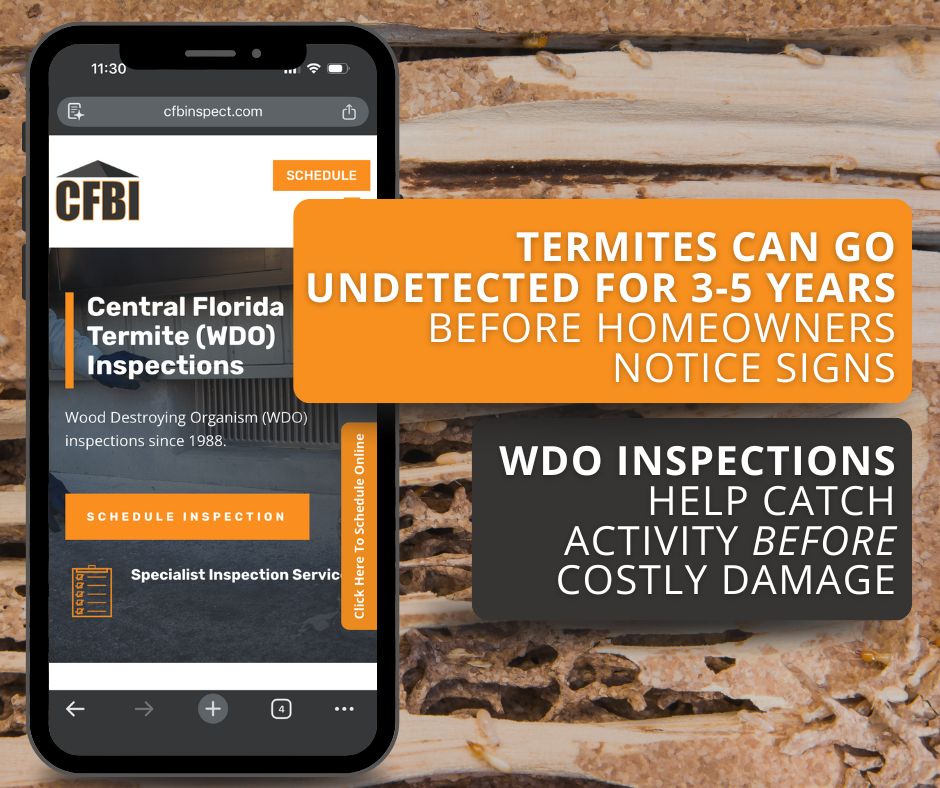
Termites cause more than $5 billion in property damage across the United States every year. And here in Central Florida, our warm, humid climate makes us one of the most termite-active regions in the country. These pests work silently behind walls, under floors, and inside wood structures, often causing significant damage before homeowners notice anything wrong.
The good news is that termites leave clues. Knowing what signs to look for helps you catch an infestation early, before repair costs spiral out of control.
Whether you’re a longtime local homeowner or buying your first place in Central Florida, understanding termite warning signs protects your biggest investment.
Are Central Florida Homes at High Risk?
Termites thrive in warm, moist environments, which makes Central Florida ideal termite territory. Our subtropical climate, frequent afternoon rain showers, and high humidity create perfect conditions for colonies to flourish year-round.
Factors that increase termite risk in our area:
Climate: Warm temperatures allow termites to remain active all 12 months
Soil conditions: Sandy Florida soil is easy for subterranean termites to tunnel through
Moisture: Humidity and rain create the damp wood that termites prefer
Mature landscaping: Established trees and mulch beds near homes provide food sources and pathways
Homes throughout the Central FL region face consistent termite pressure, making regular vigilance essential.
Common Signs of Termites in Your Home
Termites are secretive by nature. They avoid light and open air, which means you’re unlikely to see the insects themselves until an infestation is well established. Instead, look for these telltale signs.
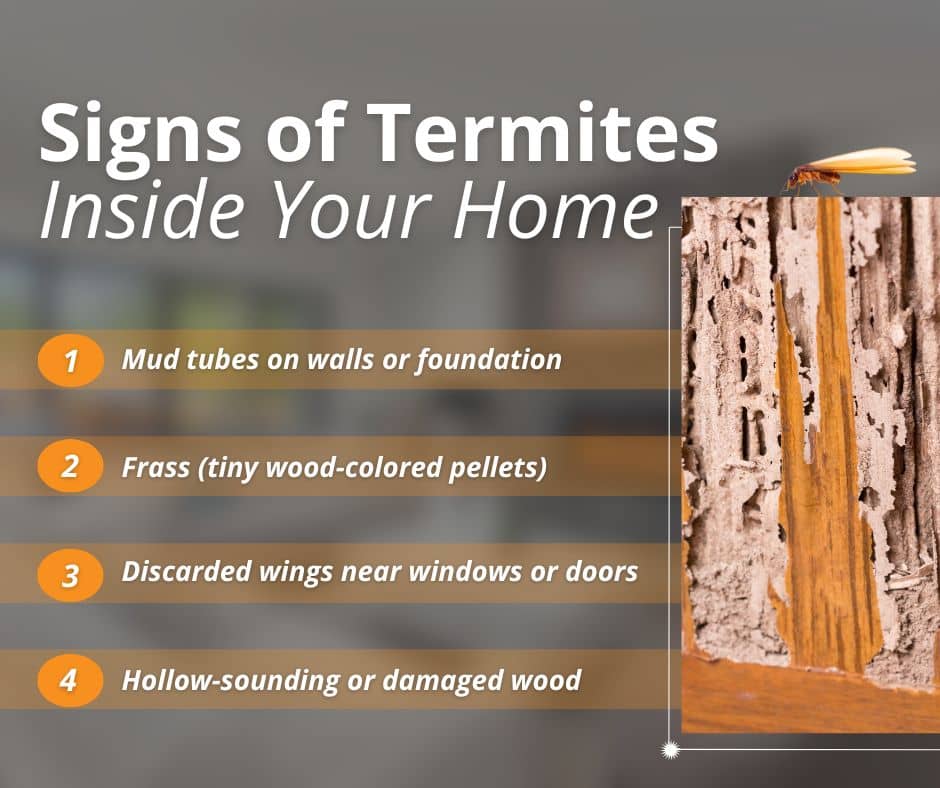
Mud Tubes on Walls or Foundation
Subterranean termites, the most common and destructive type in Florida, build pencil-sized mud tubes to travel between their underground colonies and food sources. These tubes protect them from predators and dry air.
Check your foundation walls, crawl spaces, and areas where concrete meets wood. Mud tubes may appear on interior or exterior walls, often in corners or along pipes where they’re less noticeable.
Discarded Wings Near Windows and Doors
Termite swarmers, the reproductive members of a colony, emerge to mate and start new colonies. After landing, they shed their wings. If you or your inspector find small piles of translucent wings near windowsills, door frames, or light fixtures, that indicates termites are nearby.
In Central Florida, swarm season typically peaks in spring, though our warm climate can trigger swarms almost any time of year.
Hollow-Sounding or Damaged Wood
Termites eat wood from the inside out, leaving a thin outer shell intact. Tap on wooden baseboards, door frames, and window sills. If they sound hollow or papery rather than solid, termites may have been feeding inside.
Drywood termites, also common in Florida, push their droppings out of small holes near their nests. These droppings, called frass, look like tiny wood-colored pellets or sawdust piles.
Finding frass near wooden furniture, door frames, or window areas indicates drywood termite activity. Unlike subterranean termites that stay connected to soil, drywood termites live entirely within the wood they consume.
Stuck Doors and Windows
As termites consume wood around door and window frames, the structural changes can cause frames to warp. If doors or windows that previously operated smoothly now stick or won’t close properly, termites could be the culprit.
Of course, Florida’s humidity also causes wood to swell seasonally. But if sticking is combined with other warning signs, termite damage becomes more likely.
Subterranean vs. Drywood Termites in Florida
Central Florida homeowners need to watch for two main termite types. Understanding their differences helps you recognize signs specific to each.
Characteristic
Subterranean Termites
Drywood Termites
Colony location
Underground, in soil
Inside wood, no soil contact needed
Entry point
Foundation, ground contact
Can occur anywhere, often in furniture or framing
Telltale sign
Mud tubes
Frass pellets
Damage pattern
Any exposed wood, often on the upper floors
Can occur anywhere, often furniture or framing
Colony size
Large (up to millions)
Smaller (thousands)
Moisture needs
High (requires soil contact)
Lower (extracts moisture from wood)
Both types cause serious damage, but subterranean termites typically work faster due to larger colony sizes. At CFBI, we find that many Central Florida homes face pressure from both species simultaneously.
What to Do If You Spot Signs of Termites
Discovering potential termite evidence is alarming, but quick action limits damage. Here’s what to do.
Don’t disturb the area. Your instinct might be to poke at mud tubes or damaged wood, but disturbing termites can cause them to relocate and continue feeding elsewhere in your home.
Document what you found. Take photos of mud tubes, frass, damaged wood, or discarded wings. Note the location and when you discovered it. This information helps inspectors assess the situation.
Schedule a professional inspection. A qualified WDO (wood-destroying organism) inspector can identify termite species, locate colony activity, and assess damage extent. This inspection goes beyond what’s visible to untrained eyes.
Get multiple treatment quotes. If termites are confirmed, obtain estimates from licensed pest control companies. Treatment options vary based on termite type, infestation severity, and your home’s construction.
Address moisture issues. Termites need moisture to survive. Fixing leaky pipes, improving drainage, and ensuring proper ventilation make your home less hospitable to future infestations.
How Do Professional Termite Inspections Work?
A WDO inspection is a thorough evaluation specifically designed to detect termites and other wood-destroying organisms like carpenter ants, wood-boring beetles, and wood-decay fungi.
Inspectors use specialized tools, including moisture meters, probing devices, and sometimes thermal imaging, to detect hidden activity. We know where termites typically enter Central Florida homes and focus attention on high-risk areas.
After the inspection, you’ll receive a detailed report documenting any evidence of current or previous termite activity, visible damage, and conditions conducive to future infestations.
Preventing Future Termite Problems
Once you’ve addressed an active infestation or confirmed your home is clear, prevention becomes the priority.
Reduce wood-to-soil contact. Keep mulch, firewood, and debris at least 12 inches away from your foundation. Ensure wooden siding, lattice, and door frames don’t directly contact the ground.
Control moisture around your home. Fix leaky faucets, air conditioners, and irrigation systems promptly. Ensure gutters drain away from the foundation and that crawl spaces are properly ventilated.
Seal entry points. Caulk cracks in your foundation and gaps around utility penetrations. While termites can breach most barriers eventually, eliminating easy entry points helps.
Schedule regular inspections. Annual WDO inspections catch new activity before it becomes a major problem. In Central Florida’s high-risk environment, this preventive step is well worth the investment.
Consider ongoing treatment plans. Many pest control companies offer monitoring and baiting systems that provide continuous protection. These can be especially valuable for homes with a previous termite history.
Other Related Questions for Florida Homes
What’s the difference between a WDO inspection and a full home inspection? A WDO inspection focuses specifically on wood-destroying organisms like termites, carpenter ants, and wood-decay fungi. A comprehensive home inspection evaluates all major systems, including roofing, electrical, plumbing, HVAC, and structural components. Many buyers schedule both to get a complete picture of a property’s condition.
How does moisture affect a home’s structure beyond attracting termites? Excess moisture leads to mold growth, wood rot, foundation issues, and poor indoor air quality. Florida’s humidity makes proper ventilation, drainage, and waterproofing essential. Addressing moisture problems protects against multiple threats, not just termites.
Should I get an inspection before buying a home in Florida? Absolutely. A pre-purchase home inspection reveals issues that aren’t visible during a typical walkthrough, from roof damage and electrical problems to plumbing leaks and foundation concerns. Knowing what you’re buying helps you negotiate repairs or budget for future maintenance.
When to Call a Professional
Schedule a WDO inspection with CFBI if you notice:
Mud tubes on your foundation or walls
Piles of discarded wings indoors
Frass pellets near wood surfaces
Hollow-sounding wood or visible damage
Doors and windows that suddenly stick
Any signs during the spring swarm season
Even without visible signs, annual inspections make sense for Central Florida homeowners. Termites work invisibly, and catching activity early saves thousands in repair costs.
Conclusion
Termites are a fact of life in Central Florida, but serious damage doesn’t have to be. Knowing what signs to watch for puts you ahead of most homeowners who don’t discover infestations until significant harm is already done.
If you’ve spotted mud tubes, frass, damaged wood, or swarmer wings, don’t wait to take action. Early detection protects your home’s structure and your wallet.